
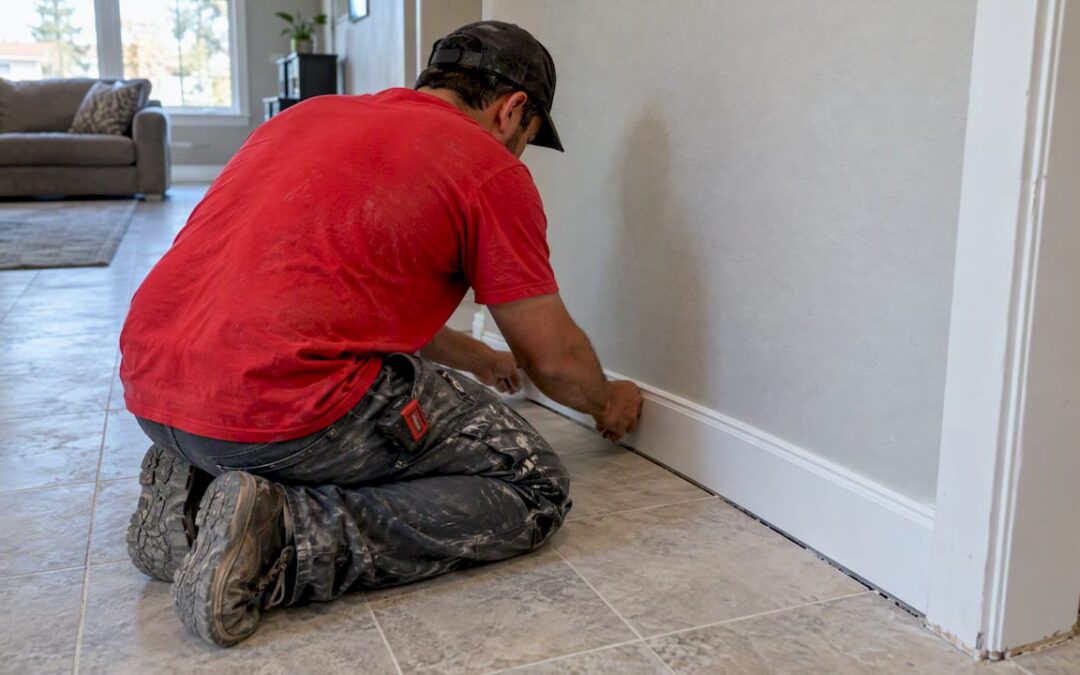
For most rooms, the two approaches that hold up best are a trimmed tile reveal for wet or modern spaces, and a baseboard installed over tile with a rabbet, for a traditional, cleaner look. High-moisture areas do best with PVC or tile base. Keep a perimeter movement joint of about 1/4 inch, let tile and grout cure before trimming, and call a pro if you hit waterproofing, uneven heights, or substrate problems.
TL;DR:
- Proper waterproofing and a 1/4-inch movement joint at the tile perimeter are essential to prevent movement damage and cracks over time.
- In wet areas, use moisture-resistant materials like PVC or fully water-resistant tile bases to avoid issues caused by water exposure.
- Installing the tile first and the baseboard after provides a tighter, more waterproof seal and simplifies future repairs.
- Choose baseboard materials based on moisture exposure, with PVC recommended for high-moisture environments and tile bases for seamless, water-resistant finishes.
- Waiting 48 to 72 hours after grout and mortar curing is critical before fastening or sealing trims to avoid early joint failures.
Table of Contents
- Choosing a transition method between tile and baseboard
- Materials and profiles that pair well with tile floors
- Should baseboards go in before or after tile flooring?
- How to install baseboards next to tile floors
- Movement joints and moisture control at the tile edge
- Getting a clean, finished caulk and paint line
- Common problems and how to fix them
- What we have learned installing trim against tile
- Let Leonardo’s Flooring Corp handle your tile and trim transition
- Standards and guides behind this article
- Sources
- FAQ
Choosing a transition method between tile and baseboard
Five methods cover almost every situation you will run into, and each one trades off durability, cost, and how much skill it demands.
A trimmed tile reveal leaves a small, intentional gap of exposed tile edge below the wall, finished with caulk instead of trim. It reads as modern and works well in bathrooms and kitchens where you want a wipeable, low-profile edge. A tile base, sometimes called a mortared tile-to-base detail, extends the same tile material up the wall a few inches instead of using wood or PVC trim; it is durable and moisture-proof but requires more tile work and a higher upfront cost. Baseboard installed over tile is the most familiar option for living rooms and bedrooms: the tile stops short of the wall, and a standard or rabbeted baseboard sits on top of the tile edge. Quarter-round or shoe molding covers small gaps and height mismatches cheaply, though it adds another seam that can trap dust and needs its own caulk line. Metal or PVC edge trim, similar to what installers use at flooring transitions, gives a crisp, factory-finished edge without wood, and holds up better than painted wood in areas with standing water. These are the common transition methods installers reach for depending on moisture exposure, durability needs, and looks.
- Bathrooms and laundry rooms: favor a trimmed reveal, tile base, or PVC/metal trim since they resist splashes and mop water.
- Kitchens: tile base or baseboard-over-tile both work, depending on whether you want a seamless look or a softer transition to cabinetry.
- Entryways and mudrooms: PVC or metal trim survives boots, bikes, and grit better than painted wood.
- Living rooms and bedrooms: baseboard-over-tile or quarter-round gives the most traditional look and is the easiest DIY option.
Tile base and a fully mortared reveal are pro-level work because they involve cutting and setting tile pieces to match existing courses. Baseboard-over-tile, quarter-round, and PVC trim are all reasonably DIY-friendly with basic carpentry tools.
Materials and profiles that pair well with tile floors
The material you choose for the baseboard matters almost as much as the transition style, especially anywhere moisture is a regular visitor.
PVC baseboard will not swell, rot, or absorb water, which makes it the safer pick for bathrooms, laundry rooms, and basements. Primed MDF is affordable and paints beautifully, but it swells if it gets wet repeatedly, so it belongs in dry rooms only. Solid wood baseboard holds paint and stain well and matches existing trim in older homes, though it needs the same moisture caution as MDF. Tile bullnose or a matching tile base skips the material question entirely by using the floor tile itself as the baseboard, which is the most water-resistant option of all but the least flexible if you ever want to change the look.
- PVC: best moisture resistance, paints well, ideal for wet rooms.
- Primed MDF: smooth paint finish, low cost, but only for dry areas.
- Solid wood: durable and stainable, needs sealing near moisture.
- Tile bullnose or tile base: matches the floor exactly, fully water-resistant, but pricier and less adjustable later.
Tile thickness changes the math on your profile. Standard ceramic and porcelain tile runs from about 3/8 inch to 1/2 inch, and once you add mortar and any underlayment, the finished floor can sit noticeably higher than the subfloor the baseboard was designed for. Rabbeting the back of the baseboard, essentially cutting a notch to fit over the tile edge, is the standard fix, and it also keeps the board from resting directly on grout lines. A thicker baseboard profile can absorb height differences without rabbeting, and shoe molding is a quick patch for smaller gaps. In bathrooms and laundry rooms, prime and paint every cut edge before installation, since exposed MDF or wood fibers are what actually let moisture in.
Should baseboards go in before or after tile flooring?
The order you choose affects both how clean the finished line looks and how easy repairs will be years from now.
Tiling first, then installing baseboard over the tile, is generally the better sequence for waterproofing and a tighter transition. It lets the tile and any waterproofing membrane run uninterrupted to the wall, which matters most in bathrooms and other wet-prone rooms. Installing baseboard before tile, so the tile is cut to fit against the trim, gives a more traditional finished look and can simplify painting, but it makes future tile repairs harder since you have to work around finished trim.
- Tile-first, baseboard-over-tile: better waterproofing, cleaner transition, easier to replace baseboard later without disturbing tile.
- Baseboard-first, tile-to-base: more traditional look, but repairs or tile replacement mean removing trim first.
- Either order: wait until grout and thin-set have cured before fastening or caulking trim against the tile.
Cure time is not optional. Grout and mortar need real time to set before you load them with fasteners, caulk, or foot traffic near the edge, and rushing this step is one of the most common causes of cracked joints later.
How to install baseboards next to tile floors
Once you have picked a transition method and material, the installation itself follows a predictable sequence.
- Measure and remove old trim. Pull existing baseboard carefully, check the wall for movement joints, and confirm the subfloor and tile surface are reasonably flat before you start.
- Confirm cure time. Wait at least 48 to 72 hours after grouting before sealing or fastening near the tile, since fresh grout and thin-set are still curing during that window.
- Cut and fit the baseboard. Miter outside corners, cope inside corners for a tighter seam, and rabbet the back edge of the board if it needs to sit over the tile lip.
- Shim for height differences. Where tile sits proud of the subfloor, use thin shims behind the baseboard so it sits flush against the wall instead of tipping forward.
- Fasten carefully. Nail into the wall framing or drywall above the tile line, never through the tile itself, and use a brad nailer at a slight angle to avoid vibration cracks near the tile edge.
- Use adhesive where nailing is risky. A construction adhesive made for trim can hold baseboard sections that would otherwise need a fastener too close to the tile.
- Caulk the seams. Run a bead of paintable caulk along the top of the baseboard and a moisture-appropriate sealant where the baseboard meets the tile floor.
- Paint and clean up. Touch up nail holes and caulk lines after the sealant skins over, then wipe down the tile edge to remove any smears before they cure.
Pro Tip: Test your shim height on a scrap piece of baseboard first. A gap that looks fine dry can open up once the caulk shrinks slightly over the first week.
Skipping the cure window is the single biggest mistake DIYers make here: caulking or nailing too soon traps moisture that has not fully evaporated from the mortar bed, which can lead to a soft bond or a caulk line that fails within months.
Movement joints and moisture control at the tile edge
Tile is rigid, and buildings move slightly with temperature and humidity, which is exactly why a gap at the perimeter is not a mistake, it is a requirement.
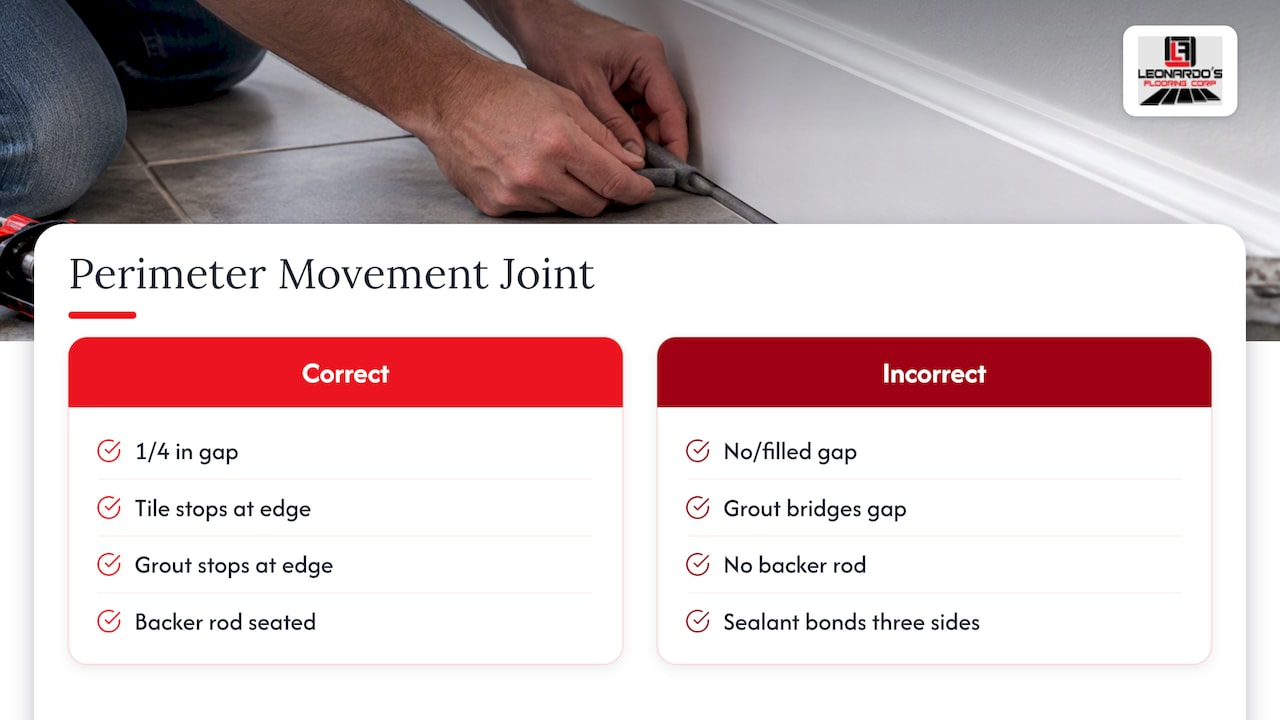
A 1/4-inch perimeter movement joint at the wall, kept free of mortar and grout, is the standard baseline in the TCNA Handbook. That gap absorbs the natural expansion and contraction of a tile field, and grout that bridges it can crack the tile itself later. Grout should stop at the tile edge, not run into the joint. The standard fix is a backer rod pressed into the gap, topped with a flexible sealant, which bonds to only two sides of the joint instead of three; three-sided bonding restricts movement and is a common cause of caulk failure. Choose non-swelling trim like PVC in areas exposed to routine moisture, and confirm waterproofing membranes are properly installed before tile ever goes down, following ANSI and TCNA installation methods for the substrate you have.
Getting a clean, finished caulk and paint line
The last few steps are what separate a professional-looking transition from one that looks rushed, and they come down to sealant choice and tooling.
- Paintable acrylic-latex caulk works well for the seam between baseboard and wall in dry rooms.
- Bathroom-grade silicone or hybrid sealant holds up better where the baseboard meets tile in constant wet exposure.
- Tool the bead immediately with a wet finger or caulk tool for a crisp, consistent line before it skins over.
- Paint before the final seal coat where possible, since paint adheres better to primed wood than to cured caulk.
Installers often treat that finished seal line as a visual reference edge, the way a clean, tooled bead of silicone reads as intentional rather than an afterthought. A slightly visible reveal, where a sliver of tile edge shows below the baseboard, can also be used on purpose as a design detail rather than hidden. Just make sure your grout color and trim paint do not fight each other visually.
Pro Tip: If your grout is a bold or dark color, keep the sealant at the tile-to-baseboard joint close to the grout shade rather than matching the trim, so any small gaps blend in instead of drawing the eye.
Common problems and how to fix them
Most tile-and-baseboard failures trace back to a handful of causes, and most are fixable without tearing anything out.
- Tenting or cracked tiles near trim: usually means the perimeter movement joint was filled with grout or mortar; the fix is removing the rigid material and replacing it with backer rod and sealant.
- Visible gaps from uneven tile height: small gaps can be shimmed behind the baseboard; larger ones may need a thicker profile or a rabbet cut.
- Failed caulk lines: recaulk after fully removing old, cracked sealant, and check whether the old bead was bonded on three sides instead of two.
- Persistent moisture or soft substrate: this points to a waterproofing or installation issue beyond trim work and is worth a contractor visit before it spreads.
What we have learned installing trim against tile
After years of finishing tile jobs across the Denver area, a few patterns hold up on nearly every project. Tile base gets specified when a client wants a fully water-resistant, seamless look and is willing to pay for the extra tile work; PVC trim gets the nod almost everywhere else moisture is a concern, because it survives the occasional flooded washing machine hose without complaint. Cure time is the step people most want to skip, and it is the one that causes the most callbacks.
Every floor gets the same attention to detail we would want in our own home, whether the job is a single room of baseboard or a full tile installation.
A contractor backed by a real warranty and a documented process takes the guesswork out of matching trim height, sealant choice, and cure timing all at once.
— Jim
Let Leonardo’s Flooring Corp handle your tile and trim transition
Getting the tile-to-baseboard line right the first time saves you from redoing caulk and trim work twice. A trusted flooring company has spent over ten years fitting tile, baseboards, and quarter-round trim together for homes and businesses across the Denver metro, backed by numerous five-star reviews and straightforward pricing.

- Tile flooring installation with proper waterproofing and movement-joint detailing.
- Baseboard and quarter-round trim installation matched to your tile height and finish.
- Subfloor preparation for a flat, stable base before tile ever goes down.
Every estimate is tailored to your room, timeline, and budget, with no cookie-cutter packages. Visit our services page to request a quote for your tile and trim project.
Standards and guides behind this article
For readers who want the primary references, the TCNA Handbook covers movement joints and installation tolerances, while the waterproofing and tiling installation spec details membrane and sequencing rules. For transition-method comparisons and hands-on tips, see the tile-to-baseboard transition guide. Preventing stress cracks at joints between dissimilar materials is also covered in this drywall crack prevention guide.
Sources
- TCNA Handbook (installation and movement-joint guidance)
- Tile-to-baseboard transition methods — FlooringClarity
- Tile installation and waterproofing guidance — IPF/MSU (installation spec excerpt)
FAQ
Is tile baseboard a good idea?
Tile base is a good choice when you want a fully water-resistant, seamless look that matches the floor exactly, particularly in bathrooms and laundry rooms. It costs more and takes more skill to install than wood or PVC trim, so it fits best where moisture resistance is the priority.
What is the new trend for baseboards?
Trimmed tile reveals and PVC or metal edge trim have grown more popular for their clean, low-profile look in modern kitchens and bathrooms. Traditional wood baseboard over tile remains the standard choice in living rooms and bedrooms, where a classic profile still fits best.
Do you install baseboards before or after tile flooring?
Tiling first and installing baseboard over the tile afterward is generally the better sequence, since it keeps waterproofing and tile continuous to the wall. Either order can work, but you should always wait for grout and mortar to cure before fastening or caulking trim against the tile.
Should you caulk where the baseboard meets the tile?
Yes, caulk or sealant at that seam protects against moisture and gives a finished appearance. Use a bathroom-grade silicone or hybrid sealant in wet areas, and make sure the bead bonds to only two surfaces instead of three so it can flex with normal movement.
How wide should the gap be between tile and the wall?
A perimeter movement joint of not less than 1/4 inch, kept free of grout and mortar, is the standard guideline. That gap lets the tile field expand and contract without cracking, and it gets covered by baseboard or trim rather than left exposed.