
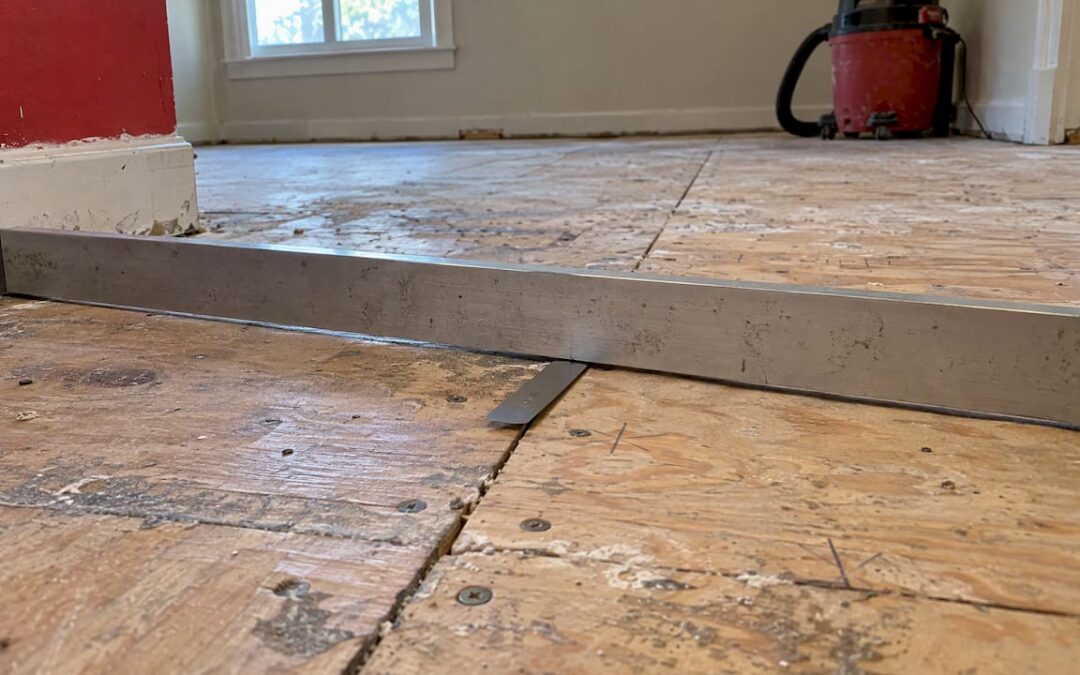
Laminate will not forgive a subfloor that dips and humps. It floats, so it bridges small flaws, but past the manufacturer’s flatness limit the locking edges flex, the planks creak, and joints can open. The fix is to measure the floor, grind or fill it until it falls within tolerance, and only then install. Here is how that works for concrete and wood subfloors, and when to hand the job to a professional.
TL;DR
- Most manufacturers want the subfloor flat to within about 1/8 inch over 6 feet or 3/16 inch over 10 feet. Check your planks’ instructions, because they set the rule.
- Check with a long straightedge or level, mark the highs and lows, then grind or sand the highs and fill the lows.
- On concrete, use a cement-based leveling compound. On wood, secure loose boards and squeaks first.
- Underlayment helps with minor imperfections only. It does not replace leveling.
- Laminate floats. Never nail, screw or glue it to the subfloor, and keep the expansion gap at the walls.
Table of Contents
- How flat does the subfloor need to be?
- What goes wrong when you skip the leveling
- Step 1: Find the high and low spots
- Step 2: Level a concrete subfloor
- Step 3: Level a wood subfloor
- Does underlayment fix an uneven floor?
- Installing over an existing floor
- Moisture and the floating rule
- Our perspective
- Let us handle the prep and the install
- FAQ
- Sources
How flat does the subfloor need to be?
Not perfectly level, but flat. That distinction matters. A floor can slope gently across a room and still be fine, because laminate follows a gradual slope. What it cannot handle is an abrupt dip or hump, because the planks then bend at their joints every time someone steps there.
Manufacturers put numbers on this. One published laminate installation instruction requires the subfloor to be flat within 3/16 inch in 10 feet or 1/8 inch in 6 feet. Mannington’s professional installation guide for its laminate line says variations should not exceed 1/8 inch in 6 feet. A looser guideline from another manufacturer allows a slope of up to 1 inch in 12 feet, which is about gradual slope rather than local dips.
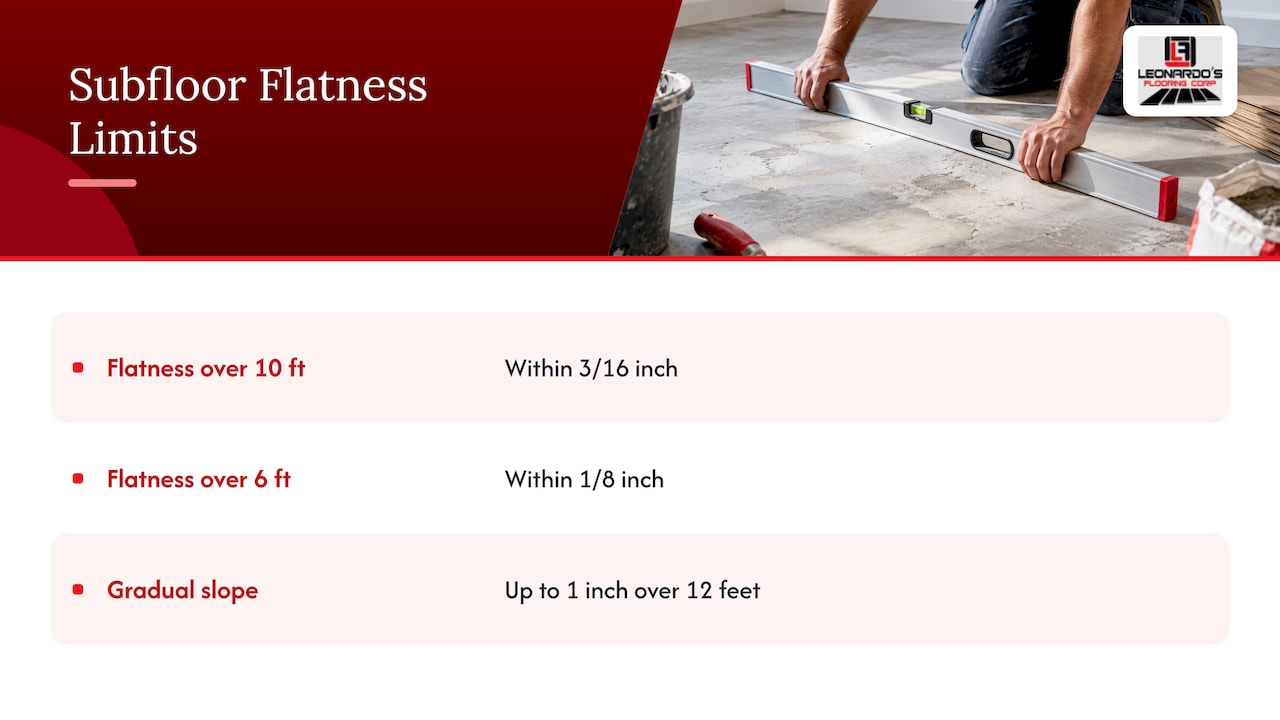
The two ideas fit together. Gradual slope is tolerated. Local deviation under a straightedge is what the tight 1/8 inch and 3/16 inch limits control.
The European laminate association adds a practical point: national rules can sometimes conflict with manufacturer instructions, and the stricter requirement should win. In plain terms, read the sheet in the box. If your planks specify 1/8 inch in 6 feet, that is your number, and it is also what a warranty claim will be judged against.
What goes wrong when you skip the leveling
The symptoms show up in the first weeks or months, and they are hard to fix once the floor is down.
Noise. Flooring manufacturer Egger notes that many noises people blame on the planks are really caused by an uneven subfloor that stops the planks from sitting evenly. You hear it as a creak or click where the floor rocks across a low spot.
Bounce. Over a dip, the planks span an air gap. Step there and the floor gives, then knocks back. It feels cheap, even when the laminate itself is good.
Stressed locking edges. Each cycle of flexing works the click-lock joints. Over time, that can show up as gaps at the end joints, particularly in hallways, kitchens and entries where traffic is heavy.
Uneven wear and warranty trouble. A floor that fails because the subfloor was out of tolerance is rarely covered by the manufacturer. Leveling is cheaper than replacing planks.
The Denver area adds its own wrinkles. Many homes here have concrete slabs in basements and wood-framed floors above, and older houses can have floors that have shifted over decades. Both need to be checked, not assumed.
Step 1: Find the high and low spots
Prepare by clearing the room, removing baseboards if they are in the way, and sweeping the surface. Debris under a straightedge gives false readings.
Then:
- Lay a straightedge or long level on the floor. A 6-foot or 10-foot one matches the published tolerances. The same installation instruction that sets the limits says to use a straight edge or level to check them.
- Slide it across the room in several directions: along the length, across the width and diagonally.
- Wherever light shows under the tool, slip in a ruler or feeler gauge to measure the gap. Anything over 1/8 inch at 6 feet is a low spot to fix.
- Look for rocking. If the straightedge pivots on a hump, that is a high spot.
- Mark every problem with a pencil on wood or chalk or painter’s tape on concrete. Write the measurement next to it.
For a quick pass, a marble or ball bearing rolled across the floor will head for the lowest area. It’s not a measurement, but it shows where to start.
Notice the pattern. Highs and lows tend to cluster along old seams, near walls, around plumbing, and where a previous floor was removed. Map them before you buy materials so you know how much compound or how much grinding you need.
Step 2: Level a concrete subfloor
Concrete is the most forgiving surface to correct because you can both remove and add material.
Grind or sand the high spots. The manufacturer instruction says high spots should be sanded or ground down to reach the required flatness. A concrete grinder with a dust shroud and vacuum is the right tool. Dust from grinding concrete is hazardous to breathe, so a proper vacuum and respirator are part of the job, not extras.
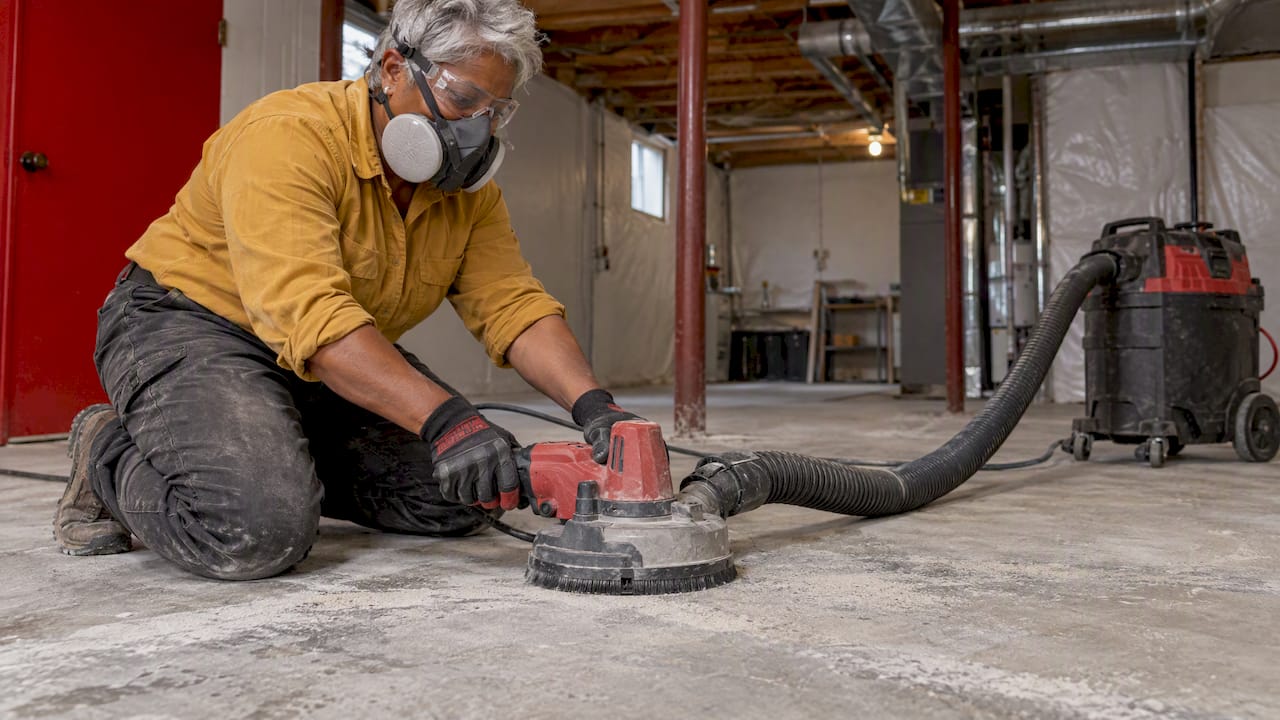
Fill the low areas. Use a cement-based leveling compound. The same document specifies a compound with a strength of at least 3,000 psi. Check the bag for its psi rating and its maximum and minimum thickness per pour, since they vary by product.
A few practical notes from how this work goes in the field:
- Clean and prime the slab as the compound’s instructions say. Skipping primer is the common cause of poor bonding and cracking.
- Dam doorways and drains so the compound stays where you want it.
- Mix to the exact water ratio. Too much water weakens the cure.
- Work quickly. Self-leveling products have a short working time, and a second pair of hands helps on larger rooms.
- After it cures, run the straightedge again. If a spot is still out, you repeat the process there.
If the slab has cracks, heaving or signs of moisture, stop. Those are not leveling problems, and covering them hides the cause.
Step 3: Level a wood subfloor
Wood subfloors, such as plywood or OSB over joists, need a different approach. You are dealing with a structure that moves.
Start with soundness. Home Depot’s laminate install guide says wood subfloors must be structurally sound and free of loose parts, with loose boards or squeaks secured by nailing or screwing them down before installation. Do that first, because a loose panel will show up as noise under the new floor no matter how flat it is.
Then deal with the highs and lows:
- High spots: sand or plane ridges where panel edges or old boards sit proud. Check for protruding fasteners and set them below the surface.
- Low spots: fill shallow dips with a patching or leveling product made for wood subfloors, and follow its instructions for thickness.
- Widespread waves: if a whole area sags, the cause may be framing, and a flooring crew can tell you whether the fix is shimming, a new underlayment panel layer, or a structural repair.
The key difference from concrete is that a wood floor is often uneven for a reason. A dip can come from a sagging joist or past water damage. Treat the cause, not just the surface.
Does underlayment fix an uneven floor?
Only a little. The North American Laminate Flooring Association says underlayment supports the locking system, protects against moisture and helps level minor subfloor imperfections. The word that matters is minor. A foam pad can smooth a grain of grit or a faint ripple. It cannot bridge a 1/4 inch dip, and a thicker, softer pad can make it worse by letting the joints flex more.
The same organization says a suitable, prepared subfloor helps laminate look great and last longer. Use the underlayment your planks call for, after leveling, not in place of it.
Installing over an existing floor
Sometimes the easiest way to a flat base is to use the floor already there. Home Depot’s guide says laminate can go over most existing hard-surface coverings if they are clean, flat, dry, securely fastened and structurally sound. Sheet vinyl must not be heavily cushioned or more than one layer. Carpet and cushion-backed flooring are unsuitable.
That means an old floor that is flat can be a good base, but one with curling edges, soft spots or cushioning has to come out. If you are stripping carpet or vinyl first, the disposal side is its own task, and a guide to office carpet and vinyl removal shows what clearing out old floor coverings involves on larger commercial jobs.
After removal, the subfloor underneath is exposed, so measure again. Adhesive residue, staples and tack strips all need to be cleaned off before you start leveling.
Moisture and the floating rule
Two requirements apply once the surface is flat.
Control moisture. InterNACHI, the home inspectors’ association, notes that laminate can buckle and warp if the subfloor lacks a sufficient moisture barrier or has excess moisture. On concrete slabs, particularly basements, that means testing and using the vapor barrier your flooring calls for. Leveling compound needs to cure fully before you cover it.
Keep the floor floating. Laminate must move freely as it expands and contracts, so it should never be fastened to the subfloor with nails, screws or glue. The same guide calls for a 3/8-inch gap between the flooring and walls or fixtures, and for undercutting door trim so the planks can slide beneath it. Baseboards and quarter-round trim then cover that gap. Denver’s dry climate and seasonal swings make that room to move matter more than people expect.
Our perspective
We see the same story often. A homeowner lays laminate over a floor that “looked fine,” and a few months later there is a creak by the hallway and a joint that won’t stay shut. The planks get blamed. Almost every time, the floor underneath was the problem.
That is why we treat subfloor preparation as its own service, not an add-on. Measuring, grinding, filling and checking again is the least glamorous part of a flooring job, and it is the part that decides whether the floor feels solid ten years later. A clean install on a flat base is also faster, because planks click together without fighting you.
Our approach is to listen first. We look at the room, the subfloor type, how you use the space and your budget, and then tell you what the floor needs and what it doesn’t. Sometimes that is a light patch. Sometimes it is a full pour. You should know which before work starts, with no surprises on the day.
We treat every floor like it is going into our own home, and that starts with what you can’t see once the planks are down.
Jim
Let us handle the prep and the install
Leveling is fussy work: the measuring, the grinding dust, the timing of a pour, then the install on top. We do the whole sequence for homes and businesses across the Denver metro, from subfloor preparation through laminate flooring installation, including the baseboards and quarter-round that finish the job. You can see everything we do on our services page.

If you’re planning a new floor and aren’t sure what your subfloor needs, contact us through Leonardo’s Flooring Corp and we’ll look at it with you. If you’re still deciding between materials, our page on vinyl floors covers another option that suits many rooms.
FAQ
Does the floor have to be perfectly level for laminate?
No, but it has to be flat. Published limits are typically 1/8 inch in 6 feet or 3/16 inch in 10 feet, and your planks’ instructions are the ones that count. A gentle slope across a room is usually fine. Sudden dips and humps are not.
Can I put laminate over an uneven floor if I use thick underlayment?
Not as a fix. Underlayment is meant to help with minor imperfections, not real dips. Thick, soft padding can let the locking edges flex more. Level the subfloor first, then use the underlayment your laminate specifies.
What do I use to level a concrete subfloor for laminate?
Grind down the high spots and fill the low ones with a cement-based leveling compound. The manufacturer instruction cited above specifies a strength of at least 3,000 psi. Prime the slab and measure again once the compound cures.
Should I nail or glue laminate to fix a bouncy spot?
No. Laminate has to float so it can expand and contract, and it should never be fastened to the subfloor. A bouncy spot means the subfloor needs leveling or repair underneath.
Sources
- Laminate installation instruction, flatness and concrete leveling requirements
- Mannington Laminate Restoration installation guide
- Lions Floor laminate installation guide
- EPLF: Installation of laminate floor coverings
- EGGER: How to stop laminate floor creaking and squeaking
- Home Depot laminate install guide
- NALFA: Laminate flooring FAQs
- InterNACHI: Laminate floor inspection
- Office carpet and vinyl removal