
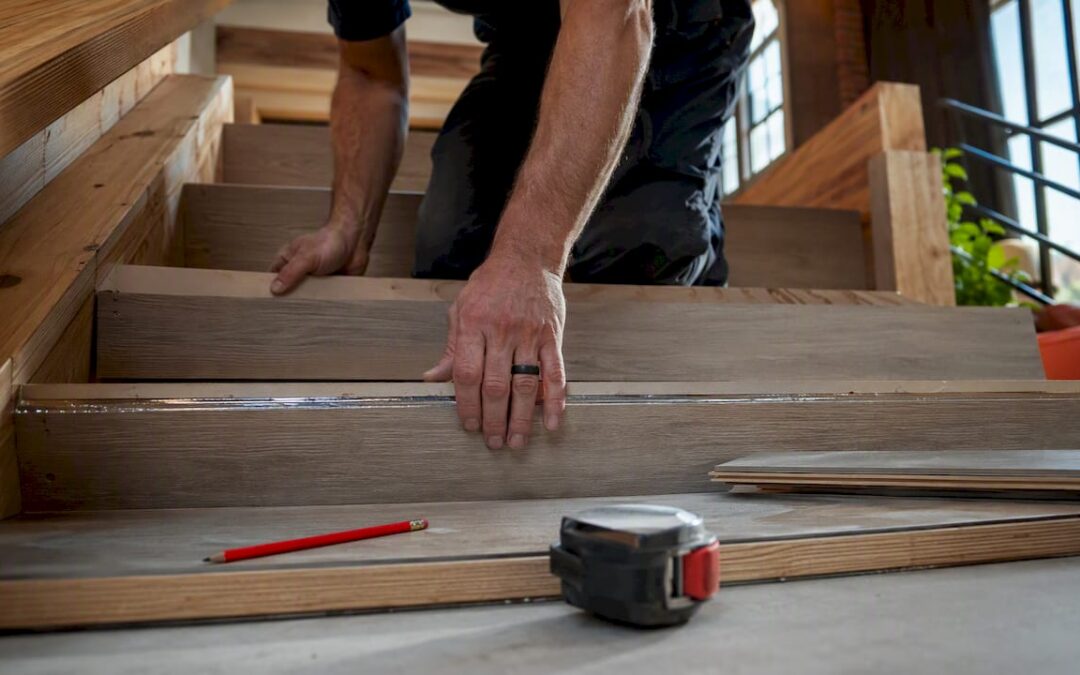
Yes, you can install vinyl plank on stairs — but only as a fully bonded, glued-down system. Floating click-lock is not acceptable on stairs, full stop. The Consumer Product Safety Commission treats stair safety as a priority hazard category, and manufacturers void warranties when planks are left to float on treads. For a 13-step flight, DIY material costs typically run $300–$800 using prefabricated rigid-core treads, while professional installation runs roughly $50–$120 per step depending on substrate condition and nosing profile. The install sequence that prevents shifting and nosing pry is always the same: riser first, tread second, nosing last.
- Floating click-lock on stairs leads to plank creep, nosing lift, and trip hazards
- Rigid SPC (stone polymer composite) core is the correct plank type for stair use
- Matching stair nosing from the same product line prevents dye-lot mismatches
- Full-spread adhesive, not bead application, eliminates hollow spots and flex
- Riser → tread → nosing is the only install order that works reliably
Key Takeaways
Vinyl plank on stairs works reliably only when fully bonded with manufacturer-approved adhesive, installed in riser-first order, with a matched rigid-core nosing from the same product line.
| Point | Details |
|---|---|
| No floating allowed | Vinyl plank on stairs must be fully glued down; click-lock alone causes creep and nosing lift. |
| Choose rigid SPC + matched nosing | SPC core resists compression at the nose edge; order the matching nosing at the same time as the planks. |
| Fix the substrate first | Tighten squeaky treads, remove underlayment, and flatten to within 3/16 inch before any adhesive goes down. |
| Use full-spread adhesive | Full-spread urethane or hybrid adhesive eliminates hollow spots; bead-only application is a common failure cause. |
| Leonardosflooringcorp for complex jobs | Structural deflection, open stringers, or curved landings call for a professional; Leonardosflooringcorp serves the Denver metro with warranty-aware installs. |
Table of Contents
- Which installation methods work for vinyl plank on stairs?
- Step-by-step: how to install vinyl flooring on a staircase
- What tools and adhesives do you need for vinyl stair installation?
- Common failure modes and how to prevent them
- Safety and code checks before you start
- When does hiring a contractor make more sense than DIY?
- What installers wish homeowners knew before the job starts
- Leonardosflooringcorp handles vinyl stair installs in the Denver area
- Sources
Which installation methods work for vinyl plank on stairs?
Two approaches hold up under real-world stair traffic. The first is individual rigid-core planks cut to fit each tread and riser, paired with a matching stair-nose profile applied last. The second is prefabricated one-piece vinyl stair treads with an integrated nosing already formed into the piece. Both require full adhesive bonding. Neither works as a floating system.
Fully adhered rigid SPC with a matched stair nose is the preferred specification for durability and appearance. SPC cores resist compression and flex better than WPC (wood polymer composite) or thin LVT, which matters at the nose edge where foot traffic concentrates. Avoid flexible or foam-backed planks on nosings entirely — they compress unevenly and telegraph every substrate imperfection.
Nosing profiles and which one fits your staircase
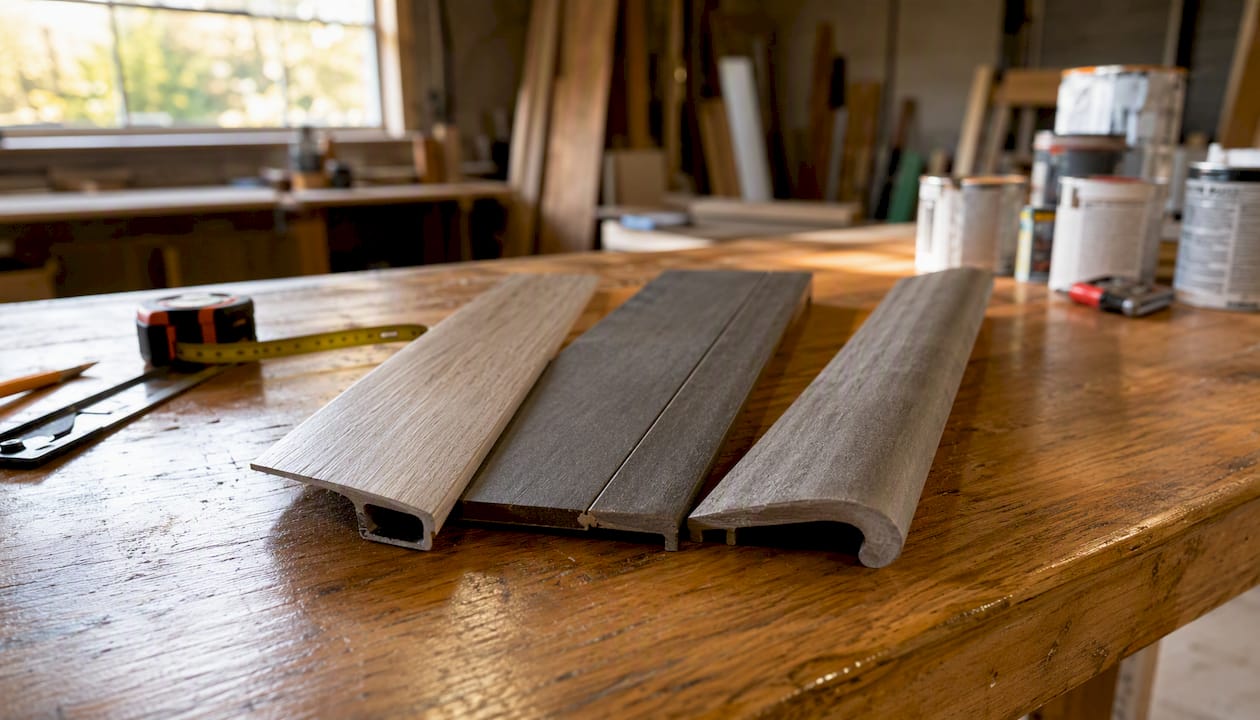
Three nosing profiles cover most residential situations:
Overlap nosing drops over the front edge of the tread and covers the top of the riser below. It’s the most forgiving for retrofit jobs because it hides minor substrate irregularities. The tradeoff is a slightly bulkier look at the nose.
Flush (square-edge) nosing sits level with the tread surface and creates a clean, hardwood-like line. It demands near-perfect substrate prep because there’s nowhere to hide a gap or a high spot.
Bullnose (rounded) nosing has a soft, curved front edge. It reads as a softer aesthetic and works well on painted or wrapped risers, but the curve can telegraph substrate unevenness more than overlap profiles do.
Order the matching stair nose from the same product line at the same time you order your planks — dye lots shift between production runs, and a nose ordered six weeks later often reads as a noticeably different color in direct light.
Pro Tip: Prefabricated one-piece treads simplify the job and reduce seams, but they come in stock widths (commonly 48 inches, trim-to-fit) and limited color runs. If your staircase is wider than standard or you want a fully integrated look, custom-cut planks with a matched nose from the same line give you more control over the final result.
| Method | DIY difficulty | Durability | Best for |
|---|---|---|---|
| Rigid SPC planks + matched nosing | Moderate | Excellent | Custom widths, integrated look |
| Prefabricated one-piece vinyl treads | Easier | Very good | Standard widths, fewer seams |
Step-by-step: how to install vinyl flooring on a staircase
The install sequence that prevents gaps and nosing pry is: acclimate → demo and prep → fix structure → flatten → dry-fit → riser first → tread second → nosing last → hold until cured. Skipping steps in this order is where most DIY callbacks originate.
-
Acclimate the planks. Leave boxes flat in the installation space for 24–48 hours. Stairs in climate-controlled homes rarely need longer, but don’t skip this step in Colorado’s dry air.
-
Remove existing coverings. Pull carpet, pad, and tack strips. Extract every staple and nail. Any fastener left proud of the tread surface will telegraph through the plank and create a hollow spot.
-
Fix structural problems. Tighten loose treads and risers from below if accessible. Inject construction adhesive or drive screws through the riser into the tread nosing to stop squeaks. A tread that bounces under load will eventually break an adhesive bond.
-
Flatten and clean. Fill low spots with floor-leveling compound. Sand or grind high spots. The substrate needs to be flat within 3/16 inch over 10 feet. Vacuum and wipe with a damp cloth; adhesive will not bond to dust or residue.
-
Measure every step individually. Stair dimensions vary more than most homeowners expect, even in new construction. Treat each tread as its own unique piece. Mark the cut dimensions directly on the back of each plank with a pencil.
-
Dry-fit all pieces before applying adhesive. Confirm the riser piece, tread piece, and nosing all fit without gaps. Check that the nosing overhang is consistent (typically 3/4 inch to 1 inch past the riser face).
-
Install the riser first. Apply full-spread adhesive to the riser substrate, press the plank in, and roll with a 3–4 lb roller. Use painter’s tape or temporary clamps to hold it flat while the adhesive grabs. The riser piece locks the bottom edge of the tread above it.
-
Install the tread second. Apply full-spread adhesive to the tread substrate. Press the tread plank firmly into the adhesive, working from back to front to push out air. Roll the entire surface. The tread should sit tight against the riser above it.
-
Install the nosing last. Apply adhesive to the back of the nosing per the manufacturer’s pattern — some specify a serpentine bead, others full-spread. Press firmly and hold with painter’s tape, finish nails (where the manufacturer allows), or weighted plates for the full adhesive cure window.
-
Restrict traffic. Most urethane and hybrid adhesives need 24 hours before light foot traffic and 48–72 hours for full cure. Work from the top step down so you never have to step on freshly bonded treads to reach the next one.
Pro Tip: Plan your work sequence before you open a single box. Start at the top of the flight and work down. That way, each completed step is above you and out of the traffic path while the adhesive cures below.
What tools and adhesives do you need for vinyl stair installation?
Getting the materials list right before you start saves two trips to the hardware store and one callback.
Material checklist
- Rigid SPC plank, minimum 6 mil wear layer for stairs (8 mil preferred for high-traffic flights)
- Matching stair-nose profile from the same product line and dye lot
- Riser boards or cut planks for riser faces
- Manufacturer-approved urethane or hybrid adhesive
- Floor-leveling compound for substrate prep
Tools you need
- Tape measure and pencil (measure twice per step)
- Fine-tooth miter saw or circular saw with a finish blade
- Notched trowel sized to the adhesive manufacturer’s spec (commonly 1/16 inch V-notch for thin-spread LVP adhesive; check your product’s technical data sheet)
- 3–4 lb floor roller or weighted plates
- Caulk gun for adhesive cartridges
- Seam roller for nosing edges
- Utility knife and straight edge
- Painter’s tape and temporary clamps
- Finish nailer (only where the manufacturer’s installation guide permits mechanical fastening)
- PPE: knee pads, safety glasses, gloves
Adhesive guidance
Full-spread adhesive reduces hollow spots and flex; urethane and hybrid adhesives deliver a strong bond with slight flexibility that handles the thermal movement rigid SPC still experiences. Two-part epoxy creates a harder, higher-strength bond and works well for nosing pieces that take direct impact, but it sets fast and is unforgiving of poor dry-fit. Construction adhesive alone is risky — it stays somewhat soft and can allow slow creep under repeated point loads.
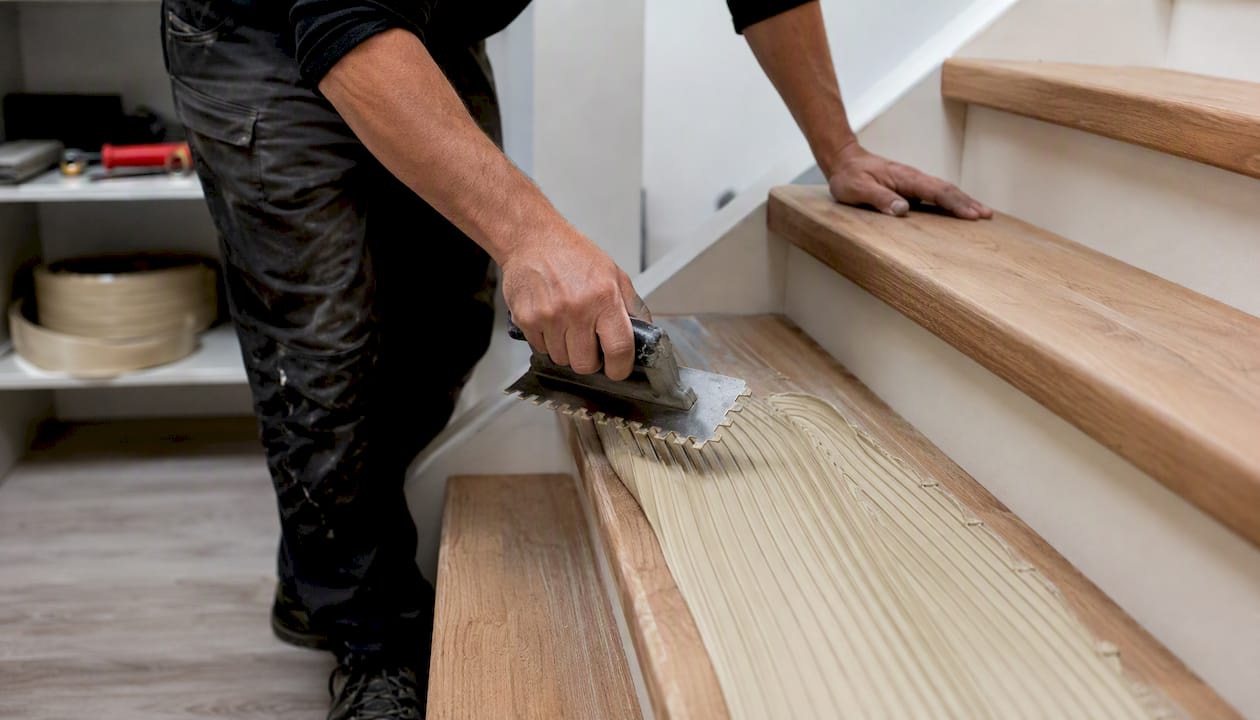
Always check the manufacturer’s technical bulletin before buying adhesive. If your planks have an attached pad, remove it before glue-down on stairs. Pad-backed planks bonded pad-side-down create a compressible layer between the adhesive and the rigid core, which defeats the bond. The role of floor adhesive in vinyl flooring goes deeper on trowel sizes and compatibility if you want to cross-check specs before purchasing.
| Adhesive type | Bond strength | Flexibility | Best use |
|---|---|---|---|
| Urethane / hybrid | High | Moderate | Treads and risers, general use |
| Two-part epoxy | Very high | Low | Nosing pieces, high-impact edges |
| Construction adhesive | Moderate | High | Supplemental only, not primary |
Common failure modes and how to prevent them
Most vinyl stair failures trace back to one of five root causes. Knowing them before you start is worth more than any repair guide.
-
Click-lock creep. Planks shift forward over weeks because click-lock joints were designed for floating across open floors, not for the repeated point loads stairs create. Fix: re-bond with full-spread urethane adhesive and hold with temporary mechanical restraint while it cures.
-
Hollow treads. A tread that sounds hollow when tapped has an air pocket under it, usually from bead-only adhesive or a substrate low spot. Hollow areas flex under load and eventually break the bond at the edges. Fix: inject adhesive into the gap through a small drilled hole, weight the tread, and allow full cure.
-
Nosing pop. The nosing lifts at the front edge, creating a trip hazard. Usually caused by insufficient adhesive coverage on the nosing back, a substrate that wasn’t flat, or traffic before full cure. Fix: clean the underside, re-apply adhesive, clamp or tape, and restrict traffic for 48 hours.
-
Open seams between riser and tread. A gap at the riser-tread junction means the riser piece wasn’t installed first or wasn’t held flat during cure. Fix: inject adhesive, press closed, and tape. Prevent by always doing riser before tread.
-
Leftover underlayment. Soft underlayment left under stair planks compresses under foot traffic and allows movement. Remove all underlayment before gluing down on stairs — no exceptions.
Pro Tip: If a nosing keeps popping despite re-bonding, check whether the substrate at the nose edge is solid. A hollow or delaminated substrate at the very front of the tread is the real culprit, and no amount of adhesive on the nosing back will fix a substrate that flexes.
Using non-approved adhesives or unauthorized mechanical fasteners can void the manufacturer’s warranty. Check the installation guide for your specific product before choosing a fastener or adhesive type.
Safety and code checks before you start
Stair uniformity is a safety requirement, not just an aesthetic preference. The CPSC identifies inconsistent rise and run as a leading contributor to stair-related falls. Even a 3/8-inch variation in riser height across a flight creates a measurable trip risk.
Nosing projections on residential stairs typically must extend between 3/4 inch and 1-1/4 inches past the riser face, and all nosings on a flight must be consistent. Verify your local jurisdiction’s requirements before installation — some municipalities follow the International Residential Code directly; others have adopted local amendments.
Keep nosing overhang consistent across every step. A nosing that projects 1 inch on step one and 1-1/2 inches on step eight is both a code issue and a visual problem that’s hard to unsee once you notice it.
For slip resistance, textured and embossed plank surfaces outperform smooth finishes on stairs, and low-profile grip strips are worth adding in high-moisture areas like basement stairs near a laundry room or any stair adjacent to an exterior door. The CPSC’s stair safety guidance is a useful reference for homeowners who want to verify their installation meets recognized safety benchmarks.
Safe working practices on stairs: secure any ladder access needed for upper landings, never walk on freshly glued treads, wear knee pads and safety glasses when cutting, and keep the work area ventilated when using solvent-based adhesives.
When does hiring a contractor make more sense than DIY?
Some stair conditions are genuinely beyond what a careful DIYer should attempt alone.
- Structural deflection. If a tread bounces or the stringer flexes visibly under load, the framing needs repair before any surface material goes down. This is carpentry work, not flooring work.
- Inconsistent step dimensions. Steps that vary significantly in depth or height need scribing and custom fitting that requires experience to execute without visible gaps.
- Open stringers. Exposed-side staircases require wrapping each tread end and matching the stringer face, which adds complexity most DIY guides don’t cover.
- Curved or split landings. Any non-rectangular landing requires template work and precise cuts that are difficult to execute without professional tools.
- Specialty adhesive requirements. Two-part epoxy nosing bonds have a short working time and require exact dry-fit before mixing. A mistake means cutting a new piece.
Professional installers bring full subfloor repair capability, exact scribing, manufacturer warranty compliance, and access to matching stair-nose dye runs from the same production batch. They also sequence the work so adhesive cures without anyone walking on it. Professional vinyl stair installation typically runs $50–$120 per step installed, with price driven by nosing profile complexity, riser wrapping, substrate repairs, and whether the staircase has curves or open stringers.
When comparing bids, ask each contractor these four questions: What adhesive product will you use, and is it manufacturer-approved for this plank? Will you remove the existing substrate material or install over it? How do you hold the nosing during cure? Can you source the stair nose from the same dye lot as the plank?
Pro Tip: A contractor who can’t answer the adhesive question specifically — by product name or at least by adhesive type — is a red flag. “I use construction adhesive” is not the right answer for a vinyl stair installation.
What installers wish homeowners knew before the job starts
The riser-first sequence isn’t arbitrary. When you install the tread before the riser, the riser piece has nowhere to lock against, and the tread edge is exposed to foot traffic before the adhesive has cured. That sequence mistake is behind a large share of the callbacks I see on DIY stair jobs.
The other thing that creates long-term problems is skipping the individual measurement step. Homeowners assume stairs are uniform and cut all their treads to the same dimension. They’re almost never exactly the same. Treating each step as its own unique tread, measuring and marking individually, is the single practice that prevents most visible fit and alignment issues. It takes an extra 20 minutes and saves hours of remediation.
Matching nosing dye lots matters more than most people expect. Order the nose at the same time as the plank, from the same product line. A nose ordered later, even from the same manufacturer, often reads as a slightly different shade in natural light. Leonardosflooringcorp handles stair-nose sourcing as part of every vinyl stair project, which is one of the details that separates a finished installation from one that looks almost right.
Leonardosflooringcorp handles vinyl stair installs in the Denver area
Vinyl stair installation done right is a multi-day, detail-heavy job. Leonardosflooringcorp has been handling vinyl flooring installation across the Denver metro for over 10 years, including full stair projects that cover subfloor repair, riser and tread installation, stair-nose matching, and finishing carpentry like baseboards and quarter-round trim.

Every stair project starts with an on-site assessment: tread condition, substrate soundness, stringer type, and nosing profile options. Adhesive selection is always manufacturer-approved for the specific plank product, and nosing is sourced from the same dye lot as the field planks. Pricing is transparent, and you’ll know the full scope before any work begins. To get an accurate estimate, have ready the number of treads, a note on current stair covering (carpet, bare wood, existing vinyl), and photos of the stringer type if the stairs are open-sided.
Schedule an on-site estimate through the vinyl floors service page or reach out directly. Leonardosflooringcorp’s 125+ five-star reviews reflect what happens when a stair job is done without shortcuts.
Sources
These are the primary technical and safety references worth bookmarking before you buy materials or schedule a contractor.
- LVP Stair Installation: Expert Tips & Pro Guide | Cavalieri Flooring
- Click-Lock LVP Stairs: Stop Shifting, Best Glue (2026)
- Technical Bulletin
- Vinyl Stair Treads with Nosing: Complete Guide for Homeowners – D and G Flooring
- Vinyl Plank Flooring on Stairs: Does It Work? | Potomac Floors
Before purchasing adhesive, pull the technical data sheet (TDS) for your specific plank product and confirm adhesive compatibility. Local building codes may impose nosing projection or stair uniformity requirements beyond the IRC minimums — check with your local authority having jurisdiction (AHJ) before installation begins.