Hardwood installation mistakes are defined as errors in preparation, technique, or material handling that cause premature floor failure, visible defects, or voided warranties. These errors range from skipping acclimation to ignoring subfloor moisture, and each one compounds the next. A floor that buckles, squeaks, or gaps within two years almost always traces back to one of the mistakes covered here. Whether you are managing a DIY project or overseeing a contractor, knowing these pitfalls before work begins is the difference between a floor that lasts decades and one that needs replacing.
1. Skipping or rushing the acclimation process
Acclimation is the process of allowing hardwood planks to adjust to the temperature and humidity of the room where they will be installed. Wood is hygroscopic, meaning it absorbs and releases moisture based on its environment. If you install boards before they reach equilibrium with the room, they will expand or contract after installation, causing buckling, gaps, or cupping.
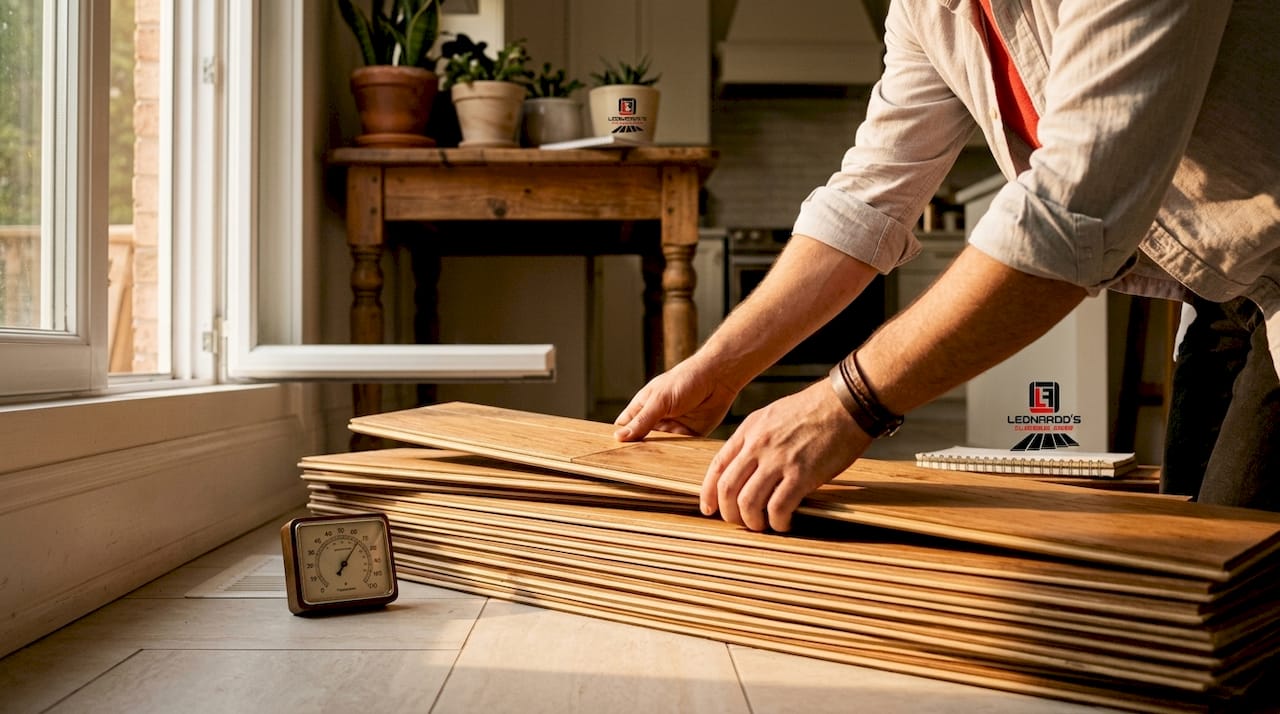
Most manufacturers recommend a minimum of 48 to 72 hours for acclimation, and often up to 7 days for thicker or wider planks. That window assumes your HVAC system is running at normal living conditions throughout. Stacking boards flat in a cold garage or an empty room with no climate control does not count as proper acclimation.
The target environment during acclimation is 60 to 80°F with relative humidity between 30% and 60%. These are the same conditions the floor will live in permanently. Acclimation requires environmental controls, not just time. Running your HVAC at normal settings for the full acclimation period is non-negotiable.
- Stack boards in the installation room, not a hallway or garage
- Leave space between stacks for air circulation
- Use a digital hygrometer to monitor humidity throughout the process
- Do not begin installation until readings stabilize across multiple days
Pro Tip: Buy an inexpensive digital hygrometer from a hardware store and place it next to the wood stacks. If the reading fluctuates more than 5% between days, extend the acclimation period.
2. Ignoring subfloor moisture testing
Ignoring subfloor moisture testing is the number one cause of hardwood floor failure. Moisture trapped beneath the boards creates the perfect conditions for mold, swelling, and adhesive breakdown. By the time you see the damage on the surface, the subfloor underneath is often already compromised.
The standard threshold is a subfloor moisture reading below 12%. Beyond that, the moisture levels of the subfloor and the hardwood planks themselves must be within 3% of each other. A subfloor at 10% and boards at 6% will cause the wood to absorb moisture after installation and expand unpredictably.
Professional installers document moisture readings at multiple points across the subfloor before installation begins. These records serve as warranty protection if moisture damage claims arise later. A basic pin-type moisture meter costs under $30 and takes readings in seconds.
Pro Tip: Take moisture readings in at least five locations across the subfloor, including corners and the center. Record them with your phone camera. If a warranty claim ever comes up, those photos are your evidence.
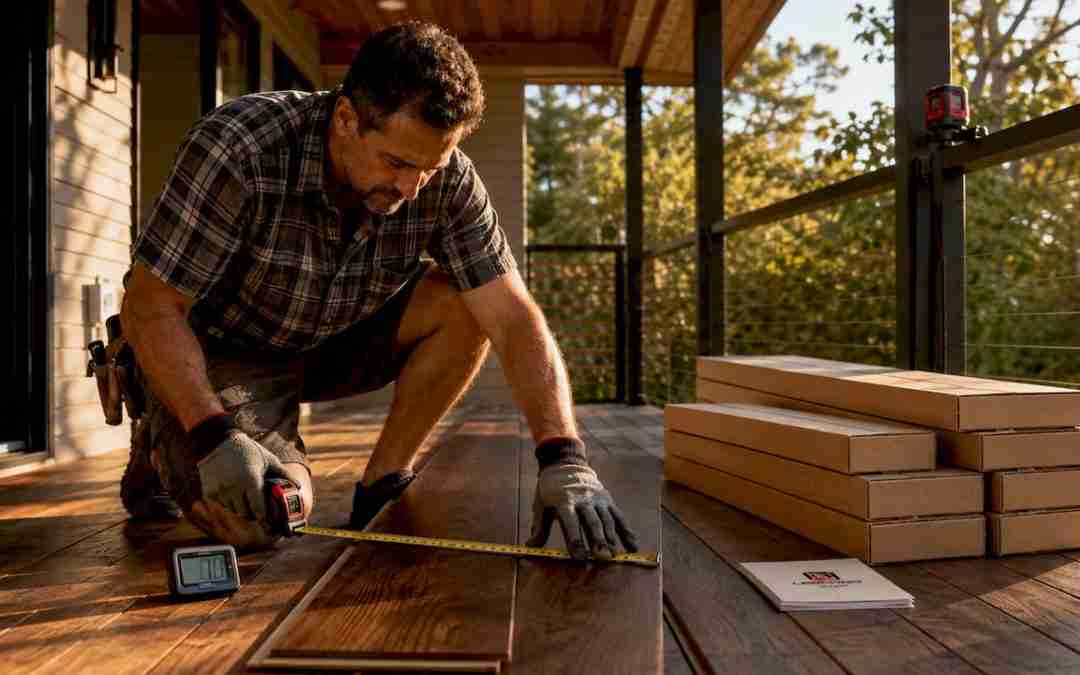
3. Failing to verify subfloor flatness
Subfloor flatness tolerance is 3/16 inch over 10 feet. Any deviation beyond that creates hollow spots where boards flex underfoot, which leads to squeaking, cracking finish, and eventually broken tongue-and-groove joints. This is one of the most skipped steps in DIY flooring projects.
A long straightedge or a laser level reveals high and low spots quickly. High spots get sanded or ground down. Low spots get filled with a floor-leveling compound. Neither fix is complicated, but both require time and the right materials. Rushing past this step to start laying boards is a mistake that shows up within months.
Loose subfloor panels are a separate but related problem. Any panel that moves when you walk on it needs to be re-secured with screws before installation begins. Squeaky subfloors become squeaky hardwood floors. The subfloor prep process also includes removing all debris, old adhesive residue, and staples from previous flooring.
4. Leaving out expansion gaps
Expansion gaps of approximately 1/2 inch around all edges of the room are required for every hardwood installation. Wood expands and contracts with seasonal humidity changes. Without that gap, the floor has nowhere to move and buckles upward. This applies not just at walls but at door frames, cabinets, islands, and any fixed vertical surface.
The gap gets covered by baseboards or quarter-round molding, so it is never visible in the finished floor. Many DIYers skip it because they assume it will look like a gap. It will not. What will look bad is a buckled floor in August when indoor humidity rises.
Use plastic spacers during installation to maintain consistent gap width along every wall. Remove them as you go, not all at once at the end. Pulling spacers from under already-installed rows can shift boards and close gaps you worked to maintain.
- Maintain gaps at walls, door frames, heating pipes, and posts
- Use 1/2-inch plastic spacers consistently
- Never nail or glue boards within the expansion zone
- Verify gaps are present before installing baseboards
5. Using incorrect fastener spacing
Proper fastener spacing of every 6 to 8 inches is the standard for nail-down and staple-down hardwood installations. Boards fastened too far apart flex between fasteners, creating movement that generates squeaking and eventually loosens the tongue-and-groove connection. Boards fastened too close together can split.
Incorrect fastening causes shifting boards, gaps, and squeaking underfoot. The first two rows and the last two rows near walls require hand-nailing because pneumatic floor nailers cannot reach those positions. Many DIYers skip the hand-nailing and rely on adhesive alone, which is not sufficient for long-term performance.
For glue-down installations, using the wrong adhesive or applying it too thin creates the same problems. The adhesive must be spread with the correct trowel notch size specified by the manufacturer. Using a worn trowel that no longer cuts clean notches results in inconsistent coverage and hollow spots.
6. Planning the layout incorrectly
Layout planning determines both how the floor looks and how structurally sound it is. The most common error is starting installation in a corner without checking whether the walls are square. Out-of-square walls create a tapered gap on the opposite side of the room that no baseboard can hide cleanly.
End joints in adjacent rows should offset by at least 6 to 12 inches to prevent aligned weak spots and an artificial, repetitive appearance. Short pieces less than 6 inches long should be avoided entirely. They pop loose faster and look unnatural.
Mixing boards from multiple boxes before installation, a process called racking, prevents color and grain clustering. Lay out several rows dry before nailing anything. This lets you see the visual pattern and catch problems before they are permanent. Boards should run perpendicular to floor joists for structural strength and parallel to the longest wall for visual proportion.
7. Choosing the wrong underlayment
Wrong underlayments undermine floor performance and durability. The underlayment type must match both the flooring product and the subfloor material. Using a foam underlayment under a nail-down hardwood installation, for example, creates a spongy surface that prevents proper fastening.
Moisture barriers belong on concrete and mineral subfloors, not on wood subfloors. A moisture barrier on a wood subfloor traps humidity between the barrier and the wood, accelerating rot. On concrete, skipping the moisture barrier allows vapor transmission that destroys the floor from below. Engineered wood performs better than solid hardwood in high-humidity environments or over radiant heating systems, which is worth knowing before you select your material.
Pro Tip: Read the underlayment section of your flooring manufacturer’s installation guide before purchasing anything. Many manufacturers specify approved underlayment products by name. Using an unapproved product voids the warranty.
8. Skipping the manufacturer’s installation instructions
Skipping manufacturer instructions leads to voided warranties and performance failures that no installer can fix after the fact. Every hardwood product has specific requirements for subfloor type, adhesive chemistry, expansion gap size, acclimation period, and fastener type. These are not suggestions.
Hidden project costs like moisture-rated adhesives, specialized underlayments, and trim transitions are often listed in the installation guide. Homeowners who skip the guide discover these requirements after installation, when correcting them means pulling up finished flooring. Reading the full guide before purchasing materials prevents this entirely.
Finishing details matter too. Not undercutting door casings forces you to cut the flooring at an angle to fit under the casing, which looks sloppy and creates a weak edge. A simple jamb saw or oscillating tool undercuts casings in minutes and produces a clean, professional result.
Key takeaways
Avoiding hardwood installation mistakes requires correct acclimation, verified subfloor conditions, proper expansion gaps, accurate fastening, and strict adherence to manufacturer specifications before the first board is ever nailed down.
| Point | Details |
|---|---|
| Acclimate properly | Allow 48 to 72 hours minimum at 60 to 80°F and 30 to 60% humidity before installing. |
| Test subfloor moisture | Subfloor must read below 12% and match wood moisture within 3% to prevent failure. |
| Maintain expansion gaps | Keep 1/2-inch gaps at all fixed edges to allow seasonal wood movement. |
| Fasten every 6 to 8 inches | Consistent fastener spacing prevents squeaking, shifting, and joint failure. |
| Follow manufacturer instructions | Every product has specific requirements; ignoring them voids the warranty. |
What 10 years of floors taught me about patience
I have seen homeowners spend $8,000 on premium white oak and then watch it buckle within six months because the installer skipped two days of acclimation. The floor was beautiful for about three weeks. That story repeats itself more often than it should.
The conventional wisdom says hardwood installation is mostly about technique. My experience says it is mostly about patience. The technical skills are learnable in an afternoon. The patience to wait 72 hours before touching the wood, to take moisture readings at five spots instead of one, to dry-fit three rows before nailing anything, that is what separates floors that last 30 years from floors that need replacing in three.
If you are hiring a contractor, ask them directly: “How long will you acclimate the wood, and how will you document subfloor moisture?” A qualified installer answers both questions without hesitation. Vague answers or pushback on documentation are red flags worth taking seriously. You can find more guidance on what to expect from a professional job in the Colorado hardwood flooring guide from Leonardosflooringcorp.
The homeowners who get the best results are the ones who stay involved. You do not need to stand over the installer all day. You do need to ask questions, review the plan before work starts, and check that expansion gaps are in place before baseboards go on. That level of involvement costs you nothing and protects everything.
— Jim
Get your hardwood floor installed right the first time
Every mistake covered in this article is preventable with the right installer. Leonardosflooringcorp has spent over 10 years serving Denver homeowners with hardwood installations that meet 2026 professional standards, from subfloor moisture testing to final trim work. No shortcuts, no surprises.

If you want a floor that looks great and holds up for decades, the team at Leonardosflooringcorp is ready to help. Browse the full range of hardwood floor installation services and request a free consultation. Every project includes a detailed plan, documented moisture readings, and workmanship you can verify at every stage. With 125+ five-star reviews, the results speak for themselves.
FAQ
What is the most common hardwood installation mistake?
Ignoring subfloor moisture testing is the leading cause of hardwood floor failure. Subfloor moisture must stay below 12%, and the difference between subfloor and wood moisture levels must not exceed 3%.
How long should hardwood floors acclimate before installation?
Most manufacturers require a minimum of 48 to 72 hours, and up to 7 days for wider planks. The HVAC must run at normal living conditions (60 to 80°F, 30 to 60% humidity) throughout the entire acclimation period.
Do I really need expansion gaps around every wall?
Yes. A standard 1/2-inch expansion gap is required at every fixed vertical surface, including walls, door frames, and pipes. Without it, seasonal wood movement causes buckling that cannot be repaired without pulling up the floor.
Can I use any underlayment under hardwood floors?
No. The underlayment must match both the flooring product and the subfloor type. Using the wrong underlayment voids the manufacturer warranty and can trap moisture or prevent proper fastening.
How do I know if my subfloor is flat enough for hardwood?
The professional standard allows no more than 3/16 inch of deviation over 10 feet. Use a long straightedge or laser level to check. High spots need grinding and low spots need leveling compound before any flooring goes down.