Most homeowners assume that new floors need to be permanently glued down or nailed into place. That assumption is understandable, but it leaves a surprisingly popular and practical option off the table. Floating floor installation flips that logic entirely, and once you understand how it works, you’ll see why it’s become a go-to choice for Denver renovations and new builds alike. Whether you’re refreshing a basement, updating a living room, or tackling a whole-home project, getting the details right from the start makes all the difference between a floor that lasts decades and one that buckles by winter.
Table of Contents
- What is floating floor installation?
- Critical steps for a successful floating floor installation
- Floating floor vs. glue-down: Choosing the right method
- Common floating floor issues and how to avoid them
- What most flooring guides miss about floating floors
- Upgrade your floors with expert help
- Frequently asked questions
Key Takeaways
| Point | Details |
|---|---|
| Floating floors explained | Floating floors interlock above underlayment rather than being glued or nailed to the subfloor. |
| Critical preparation steps | A flat subfloor, proper moisture control, and expansion gaps are vital to avoid future problems. |
| Floating vs. glue-down | Floating floors are faster and DIY-friendly; glue-down offers greater stability and quiet but is harder to replace. |
| Common mistakes to avoid | Skipping acclimation, neglecting moisture barriers, or using the wrong underlayment are top causes of failure. |
| Local expertise matters | Denver’s climate makes expert prep and barrier selection critical for long-term floating floor performance. |
What is floating floor installation?
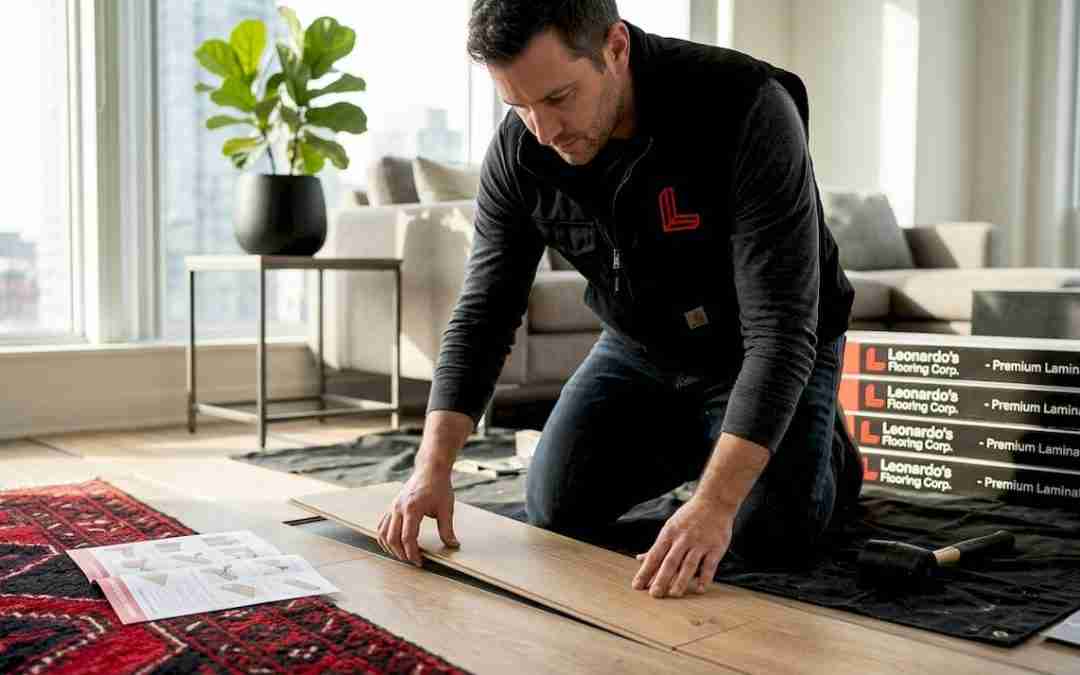
A floating floor is exactly what it sounds like: a floor that isn’t fastened directly to the subfloor below it. Instead, floating floor installation connects planks to each other using an interlocking click-lock system, allowing the entire surface to “float” freely above an underlayment layer. No glue. No nails. Just planks that lock together and rest in place through friction and weight.
This approach works across several popular flooring materials:
- Laminate flooring: Made from compressed fiberboard with a photographic layer on top, laminate is one of the most common floating floor choices for Denver homes.
- Engineered hardwood: Real wood on the surface with plywood layers beneath, engineered wood handles Colorado’s dry climate better than solid hardwood when installed as a floating system.
- Luxury vinyl plank (LVP): A waterproof core with a realistic wood or stone look, LVP has surged in popularity because it handles moisture exceptionally well.
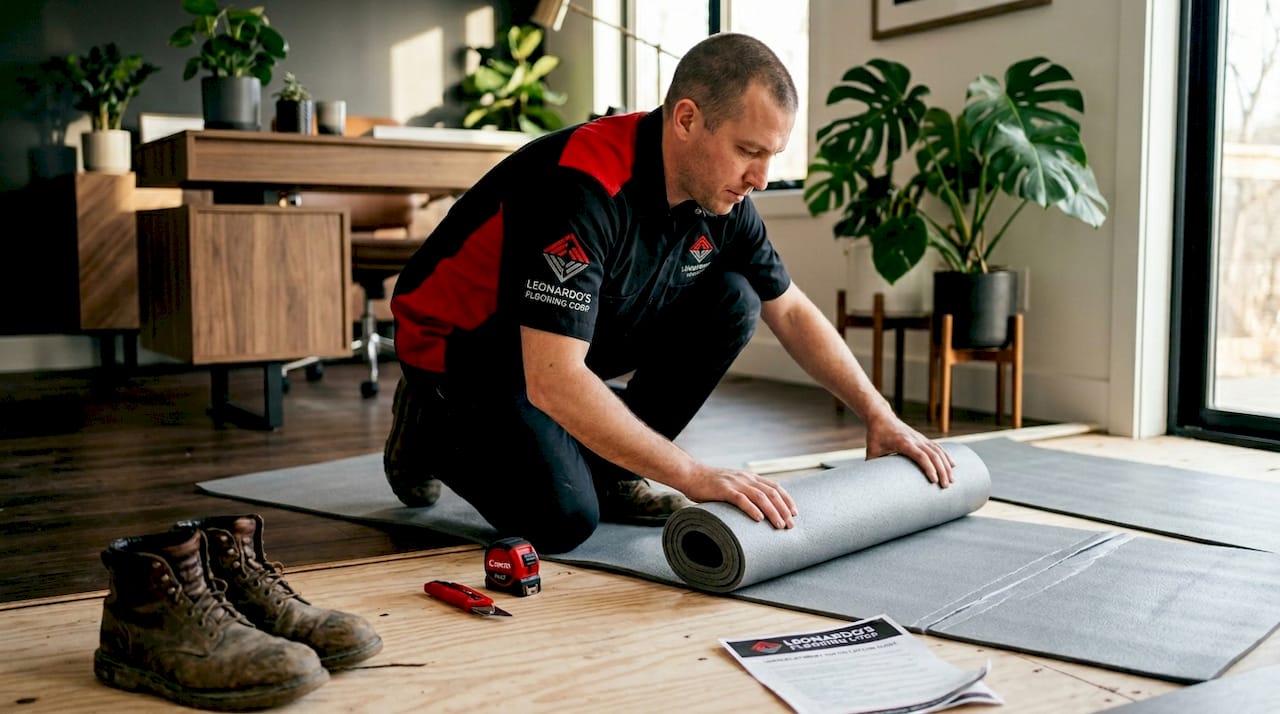
The underlayment is the unsung hero of any floating floor. It sits between the subfloor and the planks, performing three critical jobs: cushioning foot traffic, dampening sound so the floor doesn’t echo with every step, and acting as a barrier against moisture rising from below. Without the right underlayment, even a premium floating floor will underperform.
So how does the floor actually stay in place without being attached? The answer is straightforward: mass and friction. Once a room’s worth of interlocking planks are laid down, the sheer weight holds everything together. The key detail is the expansion gap, a small space left around all walls and fixed objects that lets the floor move slightly as temperature and humidity shift. This gap is what keeps the floor from buckling when Denver’s seasons swing between dry winters and wetter springs.
| Feature | Floating floor | Traditional glue-down or nail-down |
|---|---|---|
| Attached to subfloor | No | Yes |
| Installation speed | Faster | Slower |
| Skill level required | Moderate | Higher |
| Repair and replacement | Easier | More difficult |
| Suitable for DIY | Yes | Sometimes |
| Best materials | Laminate, LVP, engineered wood | Solid hardwood, some tile |
The practical benefits are real. A well-executed flooring installation process using floating methods produces less mess, requires fewer specialized tools, and gives homeowners more flexibility if they want to change things down the road. For anyone exploring a Denver flooring renovation guide, floating floors consistently rank as one of the most accessible and cost-effective starting points.
Quick fact: Floating floors represent a large and growing share of the residential flooring market because their combination of speed, affordability, and visual variety makes them well suited for the modern renovation cycle.
Critical steps for a successful floating floor installation
Once you understand how floating floors are constructed, it’s time to focus on the reliability factors for your installation, especially vital in the greater Denver area with its seasonal changes. Subfloor flatness and moisture control are the two biggest variables that determine whether your floor will hold up beautifully or start causing problems within the first year.
Here are the steps that matter most:
-
Flatten the subfloor. Most manufacturers require the subfloor to be flat within 3/16 of an inch over a 10-foot span. High spots need to be sanded down, and low spots need to be filled with floor leveling compound. Any deviation beyond that tolerance will stress the locking joints over time.
-
Test for moisture. Before laying anything, test the subfloor for moisture content. Concrete slabs in Denver basements can release significant moisture, especially during spring snowmelt. A simple moisture meter or plastic sheet test (tape it down for 24 hours and check for condensation) tells you whether you need a vapor barrier.
-
Choose the right underlayment. Over wood subfloors, a basic foam or cork underlayment is usually sufficient. Over concrete, you need underlayment with an integrated vapor barrier. Never use two separate vapor barrier layers because trapped moisture between them becomes a problem of its own.
-
Acclimate your flooring. Bring your flooring into the room and let it sit for at least 48 to 72 hours before installation. Denver’s low humidity, especially in winter, can cause planks to shrink if they aren’t given time to adjust to the environment first. Acclimation prevents gaps from forming after the floor is laid.
-
Don’t double-layer underlayment. Many LVP and laminate products now come with an attached foam pad on the bottom. If you add a second layer of underlayment beneath it, the total thickness becomes too soft, which causes the click-lock joints to flex and eventually fail. One layer only.
-
Maintain your expansion gaps. Leaving an expansion gap around all walls, door frames, cabinetry, and any other fixed feature is required for virtually every floating floor on the market. Use plastic spacers during installation to keep the gap consistent, typically about 1/4 of an inch. Moldings and transition strips will cover the gap when you’re done.
Pro Tip: In Denver, pay extra attention to rooms with south-facing windows or over radiant heat systems. Those environments experience more dramatic temperature swings than the rest of the house, and your expansion gaps need to account for that extra movement.
Solid subfloor preparation is genuinely non-negotiable. Skipping or rushing any of these steps is the number one reason floating floors fail, and it’s a pattern we see repeatedly in renovation jobs where homeowners or less experienced contractors cut corners at the prep stage.
“The best product in the world won’t perform if it’s sitting on a subfloor that isn’t flat, dry, and properly prepared.” This is one of those truths that sounds obvious until you’re dealing with a buckled floor six months after installation.
Check your Denver renovation steps carefully and build subfloor prep into your project timeline from day one.
Floating floor vs. glue-down: Choosing the right method
Knowing the technical requirements for floating installation, it helps to see how floating floors stack up against other methods, especially glue-down, to decide what’s right for your home or property.
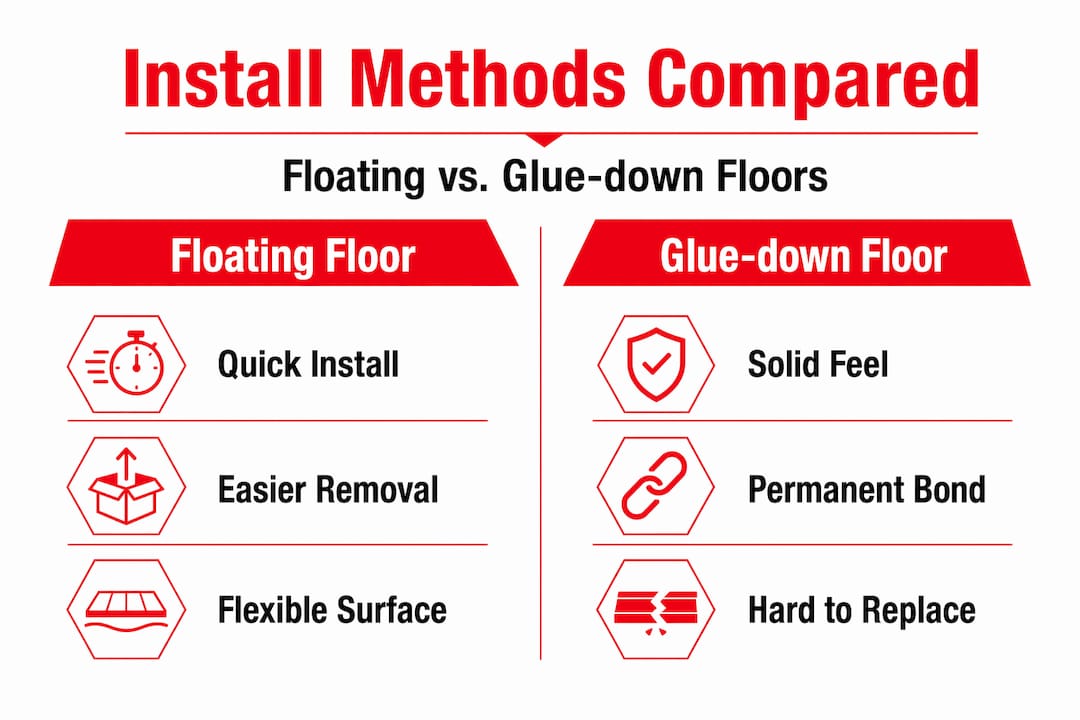
Glue-down floors are more rigid and harder to remove, but they bond directly to the subfloor for a solid, stable feel. Floating click-lock floors go in faster and are far more DIY-friendly, though they can shift slightly if the installation conditions aren’t perfect.
| Factor | Floating floor | Glue-down floor |
|---|---|---|
| Installation time | 1 to 2 days per room | 2 to 3 days (plus cure time) |
| DIY difficulty | Moderate | High |
| Stability underfoot | Good | Excellent |
| Noise and hollow feel | More common | Less common |
| Repair and replacement | Remove and reuse planks | Cut out and patch sections |
| Cost of materials | Lower | Higher (adhesive adds cost) |
| Ideal locations | Bedrooms, living rooms | High-traffic commercial spaces |
When does glue-down win? In high-traffic commercial settings, in rooms where the floor needs to feel absolutely solid underfoot, or in areas where sound transmission is a priority concern, glue-down earns its place. The trade-off is that removal is messy, time-consuming, and often damages the subfloor.
When does floating win? For most Denver homeowners renovating bedrooms, living rooms, basements, or rental properties, floating is the smarter call. It’s faster, cleaner, and gives you the option to remove and reinstall the floor later if you decide to sell or remodel again.
- Floating floors are ideal for rental properties where flexibility matters.
- They work over existing hard surfaces like tile, making them great for renovations where demolition isn’t practical.
- They allow easier repairs if a single plank gets damaged.
- They don’t require adhesive cure time, so the room is usable almost immediately.
Pro Tip: If you’re comparing laminate flooring options specifically, laminate is almost exclusively installed as a floating floor. Glue-down laminate exists but is rare and generally not recommended by manufacturers.
Common floating floor issues and how to avoid them
While installation method is important, the real-world performance of floating floors depends on sidestepping common errors and proactively resolving potential problems. Denver’s climate adds a specific layer of complexity here because the swings between dry winters and wet spring months put more stress on floor materials than a more stable climate would.
Moisture, skipped acclimation, bad underlayment, or missing expansion gaps are the leading causes of floating floor failures. Here’s what to watch for:
- Peaking or buckling: When planks push upward at the joints, it usually means the floor had no room to expand. Insufficient expansion gaps are almost always the cause.
- Joint separation or gapping: Gaps between planks typically point to insufficient acclimation before installation or low indoor humidity pulling moisture from the planks after the fact.
- Squeaking or hollow sounds: An uneven subfloor creates spots where the planks don’t have full support, and those spots flex and squeak under foot traffic.
- Loose or shifting planks: If the floor feels like it’s moving as a unit or individual planks rock, check whether the underlayment is too thick or was double-layered.
Using two layers of underlayment or skipping vapor barriers can cause locking joints to flex repeatedly, which eventually cracks or destroys the click-lock mechanism entirely. Once that happens, the floor cannot be repaired in place and needs to be removed and reinstalled.
Prevention checklist:
- Test subfloor moisture before any product goes down.
- Flatten the subfloor to manufacturer tolerances.
- Acclimate flooring for at least 48 to 72 hours in the installation room.
- Choose underlayment appropriate for your subfloor type.
- Never stack underlayment layers.
- Use spacers to maintain consistent expansion gaps at all walls.
- Check planks for damage before locking them in place.
Pro Tip: After installation, keep your home’s humidity between 35% and 55% year-round. Denver winters are dry, and indoor heating makes them drier. A whole-home humidifier can be the difference between a floor that lasts 20 years and one that develops gaps by February.
For more detailed guidance on your specific flooring type, explore Denver laminate installation advice or browse helpful flooring tips covering everything from product selection to post-installation care.
What most flooring guides miss about floating floors
Here’s something we’ve learned from over a decade of flooring installations in the Denver area: most problems with floating floors aren’t product problems. They’re preparation problems. A homeowner can purchase a premium LVP product with a 30-year warranty, and it will still fail if the subfloor isn’t flat or if the expansion gap gets buried under a baseboard nailed too tight to the wall.
Online guides love to focus on which product to buy or which click-lock system is the easiest to use. What they don’t talk about enough is that Denver’s altitude, low humidity, and temperature swings create conditions that punish installation shortcuts faster than they would in more temperate climates. A floor installed in August during warm, dry conditions will contract significantly when January heating kicks in. If the installer didn’t account for that range with proper expansion gaps and acclimation, the floor will show it.
The other thing that doesn’t get enough attention is vapor barrier strategy beneath floating floors over concrete. We’ve seen beautiful LVP installations over basement concrete slabs that started cupping within a single season because the installer assumed the waterproof core of the LVP made a vapor barrier unnecessary. The waterproof core protects the plank from liquid water on top. It doesn’t stop vapor transmission coming up from below. That distinction matters enormously in Colorado.
What professionals always do, and what shortcuts skip, is spend as much time on critical subfloor prep tips as on the installation itself. Sometimes that means adding a day to the project timeline for leveling compound to cure. Sometimes it means telling a client that their concrete slab needs a proper epoxy moisture barrier before any floating floor goes down. Those conversations aren’t as exciting as picking out a wood-tone finish, but they are the reason a floor looks and performs like new five years later.
The product matters. But the preparation matters more.
Upgrade your floors with expert help
Getting a floating floor right the first time requires more than good materials. It takes careful subfloor assessment, the right product match for your specific rooms and lifestyle, and attention to the details that most guides gloss over.
At Leonardo’s Flooring Corp, we’ve been helping Denver-area homeowners and property managers get exactly that for over 10 years. Every project starts with a real conversation about your goals, your space, and your budget. Whether you’re interested in Denver hardwood installation, looking at Denver laminate flooring options, or exploring Denver vinyl floors for a moisture-prone area, we’ll help you choose and install the right solution. With 125+ five-star reviews and a reputation built on honest service, we’re the local team that treats your home like our own.
Frequently asked questions
Can floating floors be installed over existing tile or hardwood?
Yes, floating floors can go over existing flat, stable tile or hardwood, but any unevenness, loose tiles, or raised sections must be corrected first or they will telegraph through the new floor.
How long does a typical floating floor installation take?
Most single-room floating floor projects take one to two days when the subfloor is properly prepared in advance, though larger spaces or complex layouts may add time.
What is the benefit of leaving an expansion gap with floating floors?
The expansion gap gives the floor room to expand and contract naturally with temperature and humidity changes, preventing buckling, peaking, or lifting over time.
Do floating floors always require underlayment?
Most floating floors need underlayment for cushioning, sound control, and moisture protection, but you should never double-layer underlayment if your product already has an attached foam pad, as this can damage the locking joints.
What causes floating floor planks to separate or squeak?
Subfloor unevenness is the most common cause, but missing expansion gaps, skipped acclimation, and incorrect underlayment all contribute to joint separation, squeaking, and early wear.