
Cracked tiles. Hollow sounds underfoot. Uneven edges that catch every toe in the dark. These are the hallmarks of a tile floor installation done without the right benchmarks, and they cost Denver homeowners real money to fix. What makes the situation worse is that most failures are completely preventable. Denver properties carry specific challenges, from concrete slab variability to freeze-thaw moisture cycles, that generic how-to videos simply don’t address. This guide walks you through every stage of the process, from substrate analysis to post-installation quality checks, so you know exactly what a correct installation looks like before anyone touches your floor.
Table of Contents
- What you need before installation: Substrate, moisture, and materials
- How to prepare your floors for tile installation
- Executing tile installation: Methods, benchmarks, and avoiding pitfalls
- Post-installation checks: Verifying quality and troubleshooting issues
- What most guides skip: The Denver difference and why benchmarks matter
- Get professional tile floor installation in Denver
- Frequently asked questions
Key Takeaways
| Point | Details |
|---|---|
| Moisture testing is essential | Always test for moisture vapor emission on slabs before installation to guide material and membrane choices. |
| Substrate flatness prevents failures | Strict flatness and movement checks keep tiles from cracking, hollowing, or having lippage issues. |
| Coverage benchmarks matter | Meeting minimum adhesion and coverage standards ensures a durable, problem-free tile floor. |
| Quality checks catch issues early | Post-installation diagnostics like straightedge and tap tests identify defects before they become costly repairs. |
| Local expertise is critical | Denver’s climate and substrates require industry-aligned practices, not generic shortcuts, for lasting results. |
What you need before installation: Substrate, moisture, and materials
With the critical need for proper planning established, let’s look at exactly what you need to prepare before installation begins.
Before a single tile goes down, the most important work is already happening on your floor. The substrate, which is whatever surface the tile will bond to, determines every material and method decision that follows. In Denver, this matters more than in many other regions. Older homes often have concrete slabs that have seen decades of temperature swings and moisture intrusion. Newer builds can have wood subfloors with movement and deflection issues that tile simply cannot tolerate without the right prep.
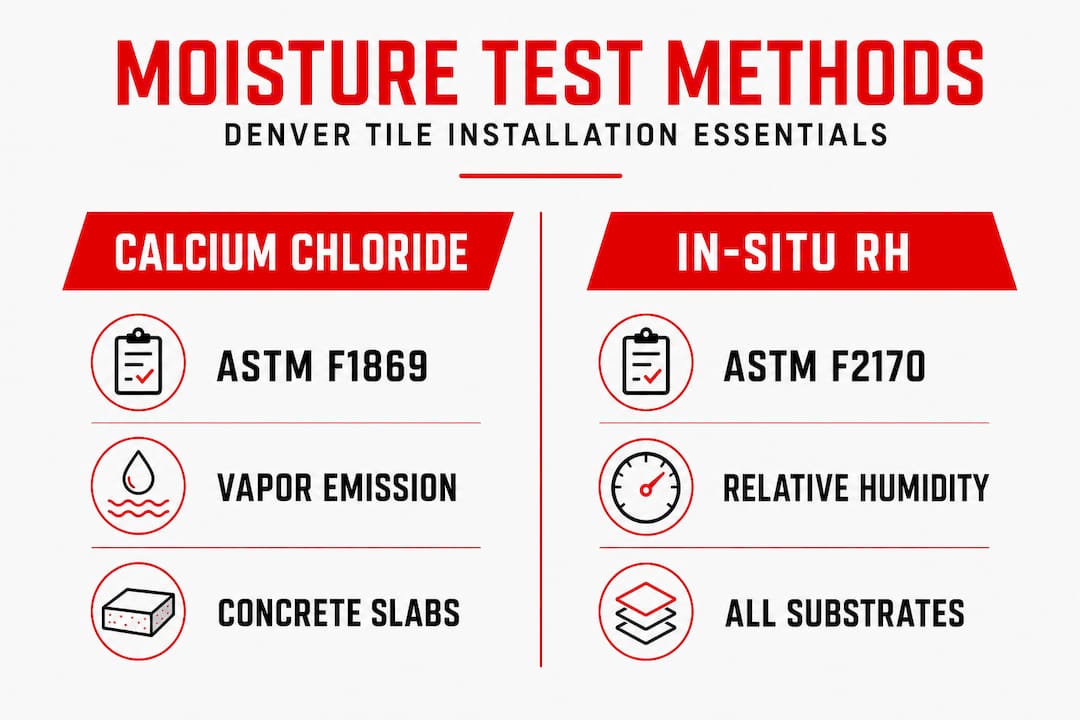
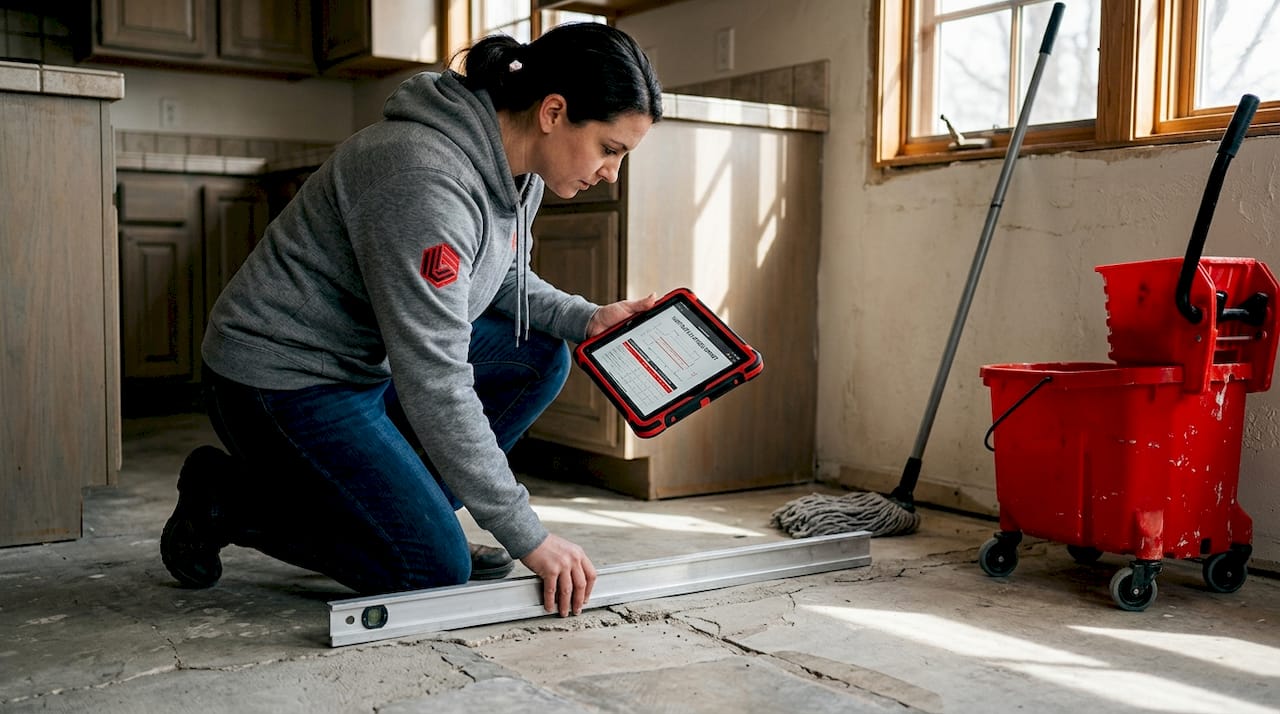
Moisture testing is not optional. Vapor mitigation decisions are driven by substrate type and moisture vapor emission testing using ASTM F1869 (calcium chloride test) or ASTM F2170 (in-situ relative humidity probe). These industry-recognized tests tell you whether your concrete slab is actively off-gassing moisture that will break down adhesive bonds over time. Skipping this step is one of the leading reasons tile floors fail within the first few years.
Here’s a quick comparison of the two standard moisture tests:
| Test method | Standard | What it measures | Best used for |
|---|---|---|---|
| Calcium chloride | ASTM F1869 | Moisture vapor emission rate (lbs/1000 sq ft/24 hrs) | Concrete slabs, standard use |
| In-situ relative humidity | ASTM F2170 | Internal slab RH% at depth | Thick slabs, new construction |
Once you have test results, material selection follows logically. The right tile floor installation approach for a high-moisture slab looks very different from one over a dry wood subfloor. You may need a vapor-mitigation membrane, a bonded waterproof membrane, or a modified mortar designed to tolerate elevated moisture levels.
Essential materials and tools checklist:
- Porcelain or ceramic tile (order 10% overage for cuts and future repairs)
- Large-format tile leveling system if tiles exceed 15 inches on any side
- Polymer-modified thinset mortar matched to your substrate and tile type
- Tile spacers or wedge-based leveling clips
- Notched trowel (size matched to tile format)
- Straightedge or laser level (10-foot rule)
- Moisture test kit or access to a qualified tester
- Grout, grout float, and sealer appropriate for your grout type
- Vapor-mitigation or uncoupling membrane if test results require it
Pro Tip: Always request written documentation of moisture testing results and the substrate preparation plan from any contractor before work begins. A professional who hesitates to provide this is waving a red flag.
Evaluating substrate flatness is equally important and often overlooked by homeowners reviewing bids. The industry tolerance for tile installation is no more than 1/4 inch variation in 10 feet, or 1/8 inch in 2 feet for large-format tiles. Denver’s freeze-thaw cycles can cause concrete to shift and settle over time, so don’t assume a slab that looked fine during a walkthrough actually meets spec. Proper Denver subfloor preparation accounts for these realities before any tile goes down, which is why it’s the stage where quality separations happen.
Reviewing a Denver flooring renovation guide can also help you understand how tile fits within a broader project scope, especially if you’re updating multiple rooms or transitioning between floor types.
How to prepare your floors for tile installation
After assembling materials and confirming your substrate type, the next essential step is thorough floor preparation, a cornerstone of lasting tile installations.
Floor prep is where most DIY projects and rushed contractor jobs go wrong. It’s tedious, it takes time, and the results are invisible once tile is laid. But every quality issue you see on the surface, from hollow tiles to cracked grout lines, almost always traces back to something that went wrong during prep.
Step-by-step substrate preparation:
- Clear and clean the substrate. Remove all debris, adhesive residue, paint, oil, and curing compounds. Contaminants prevent mortar from bonding.
- Check flatness with a 10-foot straightedge. Mark any high or low spots that exceed the 1/4-inch tolerance. High spots get ground down; low spots get filled with floor-leveling compound.
- Inspect for cracks or movement joints. Existing cracks in concrete are stress indicators, not cosmetic flaws. They must be addressed with crack-isolation membranes before tiling.
- Conduct moisture vapor emission testing. Use ASTM F1869 or ASTM F2170 and document the results. If readings exceed adhesive manufacturer thresholds, install a vapor-mitigation membrane.
- Install uncoupling or crack-isolation membrane if needed. This layer protects your tile from the substrate’s movement and moisture, dramatically extending the life of the installation.
- Prime the substrate. Some substrates, including certain concrete types and cement board, benefit from a primer coat that improves mortar adhesion.
Here’s a quick reference for common substrate scenarios in Denver:
| Substrate type | Common Denver issue | Recommended action |
|---|---|---|
| Concrete slab on grade | Moisture vapor emission | ASTM test, vapor membrane if needed |
| Wood subfloor | Deflection, movement | Assess deflection; add cement board or uncoupling membrane |
| Existing tile | Hollow tiles, height addition | Remove loose tiles; grind down high spots |
| Gypcrete (common in condos) | Low compressive strength | Verify PSI rating; may need overlay |
Safety note: Improper moisture control leads to tile adhesion failures, delamination, and mold growth underneath your floor. Never skip vapor mitigation if tests show elevated readings. This isn’t a judgment call; it’s a materials science fact.
Bond reliability and reduced installation failures depend on meeting coverage, back-buttering, and flatness tolerances before the first tile is ever placed. Denver commercial properties face an added layer of responsibility here because documented substrate prep is often required for manufacturer warranties on large-scale tile systems.
Pro Tip: For commercial properties or any installation involving a warranty, photograph every stage of substrate preparation and keep a written log of all test results and product choices. This record protects you if disputes arise later.
Reviewing commercial flooring prep standards alongside your residential project can also give you a clearer sense of how high-traffic areas demand an even more disciplined approach to the preparation phase.
Executing tile installation: Methods, benchmarks, and avoiding pitfalls
With the substrate ready, it’s time to lay tiles the right way. Here are clear benchmarks and practical methods to ensure your floor stands the test of time.
The actual tile-setting phase is where the craft becomes visible, but the benchmarks are what separate a floor that lasts decades from one that starts failing in year two.
Step-by-step installation process:
- Dry-lay your tile layout before mixing mortar. This lets you plan the pattern, identify where cuts fall, and center the design in the room.
- Mix mortar to manufacturer specifications. Consistency matters. Too much water weakens the bond; too little causes premature setting.
- Apply mortar with a notched trowel using a consistent combing direction. Trowel size must match tile format.
- Back-butter large-format tiles. Apply a thin skim coat of mortar to the back of the tile before setting it. This ensures full contact and eliminates air pockets.
- Set each tile with a slight twisting motion to collapse trowel ridges and maximize coverage.
- Check coverage every few tiles by lifting a set tile and verifying that mortar contacts at least 80% of the tile back on dry interior surfaces. Wet areas and exteriors require higher coverage.
- Use a leveling system for tiles larger than 15 inches to prevent lippage, the height difference between adjacent tiles that creates a trip hazard and an unattractive look.
- Maintain consistent joint widths using spacers or the leveling system clips.
Key benchmarks to know:
- Minimum mortar coverage standards require 80% for dry interiors, and higher percentages for wet areas, exteriors, and heavy-use commercial floors
- Lippage tolerance for standard tile: 1/32 inch where grout joints are 1/4 inch or less
- For large-format tile, manage lippage expectations by tightening substrate flatness requirements, using back-buttering, and planning joint widths before any mortar is mixed
Common installation mistakes that drive most failures:
- Using a trowel that’s too small for the tile size, leaving insufficient mortar ridges
- Rushing through back-buttering or skipping it entirely on large tiles
- Failing to allow proper open time before setting tile into mortar
- Setting tiles over a substrate that hasn’t fully cured after leveling compound was applied
- Ignoring movement joints at room perimeters and doorways, which allow the floor system to expand without cracking
Pro Tip: Lift a tile and check coverage every 5 to 6 tiles during installation. Don’t wait until the floor is done to discover you’ve been running at 50% coverage. By then, the only fix is a complete tearout.
A proper professional tile installation always includes a mortar coverage check protocol. If a contractor can’t describe their coverage verification method, that’s worth exploring further before signing a contract.
The flooring installation process for tile is genuinely more technical than most homeowners realize, which is why informed clients consistently get better results, even when hiring out the work.
Post-installation checks: Verifying quality and troubleshooting issues
Once the tiles are laid, rigorous quality control is the final step. Here’s how to make sure everything’s up to standard and what to do if things go wrong.
A properly installed tile floor should feel solid, look flat, and show consistent grout lines throughout. Quality control isn’t just a formality; it’s how you confirm that the benchmarks you paid for were actually met.
What to check after installation:
- Lippage: Run your hand across tile edges and use a straightedge. Any step greater than 1/32 inch on small tile or per spec on large-format tile is worth documenting.
- Hollow tiles: Walk the floor and listen. A dull thud means a hollow spot beneath the tile. Hollow areas indicate inadequate mortar coverage and are a structural concern, not just an annoyance.
- Cracked tiles: Look for hairline cracks, especially near movement joints or corners. These often indicate substrate movement that wasn’t addressed during prep.
- Grout inconsistencies: Check for gaps, crumbling, or color variation in grout lines. These can indicate rushed grouting or product mixing errors.
- Tile alignment: Stand at one end of the room and sight down the grout lines. They should be straight, consistent, and parallel to reference walls.
Remember this: Surface problems are rarely just surface problems. Hollow tiles and lippage are symptoms of installation-system failures, including inadequate coverage, flatness issues, or substrate warpage. Diagnostics like straightedge checks and tap tests are part of standard failure analysis, not nit-picking.
Pro Tip: For warranty documentation, photograph every identified defect with a ruler for scale, date the photos, and send written notes to your installer within the warranty window. A professional installer will take this seriously. One who dismisses documented issues is telling you everything you need to know.
If defects are found, communicate them in writing to your installer as soon as possible. Most reputable contractors will address legitimate issues promptly. For tile installation troubleshooting that goes beyond minor grout fixes, understanding the root cause is essential before any repair begins. Patching over hollow tiles without fixing the underlying coverage issue just delays the next failure.
What most guides skip: The Denver difference and why benchmarks matter
Here in Denver, we’ve seen what happens when generic installation advice meets local realities. The Mile High City’s climate creates temperature swings of 40 to 50 degrees Fahrenheit in a single day during spring, and concrete slabs in older neighborhoods have often moved and settled in ways that require a careful eye before any tile project starts.
Most how-to guides treat moisture testing as a box to check and flatness as a rough approximation. In Denver, neither of those approaches holds up. A slab that passes a visual inspection in July may be pushing moisture aggressively by February. A substrate that looks flat enough to the eye may be failing the 1/4-inch-in-10-feet threshold in three places.
What separates a genuinely trustworthy Denver tile installer from a low-bid crew is their documentation protocol. When you ask a contractor to walk you through how they verify flatness, what they do if moisture tests come back high, and how they handle movement joints in a large room, their answer tells you immediately whether they’re working from benchmarks or guesswork.
Hiring a Denver-area installer who can articulate their plan for substrate movement, flatness verification, and moisture mitigation isn’t being difficult. It’s being informed. We’ve talked with property managers who assumed the tile company they hired “knew what they were doing,” only to call us 18 months later when half the floor was hollow.
Checking out Denver property manager flooring tips gives you concrete language to use when vetting contractors for multi-unit or commercial projects, where the stakes and floor area are both significantly larger.
The uncomfortable truth is that most tile failures in Denver aren’t mysterious. They’re traceable to one or two skipped benchmarks. Insisting on documentation, flatness records, and moisture test results isn’t overkill. It’s the minimum standard for a floor that should last 20 or more years.
Get professional tile floor installation in Denver
If this guide has made one thing clear, it’s that flawless tile installation isn’t about working faster or cheaper. It’s about working to the right benchmarks, with the right materials, on a properly prepared substrate.
At Leonardo’s Flooring Corp, we’ve spent over 10 years installing tile floors across Denver for homeowners and property managers who want the job done right the first time. Every project starts with a real substrate evaluation and moisture assessment, not assumptions. We document what we find, explain what it means for your project, and give you a plan with no surprises. Our Denver tile installation services cover everything from single-room updates to full commercial builds, and our professional subfloor preparation work ensures your tile has the foundation it needs to last. With 125+ five-star reviews, we let our results speak for themselves. Reach out today and let’s talk about your floor.
Frequently asked questions
What is the most important step in the tile floor installation process?
Proper substrate preparation, including moisture testing and flatness verification, is the foundation for preventing tile failures. Without it, even the best tile and mortar combination will underperform.
Do I need to worry about vapor mitigation for tile floors in Denver?
Yes, vapor mitigation is crucial for concrete slabs with high moisture emission, which is common in Denver’s climate. ASTM F1869 or F2170 tests determine whether a vapor-mitigation or waterproof membrane is needed before installation begins.
How do I check for installation issues like hollow tiles or lippage?
Use a straightedge to measure lippage between adjacent tiles and a tap test (knuckle or coin) to identify hollow spots. These diagnostic checks reveal deeper installation-system problems that need addressing, not just cosmetic patching.
Why does large-format tile installation require special attention?
Large-format tiles demand tighter substrate flatness, consistent back-buttering, and coordinated joint planning to prevent visible lippage. Managing lippage expectations starts with substrate prep and the right setting technique, not just good tile selection.