
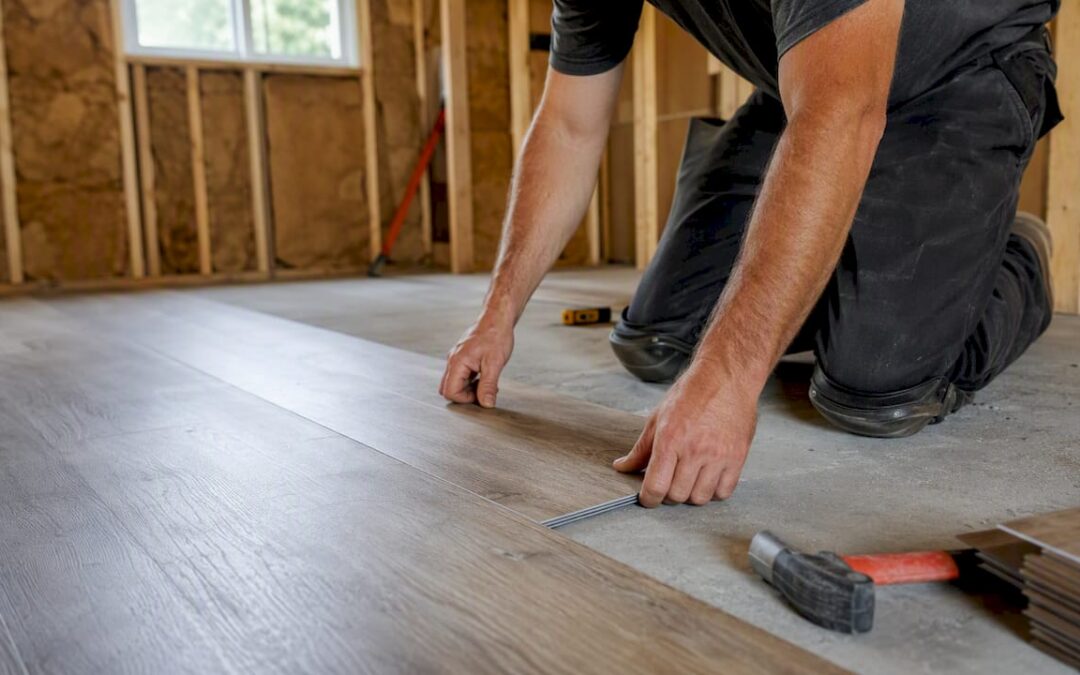
Rigid-core luxury vinyl plank (waterproof LVP with an SPC core) is the best general-purpose flooring for a finished basement, but only once you’ve dealt with the concrete underneath it. That’s the whole verdict. You still have to test the slab for moisture using the same standards flooring installers rely on, ASTM F2170 and ASTM F1869, and pick a plank with the right core, thickness, and wear layer for the room’s use.
Where vinyl plank shines:
- Finished living spaces: family rooms, guest bedrooms, home offices, and basement gyms where the slab tests dry and you want a warm, quiet, waterproof floor.
- Rec rooms and basements with occasional minor moisture: SPC tolerates brief water exposure (a leaky washing machine, a humid summer week) without swelling or delaminating the way laminate or solid hardwood would.
Where it isn’t the right call:
- Active or recurring flooding: if your basement floods every spring, no floating floor solves that problem. You need drainage work and probably a floodproof surface like sealed concrete or epoxy.
- Utility rooms and true workshop spaces: areas that see standing water, heavy equipment, or constant moisture are usually better served by tile or a coated slab than any plank product.
Key Takeaways
Rigid-core waterproof vinyl plank works in basements because SPC resists moisture and temperature swings, but only after the slab passes ASTM moisture testing and gets properly leveled and vapor-barriered.
| Point | Details |
|---|---|
| Verdict on suitability | Waterproof SPC vinyl plank is the best general-purpose basement floor when slab moisture is controlled first. |
| Top product spec | Choose an SPC core with a 20-mil (or 22-mil for heavy use) wear layer for lasting basement performance. |
| Non-negotiable prep step | Test slab moisture with ASTM F1869 or F2170 methods before buying or installing anything. |
| Installation method tip | Floating click-lock with a separate 6-mil vapor barrier suits most finished basements, even with attached-pad planks. |
| Warranty reminder | Check moisture exclusions and approved-adhesive requirements, since skipping installation rules can void coverage. |
| Professional next step | Leonardo’s Flooring Corp offers in-home moisture testing and slab prep before recommending or installing basement vinyl plank. |
Table of Contents
- What Type of Vinyl Plank for Basements Works Best?
- How Do You Test a Basement Slab for Moisture Before Installing Vinyl Plank?
- Prepping a Basement Slab: Leveling, Cracks, and Vapor Barriers
- Installing Vinyl Plank in a Basement: Floating, Glue-Down, and Loose-Lay Steps
- Choosing Thickness, Core, and Wear Layer for a Basement LVP
- What Does Vinyl Plank Flooring Cost in a Basement, and How Long Does It Last?
- When Vinyl Plank Isn’t the Right Basement Floor
- Common Basement Installation Mistakes and How Pros Avoid Them
- An Installer’s View: When Vinyl Plank Is the Right Call, and When It Isn’t
- Get a Moisture Test and Installation Quote from Leonardo’s Flooring Corp
- Sources
What Type of Vinyl Plank for Basements Works Best?
Not all vinyl plank is built the same, and the differences matter more below grade than anywhere else in the house. Three constructions dominate the market: rigid-core SPC, foam-core WPC, and standard flexible LVT. For basements, SPC wins the majority of the time.
SPC (stone plastic composite) uses a mineral-based rigid core that barely expands or contracts with temperature and humidity swings, which is exactly the stress a basement slab puts on flooring. WPC (wood plastic composite) has a softer foam core that feels a bit more cushioned underfoot, but it’s more prone to subtle movement over a slab that isn’t perfectly flat. Standard LVT, the older flexible vinyl tile format, still works fine above grade but generally lacks the dimensional stability manufacturers require for below-grade installation.
Installation method matters just as much as the plank itself. Floating (click-lock) systems are the most common choice for basements because the planks lock together and float over a vapor barrier and underlayment without touching the slab directly. Glue-down vinyl plank gives a firmer, more substantial feel underfoot and resists shifting in high-traffic commercial basements, but it demands a near-perfect subfloor and the right adhesive for a below-grade application. Loose-lay planks, held in place by their own weight and friction backing, work only when the slab is exceptionally flat and dry, since there’s no adhesive or locking mechanism to compensate for irregularities.
| Evaluation criteria | Floating (click-lock) | Glue-down | Loose-lay |
|---|---|---|---|
| Best for | Finished living spaces, DIY projects | Commercial or heavy-traffic basements | Perfectly flat, dry slabs |
| Moisture immunity | High, with proper vapor barrier | High, but adhesive choice matters | High |
| Comfort underfoot | Warmer, slightly cushioned | Firmer, more solid feel | Similar to floating |
| Price shape | Moderate material, low labor | Higher labor cost | Moderate, fast install |
| Core type common | SPC | SPC or dense WPC | SPC |
| Repairability | Easy, plank by plank | Difficult, requires scraping | Easiest of the three |
| Warranty considerations | Requires stated underlayment/vapor barrier | Requires manufacturer-approved adhesive | Requires documented slab flatness |
For a typical basement family room or bedroom, floating SPC is the practical default. It’s DIY-friendly, forgiving of minor slab imperfections, and easy to repair if a plank ever gets damaged.
- Floating SPC: Pro: easiest install and repair. Con: needs a proper vapor barrier underneath or you’re gambling on the attached pad alone.
- Glue-down SPC: Pro: rock-solid, commercial-grade feel. Con: unforgiving of slab flaws, harder DIY project.
- Loose-lay: Pro: fast installation, no adhesive mess. Con: only viable on an unusually flat, dry slab.
Pro Tip: If you’re not sure which construction to buy, look at the box label for “SPC” or “rigid core.” If it just says “luxury vinyl plank” with no core designation, ask the retailer directly. Basements aren’t the place to guess.
How Do You Test a Basement Slab for Moisture Before Installing Vinyl Plank?
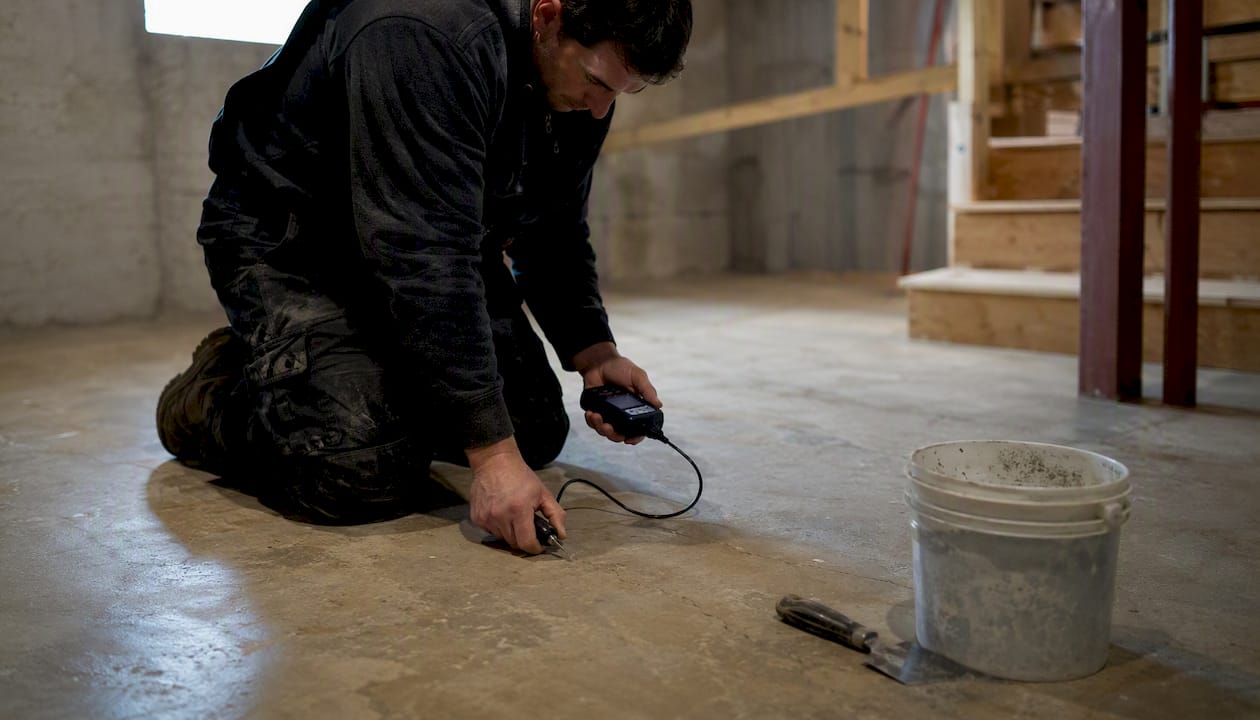
The single most important step before installing any vinyl plank in a basement is measuring how much moisture is coming up through that slab, because even waterproof flooring can trap moisture against concrete and cause mold, odor, or adhesive failure if you skip this step. Installers rely on two ASTM-recognized tests, and both should happen before a single plank goes down.
- Plastic sheet test (quick screening). Tape a 2-foot-square sheet of clear plastic to the slab, sealing all edges, and leave it for 24 to 48 hours. Condensation or a darkened patch underneath means moisture is moving through the concrete and you need a formal test before proceeding.
- Calcium chloride test, ASTM F1869. This measures moisture vapor emission rate (MVER) in pounds per 1,000 square feet over 24 hours. Most manufacturers and installers treat a reading at or below 4 lb per 24 hours as acceptable for vinyl plank installation, based on thresholds cited by trade guidance on basement LVP performance (wear layer recommendations and moisture thresholds).
- In-situ relative humidity probe, ASTM F2170. Probes get drilled into the slab to measure internal relative humidity, which many installers consider more reliable than surface calcium chloride testing since it reflects moisture deeper in the concrete. A common threshold here is 75% RH or below.
If your slab reads wetter than those thresholds, don’t install yet. Installers typically pause the job, let the slab dry longer if there’s time, or move to a mitigation product: a topical moisture-sealing compound, an epoxy vapor barrier system, or, for a longer-term fix, addressing the actual water source, whether that’s poor exterior grading, a clogged gutter system, or a sump pump that isn’t keeping up.
Pro Tip: A topical sealer bought at a home center is a fine stopgap for a borderline reading, but if your calcium chloride test comes back well above the 4 lb threshold, call a moisture mitigation specialist. Painting over a real water problem just delays the failure, it doesn’t prevent it.
Prepping a Basement Slab: Leveling, Cracks, and Vapor Barriers
A flat, clean, dry slab with the right vapor strategy is non-negotiable, full stop. Vinyl plank is remarkably forgiving of a lot of things, but it will telegraph every bump, dip, and crack in the concrete beneath it, and a poorly prepped slab is the single biggest reason basement LVP fails early.
Materials you’ll likely need on hand:
- Self-leveling compound for low spots
- Concrete crack filler or epoxy injection for structural cracks
- 6-mil polyethylene sheeting for an independent vapor barrier
- Manufacturer-recommended underlayment (if the plank doesn’t have an attached pad)
- Concrete primer and patching compound for pitted or spalled areas
Before you touch a single plank, work through this checklist:
- Strip old adhesive residue, paint, or carpet tack strips down to bare concrete.
- Fill and seal any cracks wider than a hairline, since untreated cracks can telegraph through the vinyl and create a trip hazard over time.
- Check flatness with a straightedge. Manufacturers commonly require no more than 3/16 inch of variance over a 10-foot span. Grind high spots and pour self-leveling compound into low ones.
- Roll out a 6-mil poly vapor barrier across the slab where required, even if your plank has an attached underlayment pad.
That last point trips up a lot of homeowners. An attached pad is designed mainly for sound dampening and comfort, not as a standalone vapor strategy. Installer trade practice favors adding a separate poly vapor barrier even over planks with built-in padding, because it’s a cheap insurance step that protects your warranty if a moisture claim ever comes up. Skipping it to save $50 on a 500-square-foot room is one of the more common regrets homeowners report after the fact.
Pro Tip: If your plank’s attached pad is rated for “above grade only” at La Rocks Renovations, that’s the manufacturer telling you it’s not sufficient for a basement. Read the fine print before you buy, not after installation day.
Installing Vinyl Plank in a Basement: Floating, Glue-Down, and Loose-Lay Steps
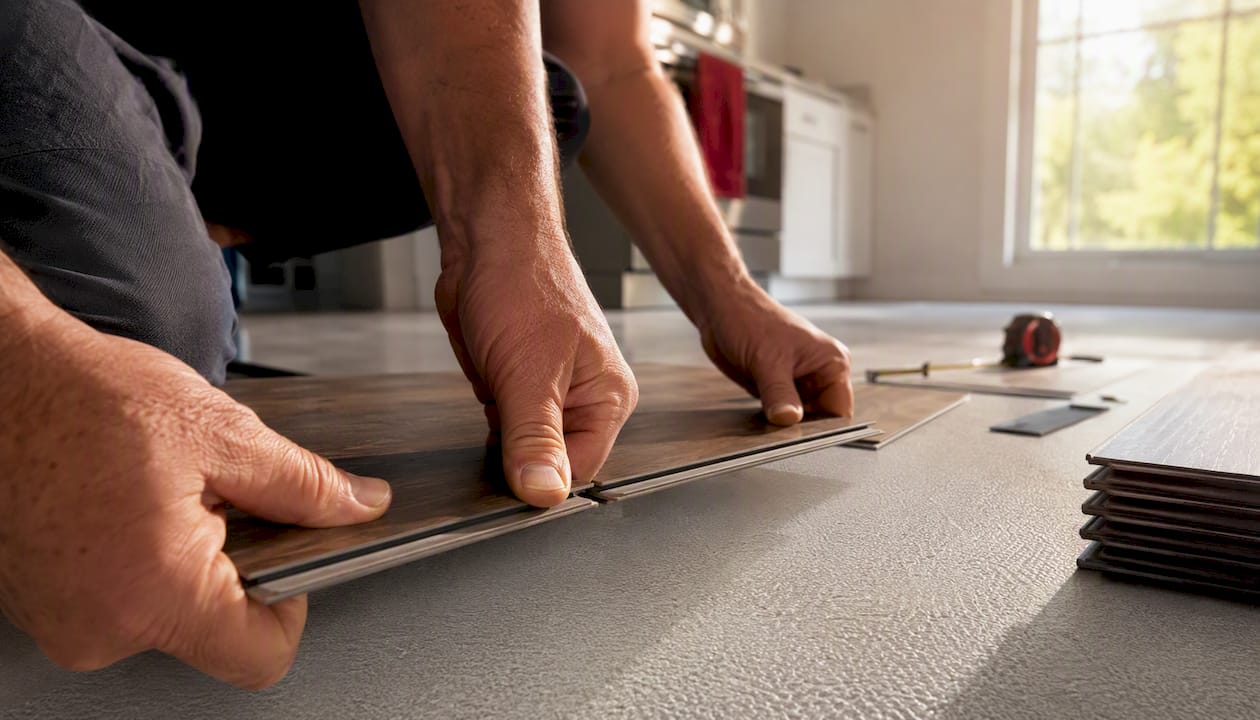
Floating SPC is the method most homeowners choose for basements, glue-down gives a firmer commercial feel where traffic is heavy, and loose-lay only makes sense on a slab that’s already close to perfectly flat. Each method has its own sequence, and basements add a few extra cautions that don’t apply on upper floors.
Floating (click-lock) installation:
- Let unopened boxes acclimate in the basement for about 48 hours so the planks adjust to room temperature and humidity, a step manufacturers and trade guides consistently recommend before any basement install.
- Roll out the vapor barrier and underlayment (if not attached).
- Start along the longest wall, leaving a 1/4 inch expansion gap at every wall and vertical obstruction.
- Click each plank’s tongue into the previous plank’s groove, using a tapping block to fully seat the joint without denting the edge.
- Stagger end joints by at least 6 inches between rows for a stable, natural-looking pattern.
Glue-down installation:
- Confirm the slab passed moisture testing and is properly primed.
- Select the adhesive the plank manufacturer specifically approves, pressure-sensitive adhesives and standard wood-flooring glues are not interchangeable.
- Trowel adhesive in small sections using the notch size the manufacturer specifies, working in workable zones rather than flooding the whole room at once.
- Set each plank into the wet adhesive and roll the floor with a 100-pound roller to ensure full contact.
Loose-lay installation:
- Verify slab flatness meets spec, since loose-lay has no locking mechanism to hide irregularities.
- Position planks against a perimeter restraint, like a wall or transition strip, so friction backing holds the field in place.
- Trim the final row carefully, as loose-lay depends on a tight perimeter fit to stay put over time.
Most premature vinyl plank failures in basements trace back to one of three things: a skipped moisture test, a missing expansion gap, or joints that never got fully seated during installation. None of those are material defects, they’re process shortcuts.
A few warning signs tell you what went wrong after the fact. Gapping between planks months after installation usually points to a missing or too-small expansion gap. Buckling or tenting in the middle of a room typically means moisture built up under the floor with nowhere to go. Hollow-sounding spots under a glue-down floor usually mean the adhesive didn’t get full trowel coverage in that section. And avoid steam mops entirely during cleanup or routine maintenance, since the heat and moisture can compromise seams and adhesive over time.
Choosing Thickness, Core, and Wear Layer for a Basement LVP
For most basements, an SPC core with at least a 20-mil wear layer is the specification to look for, and heavy-use basements (rec rooms doubling as a gym or playroom) should push that to 22 mil. The wear layer is the clear protective top coating that resists scratches and stains. It matters more for long-term basement performance than the decorative photographic layer underneath it, because a scratched-through wear layer exposes the print layer to wear and moisture, regardless of how good the pattern looked in the showroom.
Key specs to check on any product’s spec sheet:
- Core type: SPC for most basements, given its dimensional stability. SPC thickness typically runs around 5 to 6mm, while WPC tends to be thicker, generally around 7 to 8mm, so don’t assume thicker automatically means better for a below-grade room.
- Total thickness: Anything under roughly 4mm tends to feel flimsy underfoot and is more prone to flexing over minor slab imperfections.
- Wear layer: 12 to 20 mil for light residential basement use, 20 mil or higher for basements that double as a home gym, playroom, or high-traffic family space.
- Warranty coverage: Confirm the wear-layer warranty period matches the traffic level you expect. A 20-mil residential product often carries a longer warranty than a bargain 6-mil sheet, and thicker wear layers correlate with a meaningfully longer service life in humid basement conditions.
There’s a real trade-off between comfort and stability here. WPC’s thicker foam core feels softer and warmer, which some homeowners prefer for a media room or playroom, but that same foam core is more sensitive to minor slab unevenness than SPC’s rigid mineral core. If your slab tested flat and dry and comfort matters more to you than maximum stability, a quality WPC product can still make sense. If you have any doubt about slab flatness, stick with SPC.
Pro Tip: Don’t shop by mil count alone without checking the whole spec sheet. A 20-mil wear layer over a thin, poorly rated core still won’t hold up. Read the core type, thickness, and wear layer together, the way you’d read nutrition labels rather than just the calorie count.
What Does Vinyl Plank Flooring Cost in a Basement, and How Long Does It Last?
A quality vinyl plank floor in a properly prepped basement typically costs $4 to $10 per square foot installed and should last 15 to 25 years depending on the wear-layer thickness you chose. Budget products at the low end of that range wear out faster; premium SPC with a 20 to 22 mil wear layer sits at the high end of both cost and lifespan.
| Tier | Material cost (per sq ft) | Installed cost (per sq ft) | Expected lifespan |
|---|---|---|---|
| Budget | $2–$3 | $4–$5 | 8–12 years |
| Mid-range | $3–$5 | $5–$7 | 15–20 years |
| Premium (20+ mil wear layer) | $5–$7 | $7–$10 | 20–25 years |
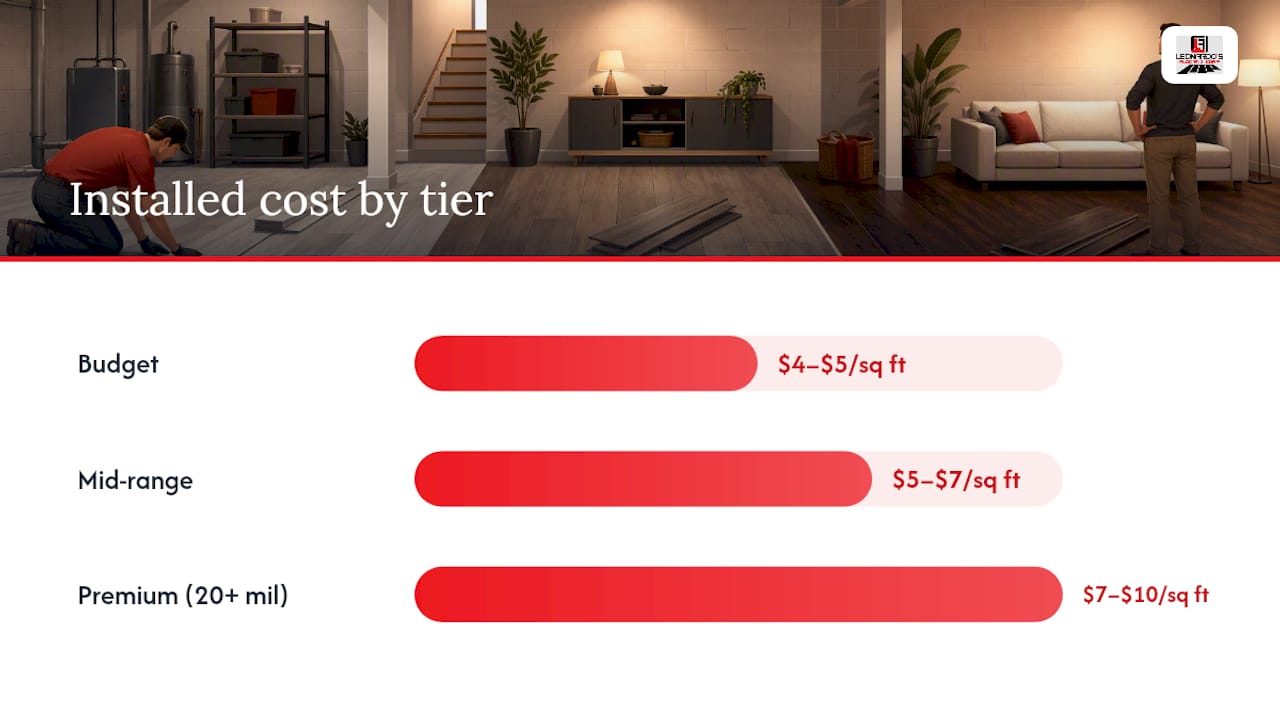
These bands roughly track figures cited across trade cost guides for basement vinyl plank, which put material costs around $2 to $7 per square foot and installation labor around $2 to $4 per square foot for typical residential jobs.
Before you buy, read the manufacturer’s warranty document closely. Most basement-related coverage disputes come down to a handful of predictable issues:
- Moisture exclusions: many warranties explicitly exclude damage from standing water or hydrostatic pressure, even though the plank itself is waterproof.
- Acclimation requirements: skipping the 48-hour acclimation period can void a claim if the manufacturer specifies it in writing.
- Approved adhesives only: using a generic adhesive on a glue-down install instead of the manufacturer’s approved product is one of the most common reasons a warranty claim gets denied.
- Installation method documentation: some warranties require proof of a vapor barrier or specific underlayment; keep your receipts and product labels.
Paying more upfront for a thicker wear layer and a documented, manufacturer-compliant installation is usually worth it in a basement specifically, since moisture cycling puts more long-term stress on flooring below grade than almost anywhere else in the house.
When Vinyl Plank Isn’t the Right Basement Floor
Porcelain tile offers the highest moisture immunity of any common basement material, epoxy coatings create a seamless, floodproof surface for utility spaces, engineered wood can work if the slab is dry and properly subfloored, and carpet tile brings warmth with easy spot-replacement. Each solves a problem vinyl plank doesn’t handle as well.
- Porcelain tile: Pro, essentially impervious to water and ideal for a basement bathroom or laundry area. Con, cold underfoot and a more involved, costlier installation than floating LVP.
- Epoxy floor coating: Pro, seamless and completely floodproof, perfect for a workshop, garage-adjacent basement, or utility room. Con, industrial look that most homeowners don’t want in a living space, and it’s a specialized epoxy floor coating application rather than a DIY weekend job.
- Engineered wood: Pro, genuine wood warmth and appearance if your slab tests bone dry and you install proper subflooring first. Con, still more moisture-sensitive than vinyl, a riskier bet if you’re not fully confident in your moisture testing.
- Carpet tile: Pro, warm, soft, and individual tiles can be replaced if one gets stained or damaged. Con, absorbs moisture and can support mold growth if the basement runs humid, a real drawback discussed in flooring comparisons between vinyl and less moisture-tolerant materials.
Choose tile or epoxy over vinyl plank specifically for utility rooms, basement bathrooms, or any space with a known history of periodic flooding. For everywhere else, a family room, guest suite, or home office, vinyl plank remains the more practical, comfortable choice.
Common Basement Installation Mistakes and How Pros Avoid Them
Most premature vinyl plank failures in basements trace back to four preventable mistakes: skipped moisture testing, a missing vapor barrier, poor slab flatness, or joints that weren’t fully seated during installation. Professional installers build their process specifically to eliminate these failure points before they become expensive problems.
A checklist that preserves both performance and warranty coverage:
- Calibrated moisture testing using calcium chloride or in-situ RH probes, not a guess based on how the slab “feels.”
- An independent 6-mil poly vapor barrier, even when the plank has an attached pad.
- Slab flatness verified to manufacturer spec, typically 3/16 inch over 10 feet, with grinding or self-leveling compound applied as needed.
- A full 1/4 inch expansion gap maintained at every wall and vertical surface.
- Every click joint fully seated with a tapping block, not just pressed together by hand.
Before you hire anyone for a basement LVP job, ask a few pointed questions:
- Can you provide records from a recent calcium chloride or RH moisture test on a similar job?
- Do you have references specifically from basement installations, not just main-floor work?
- What’s your process if a moisture test comes back marginal?
- How do you handle a warranty claim if one comes up down the road?
Pro Tip: A professional quote should itemize moisture testing, slab prep, vapor barrier material, and labor separately, not bundle everything into one flat number. If a bid comes in dramatically lower than others and doesn’t mention moisture testing at all, that’s the red flag, not the bargain.
An Installer’s View: When Vinyl Plank Is the Right Call, and When It Isn’t
On most finished-basement projects, rigid-core LVP is the recommendation, and the reasoning is straightforward once you’ve seen enough of these jobs. It’s genuinely waterproof rather than just water-resistant, it survives the humidity swings that come with below-grade living space, it looks like real wood or stone without the risk hardwood carries in that environment, and if a single plank ever does get damaged, you replace that one plank instead of refinishing an entire room.
That said, there are basement projects where tile or epoxy is the smarter recommendation from the start, not a compromise. A basement with a documented history of flooding, even minor and infrequent, needs a surface built to shrug off standing water entirely, not just resist a spill. A workshop or a basement that functions more like a garage, with heavy equipment, chemical exposure, or constant foot traffic in work boots, calls for the toughness of a coated slab over the comfort of a floating floor. The right material always follows the room’s actual function, not just what looks best in a showroom sample.
Get a Moisture Test and Installation Quote from Leonardo’s Flooring Corp
Reading about ASTM moisture thresholds and wear-layer specs is one thing. Standing in your own basement wondering whether that slab is actually dry enough is another. Leonardo’s Flooring Corp has spent over a decade handling flooring installation across the greater Denver area, and basement projects are exactly where a proper moisture test and slab prep plan save you from a floor that fails in three years instead of lasting twenty.
Request an in-home measure and moisture test, and we’ll walk you through what your specific slab needs before recommending a product. Our process covers calibrated moisture testing, slab prep and leveling, vapor barrier installation when required, professional vinyl plank installation, and warranty-compliant workmanship so you’re not stuck reading fine print after something goes wrong. Ask us for references and documentation of our moisture-testing process before you hire anyone, us included. Ready to find out what your basement actually needs? Get a quote on vinyl flooring installation and we’ll schedule a walkthrough.
Sources
- Best Flooring for Basements: How to Beat Moisture from Below (2026)
- Vinyl Plank Flooring In Basement: Expert Tips, Installation, And Maintenance Guide
- LVP for Montgomery County Basements: What Holds Up, What Fails | Carpet & Vacuum Expo
Always read the specific manufacturer’s installation guide for the product you buy before starting a project. Warranty terms and moisture requirements vary by brand and product line, and the guide that ships with your specific planks overrides any general advice here.