
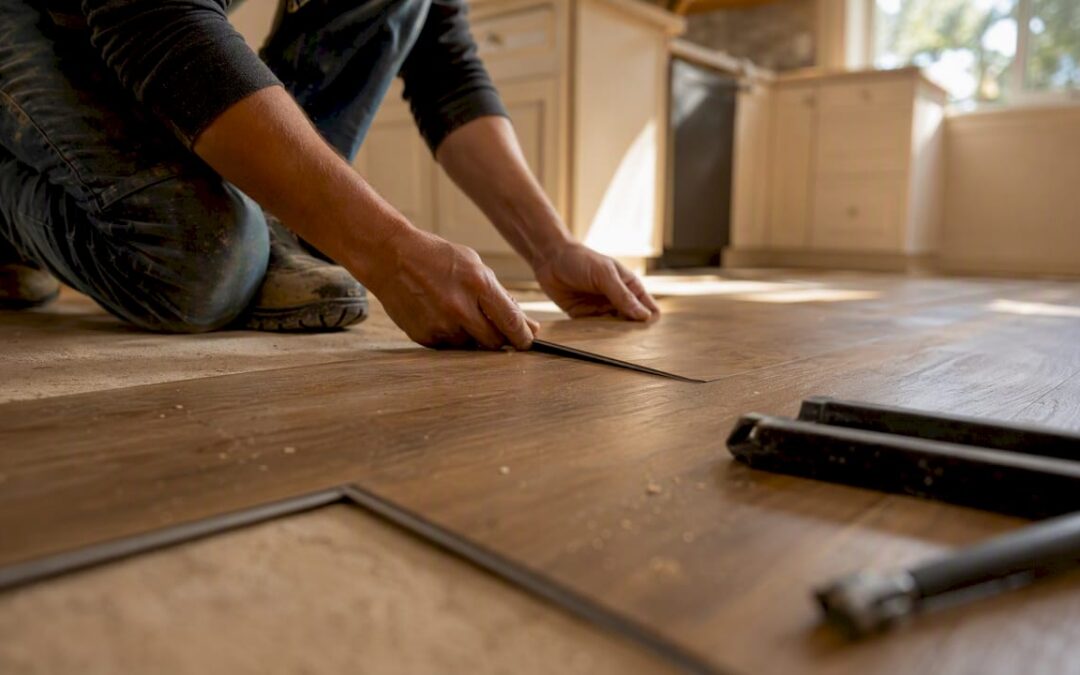
LVP stands for luxury vinyl plank, a multi-layer synthetic flooring product engineered to look like hardwood while resisting moisture, scratches, and heavy foot traffic. At its core, it’s a waterproof vinyl plank built around a rigid PVC or composite core, topped with a high-resolution wood-look print and a clear protective wear layer measured in mils. Most planks run 4–6 mm thick and cost roughly $3–$5 per square foot less than solid or engineered hardwood.
Quick verdict:
- Best rooms: Kitchens, bathrooms, mudrooms, basements, and high-traffic commercial spaces
- Who benefits most: Pet owners, families with kids, rental property managers, and anyone with a moisture-prone subfloor
- Durability summary: Wear layers from 4 mil (light residential) to 40 mil (heavy commercial) determine how long the surface holds up; a 12 mil or higher wear layer suits most active households
Key Takeaways
LVP is a fully waterproof, multi-layer vinyl plank that outperforms laminate in wet rooms and costs $3–$5 per square foot less than hardwood, making it one of the most practical flooring choices for active homes and commercial spaces.
| Point | Details |
|---|---|
| Wear layer drives durability | Choose 6 mil+ for light residential, 12 mil+ for active households, 20 mil+ for commercial. |
| Core type shapes performance | SPC suits commercial and below-grade installs; WPC offers better comfort for above-grade living areas. |
| Waterproof at the plank level | LVP’s PVC core resists moisture; subfloor prep and vapor barriers still matter for long-term performance. |
| Maintenance is straightforward | Sweep regularly, damp-mop with vinyl-safe cleaner, and avoid steam mops to protect the wear layer. |
| Leonardosflooringcorp installs LVP in Denver | 10+ years of local experience and 125+ five-star reviews back every vinyl floor installation project. |
Table of Contents
- What is LVP flooring made of, layer by layer?
- WPC vs. SPC: which core type should you choose?
- How does LVP compare to LVT, laminate, and hardwood?
- Where LVP performs well and where it falls short
- How is LVP installed, and what subfloor prep does it need?
- How to clean and maintain LVP
- What does LVP cost, and how long does it last?
- How to choose the right LVP: a buyer’s checklist
- When should you hire a professional installer?
- The part most homeowners get wrong about LVP
- Leonardosflooringcorp handles your LVP project in Denver
- Sources
What is LVP flooring made of, layer by layer?
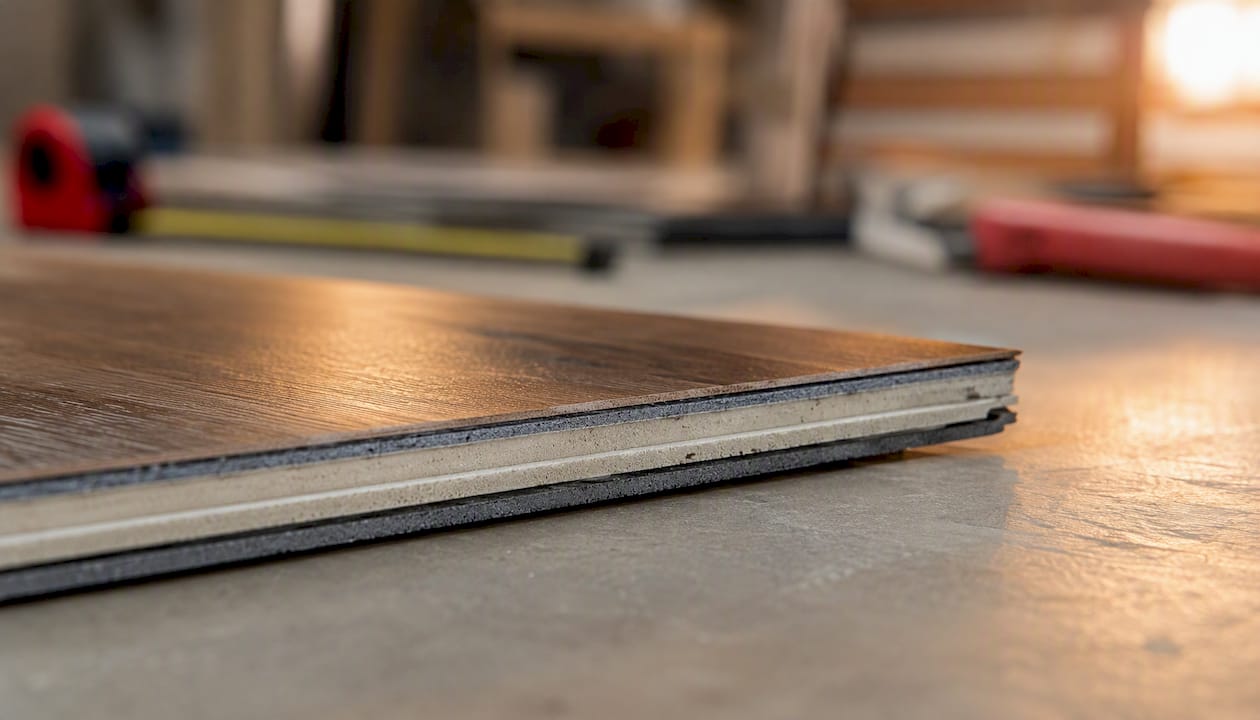
LVP is a multi-layer engineered product with six to eight distinct layers, each doing a specific job.
| Layer | Material | Function |
|---|---|---|
| Backing/underlayment | Foam, cork, or fiberglass | Cushion, sound absorption, moisture barrier |
| Core | WPC or SPC (rigid PVC composite) | Dimensional stability, dent resistance |
| PVC/fiberglass layer | PVC film or fiberglass sheet | Structural reinforcement |
| Printed design layer | High-resolution photographic film | Wood or stone visual |
| Wear layer | Clear PVC | Scratch, stain, and scuff protection |
| UV/finish coat | Aluminum oxide or ceramic bead | Surface hardness and sheen |
The wear layer is the number that matters most at the store. Wear-layer thickness ranges from about 4 mil up to 40 mil, with 12–28 mil being the typical guidance for commercial-grade durability. Thicker wear layers resist scratches and dents longer, though they can slightly soften the visual clarity of the print beneath them.
The core layer is what makes LVP waterproof at the plank level. A rigid WPC or SPC core seals out moisture far better than the wood-fiber core inside laminate. The backing layer adds a secondary moisture barrier and, when made from cork or foam, meaningfully reduces sound transmission underfoot.
WPC vs. SPC: which core type should you choose?
The two dominant core constructions pull in opposite directions, and the right choice depends on your subfloor and traffic level.
WPC (wood-plastic composite) blends wood fiber and PVC foam into a thicker, softer core. It feels warmer and quieter underfoot, absorbs minor subfloor imperfections more forgivingly, and suits residential living rooms and bedrooms well.
SPC (stone-plastic composite) replaces the wood fiber with limestone powder and PVC, producing a denser, harder core. It resists indentation from furniture legs and heavy foot traffic better than WPC, handles temperature swings without expanding or contracting as much, and is the standard choice for commercial spaces and below-grade installations.
- WPC: softer feel, better sound absorption, slightly thicker profile (5–8 mm typical), better for uneven subfloors
- SPC: harder, thinner (3.5–6 mm typical), more dimensionally stable, preferred for radiant heat systems and commercial use
- Both cores make the plank itself fully waterproof; the subfloor beneath is a separate concern
Pro Tip: SPC’s rigidity means it telegraphs subfloor humps and dips more than WPC does. If your subfloor has waves or low spots, either grind them down to within 3/16 inch over 10 feet before laying SPC, or switch to WPC and save the leveling labor.
How does LVP compare to LVT, laminate, and hardwood?
LVP and LVT share identical technology; the only real difference is shape. LVP comes as planks that mimic wood; LVT comes as tiles that mimic stone or ceramic. Same cores, same wear layers, same installation methods.
The contrast with laminate is more significant. Laminate uses a wood-fiber and resin core that swells when moisture penetrates the seams. LVP’s PVC core doesn’t absorb water, which is why LVP works in bathrooms and laundry rooms where laminate fails. See the laminate homeowner’s guide for a deeper breakdown of where laminate still makes sense.
Hardwood is real wood, which means it can be sanded and refinished multiple times over decades. LVP cannot be refinished. On the other hand, LVP handles spills and humidity without warping, installs faster, and costs considerably less per square foot.
| Attribute | LVP | Laminate | Solid Hardwood |
|---|---|---|---|
| Waterproof | Yes (plank level) | No | No |
| Refinishable | No | No | Yes |
| Install method | Click-lock, glue, loose-lay | Click-lock | Nail/staple down |
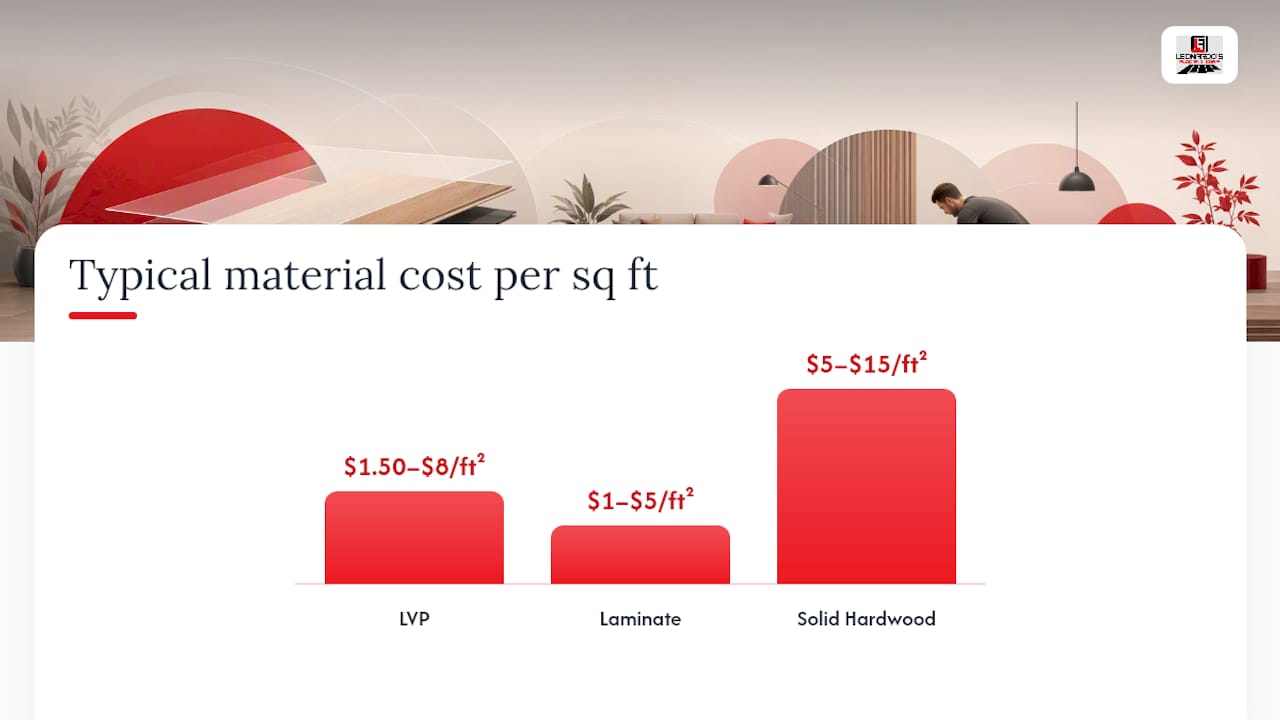
| Typical material cost | $1.50–$8/sq ft | $1–$5/sq ft | $5–$15/sq ft |
| Underfoot feel | Firm to slightly soft | Hollow | Solid, warm |
Where LVP performs well and where it falls short
LVP’s strengths cluster around moisture tolerance, durability, and low maintenance. Its weaknesses are real but manageable.
| Pros | Cons |
|---|---|
| Fully waterproof at the plank level | Cannot be sanded or refinished |
| Scratch and dent resistant (wear-layer dependent) | Can feel hollow or plastic underfoot without underlayment |
| Comfortable and quieter than tile | Susceptible to fading in prolonged direct sunlight |
| Works on radiant heat (SPC) | Extreme point loads (piano legs, heavy equipment) can dent thinner cores |
| DIY-friendly click-lock installation | Not suitable for industrial or outdoor use |
Best use cases:
- Pet households and families: family-friendly flooring with scratch resistance and easy cleanup
- Rental units: low maintenance, durable, and cost-effective to replace by the plank
- Kitchens and bathrooms: waterproof core handles spills and humidity without damage
- Retail and healthcare: commercial-grade SPC with 20+ mil wear layers handles cart traffic and cleaning chemicals
LVP is not the right call for industrial floors with forklifts, exterior decks, or spaces with sustained temperatures above 140°F.
Sound is the most common complaint in multi-story buildings. An attached foam or cork underlayment, which many mid-range and premium LVP products include, cuts impact noise noticeably. If your product doesn’t have one built in, adding a 2 mm foam underlayment before installation solves most of the problem.
How is LVP installed, and what subfloor prep does it need?
LVP installs via four main methods, each suited to different situations.
| Method | How it works | Best for |
|---|---|---|
| Click-lock (floating) | Planks snap together; no adhesive to subfloor | DIY, most residential projects |
| Glue-down | Full-spread or perimeter adhesive bonds planks to subfloor | High-traffic commercial, radiant heat |
| Loose-lay | Heavy planks rest by friction and weight | Temporary installs, rental properties |
| Peel-and-stick | Self-adhesive backing bonds directly | Light-use areas, budget installs |
Click-lock floating is the most popular residential method. The planks aren’t fastened to the subfloor, so they expand and contract as a unit. That also means the subfloor flatness requirement is strict: no more than 3/16 inch variation over a 10-foot span.
Subfloor prep checklist before any LVP install:
- Test moisture levels (concrete subfloors should read below 75% relative humidity or 3 lbs per 1,000 sq ft per 24 hours using a calcium chloride test)
- Grind down high spots; fill low spots with floor-leveling compound
- Remove old adhesive residue, staples, and debris
- Let acclimate the LVP in the room for 24–48 hours before installation
Vapor barriers matter on concrete slabs. Even though the plank itself is waterproof, moisture vapor migrating up through a slab can delaminate the adhesive on glue-down installs or cause the floating floor to buckle at the edges over time.
How to clean and maintain LVP
Daily care is simple. Sweep or vacuum (no beater bar) to remove grit, which is the primary cause of surface wear. Damp-mop weekly with a pH-neutral, vinyl-safe cleaner. That’s the whole routine for most floors.
Do:
- Use felt pads under furniture legs
- Place mats at exterior doors to trap grit before it reaches the floor
- Wipe spills immediately, especially anything acidic
Don’t:
- Use steam mops; the sustained heat can warp planks and void most warranties
- Use abrasive scrub pads or solvent-based cleaners
- Place rubber-backed mats directly on LVP; the plasticizers in rubber can permanently discolor the wear layer
For scratches, a vinyl floor repair kit with color-matched putty handles most surface damage. Deeper gouges or cracked planks are best replaced entirely, which is one of LVP’s genuine advantages over hardwood: you can swap a single plank without refinishing the whole floor.
Dye lots change, and a replacement plank from a different production run often won’t match closely enough to be invisible.*
What does LVP cost, and how long does it last?
Material costs typically run $1.50–$8.00 per square foot depending on wear-layer thickness, core type, and brand tier. Installed costs add labor, which varies by region and project complexity but generally adds $2–$4 per square foot for straightforward residential work.
| Tier | Wear layer | Expected lifespan | Typical use |
|---|---|---|---|
| Entry-level residential | 4–6 mil | 5–10 years | Light-use bedrooms, low-traffic areas |
| Mid-grade residential | 8–12 mil | 10–20 years | Living rooms, kitchens, active households |
| Commercial/premium | 20–40 mil | 20–25+ years | Retail, healthcare, high-traffic commercial |
Warranties vary widely. Residential products commonly carry 15–25 year limited warranties; commercial products often carry 5–10 year commercial warranties. Read the fine print: most warranties cover manufacturing defects and wear-through, not damage from improper installation, steam mopping, or subfloor moisture issues the installer should have caught.
Proper maintenance and a quality subfloor prep job are the two factors that most consistently determine whether a floor reaches the top of its lifespan range.
How to choose the right LVP: a buyer’s checklist
Work through these in order before you commit to a product.
Checklist:
- Wear layer: 6 mil minimum for any residential use; 12 mil or higher for kitchens, pets, and kids; 20 mil+ for commercial
- Core type: SPC for commercial, below-grade, or radiant heat; WPC for above-grade residential comfort
- Total thickness: 5 mm or more for most residential; 6–8 mm if your subfloor has minor imperfections
- Attached underlayment: Prefer products with it included; if absent, budget for a separate 2 mm foam layer
- Warranty: Look for 15+ years residential or 5+ years commercial; confirm it covers wear-through
- Finish/texture: Embossed-in-register textures align the grain texture with the printed grain pattern for a more realistic look
- Price band: Match the tier to the room’s traffic level; over-specifying in a guest bedroom wastes money
Decision flow:
- Bathroom, kitchen, laundry room, or basement: prioritize SPC core + 12 mil+ wear layer + waterproof warranty language
- Whole-house living areas: balance WPC comfort with 8–12 mil wear layer and attached underlayment
- Commercial or rental: SPC + 20 mil+ wear layer + commercial warranty; glue-down installation for high-traffic zones
When should you hire a professional installer?
Some LVP projects are genuinely DIY-friendly. Others aren’t, and the difference usually shows up in the subfloor.
| Situation | Why a pro matters |
|---|---|
| Concrete slab with moisture issues | Pros perform calcium chloride or RH testing and specify the right vapor mitigation |
| Subfloor out of flat by more than 3/16 inch | Grinding and leveling require tools and skill most homeowners don’t have |
| Large commercial space | Glue-down layout, seam placement, and transitions require precision at scale |
| Manufacturer warranty requires professional install | Many commercial warranties are void without certified installer documentation |
| Complex transitions (stairs, multiple rooms, height changes) | Stair nosing, T-moldings, and reducer strips need precise cuts and secure fastening |
What a professional brings beyond the installation itself: moisture testing equipment, leveling compounds and grinders, knowledge of local building codes, and accountability when something goes wrong. Leonardosflooringcorp has served the greater Denver area for over 10 years with vinyl flooring installation backed by 125+ five-star reviews. That track record reflects projects where subfloor prep, transitions, and warranty compliance were handled correctly the first time.
The part most homeowners get wrong about LVP
Most people shopping for LVP focus almost entirely on the visual: the wood grain, the color, the plank width. Those things matter, but they’re the last decision, not the first. The wear layer and the core type are what determine whether that floor looks good in year three or year fifteen.
The other thing I see regularly: homeowners buy a product with a 20-year warranty and then install it over a subfloor that hasn’t been moisture-tested. The warranty language almost always includes a clause that voids coverage for moisture-related failures when the installer didn’t follow the manufacturer’s subfloor prep requirements. A $400 moisture test and a bag of leveling compound protect a $3,000 floor investment more reliably than any warranty document.
LVP is genuinely one of the most practical flooring choices available right now for busy homes and commercial properties. But it rewards the people who read the spec sheet, not just the sample board.
Leonardosflooringcorp handles your LVP project in Denver
Choosing the right LVP product is half the job. A proper installation, starting with moisture testing and subfloor prep, is what makes it last.
Leonardosflooringcorp provides professional vinyl floor installation across the Denver metro, including subfloor preparation, vapor mitigation, and all transitions and trim. With 10+ years of local experience and 125+ five-star reviews, every project gets a tailored plan, not a cookie-cutter approach. Whether you’re updating a single bathroom or outfitting a commercial space, get a free on-site quote and let a pro handle the subfloor work that protects your investment.
Sources
- Vinyl plank flooring: Pros and cons of this hardwood alternative — Martha Stewart
- The pros and cons of LVP and LVT — LX Hausys
- What exactly is luxury vinyl flooring made of? — MSI Surfaces
- 7 reasons to choose commercial vinyl plank flooring — BuildDirect blog