
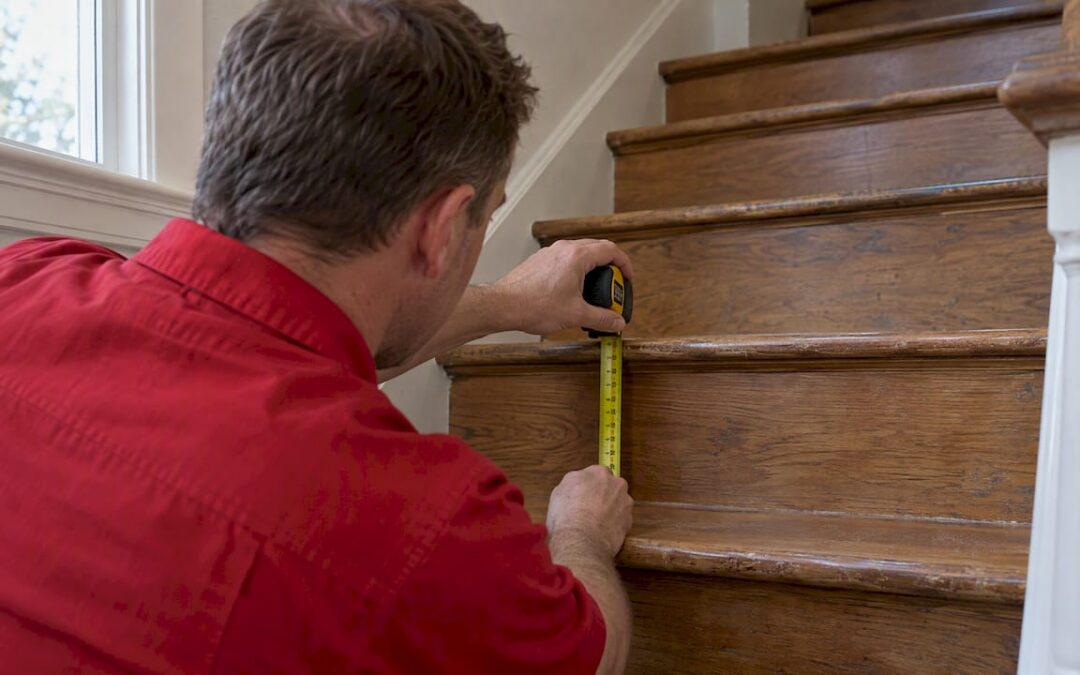
The fastest way to decide is to check two things: the condition of the sub-treads and whether your rise and run stay within 3/8 inch of consistent. If the sub-structure is solid and the measurements check out, refinishing or capping saves money. If the wood is rotten, the material underneath isn’t hardwood, or the stairs are out of tolerance, plan on full replacement, and bring in a professional for curved or winder treads or anything code-related.
TL;DR:
- Installers should measure every rise and run rather than average the staircase, then shim gaps and dry-fit each tread before applying adhesive.
- Curved nosing relies on shop templates and grain matching, and fabrication can require multiple weeks of lead time; approve the template in writing.
- Ask for quotes that separate materials and labor and specify prefinished or site-finished treads, since the finish choice affects cost and schedule.
- Treat an unusually low bid, missing inspection of existing stair supports, or no labor warranty as warning signs, and verify the contractor’s curved stair experience.
Table of Contents
- Should You Cap, Refinish, or Replace Your Stair Treads?
- How Installers Actually Install Hardwood Treads and Risers
- What Curved and Winder Treads Require That Straight Stairs Don’t
- What Hardwood Stairs Cost and How Long the Job Takes
- The Code Numbers Your Stairs Need to Meet
- Installing Risers on Their Own: A Separate Walkthrough
- What a Stair Installer Watches for on Every Job
- Get a Straight Answer on Your Stairs From Leonardo’s Flooring Corp
- FAQ
- Sources
Should You Cap, Refinish, or Replace Your Stair Treads?
Three paths lead to finished hardwood stairs, and picking the wrong one wastes money or creates a safety problem.
Tread-only capping means installing a new hardwood cap over the existing tread and riser structure. It works when the sub-treads are sound but the surface is worn, outdated, or covered in carpet remnants.
Refinishing sands and reseals hardwood that’s already there, often hiding under old carpet or a dated stain. It’s the cheapest route when the wood itself is in good shape.
Full tread-and-riser replacement tears out everything down to the stringers. It’s necessary when treads are rotten, stringers are loose, or the rise and run are inconsistent enough to be a tripping hazard.
A quick inspection tells you which category you’re in:
- Press on each tread edge and listen for movement or soft spots that signal rot.
- Pull back a corner of carpet to check for hidden hardwood worth saving.
- Measure wall-to-stringer distance at the top and bottom of the run to catch out-of-square framing.
- Check rise and run on every step, not just the first and last.
Walls that are out of square or treads that creak under light pressure both point toward replacement rather than a cosmetic fix.
How Installers Actually Install Hardwood Treads and Risers
A correct hardwood stair installation follows a sequence that doesn’t skip steps, even when the schedule is tight.
- Inspect and measure. Check every rise and run, not an average, and flag anything over 3/8 inch of variance before ordering material, a step trade installers document in detail.
- Strip and assess. Remove carpet, old treads, or risers, and inspect the sub-treads for squeaks, soft spots, or rot.
- Square and shim. Shim any gaps until each tread meets its riser at a true 90 degrees, adding plywood where the old material was thinner than the new hardwood.
- Template and scribe. Use a stair gauge or cardboard template to capture wall irregularities, then scribe each piece so it fits tight against the wall without a visible gap.
- Dry-fit everything. Set each tread and riser in place without adhesive first to confirm the cuts are right before committing.
- Kerf the underside. Cutting shallow grooves into the underside of a tread relieves internal tension and helps it sit flat over time.
- Glue and nail. Run a bead of elastomeric polyurethane adhesive, set the piece, and drive a few finish nails to hold it in place while the glue cures.
- Clamp and cure. Let the adhesive set fully before walking on the stair or starting the next tread.
- Sand and finish. Choose pre-finished material to skip on-site sanding, or finish in place for a seamless look across every step.
- Final quality check. Run a straightedge across each tread and walk the stairs listening for creaks before calling the job done.
This flow mirrors what installers describe when documenting boxed-in stair projects step by step, including the reliance on templates and gauges over a tape measure alone for tapered or out-of-square stringers.
Pro Tip: Dry-fit every tread before any glue goes down. A piece that looks right on paper can still bind against an out-of-square wall.
What Curved and Winder Treads Require That Straight Stairs Don’t
Curved treads and winders can’t be cut from a single straight board and installed on the spot. They almost always start with a template, because grain has to match across the curve and the wood often needs scoring or lamination to bend without cracking.
Common shop techniques include:
- Scored risers that bend along shallow cuts without splitting the face.
- Laminated bent borders built from thin strips glued and clamped around a curved form.
- Multi-piece nosing templates assembled off-site, then installed as one continuous-looking piece.
- Prefabricated curved blanks ordered to match a specific radius.
Curved stair nosing is commonly built from shop templates with careful grain-matching, and the process can take multiple weeks of lead time before installation day even starts. That lead time, plus the shop labor itself, is why curved work is usually billed separately from straight-run installation.
If a tread turns more than a few degrees, has an irregular radius, or sits at a landing with winders, it’s a shop job rather than something to bend on-site. Get a template approved in writing before production starts. A multi-piece laminated nosing preserves grain flow and hides seams far better than attempting a single bent piece on a tight radius.
What Hardwood Stairs Cost and How Long the Job Takes
Costs swing widely based on how many steps you have, whether any are curved, and what material you choose. Project and per-step costs for hardwood stairs vary significantly depending on complexity, with curves, winders, and premium species pushing totals well above a simple straight-run job.
A few factors drive that range:
- Material choice. Solid hardwood costs more than engineered, and site-finished treads add labor hours that prefinished material skips.
- Labor complexity. Curves, winders, and landings all add shop time beyond a standard straight run.
- Extras. New handrails, balusters, or nosing profiles each add their own line item to a quote.
- Permitting. Some jurisdictions require a permit for structural stair work, which adds time and a fee before installation even starts.
Choosing a solid species built for stair wear over a softer wood can reduce long-term refinishing costs even if the upfront price is similar.
To budget without cutting corners, get written quotes that break out material and labor separately, and ask whether the price assumes prefinished or site-finished treads since that single choice shifts both cost and timeline. DIY can save money upfront, but stairs carry real safety stakes, and a botched rise-and-run measurement is the kind of mistake that costs more to fix than it would have cost to hire out from the start.
The Code Numbers Your Stairs Need to Meet
Most residential stair codes in the US converge on a similar set of dimensions, though your local building department has the final say.
These figures come from published stairway and handrail guidelines that note some variance by jurisdiction. Measure and record every rise, run, and handrail height before ordering material, and call your local building department before starting structural work to confirm whether a permit applies in your case.
Installing Risers on Their Own: A Separate Walkthrough
Sometimes only the risers need replacing, usually when treads are sound hardwood but the risers are painted plywood or damaged. The sequence differs slightly from a full tread-and-riser job.
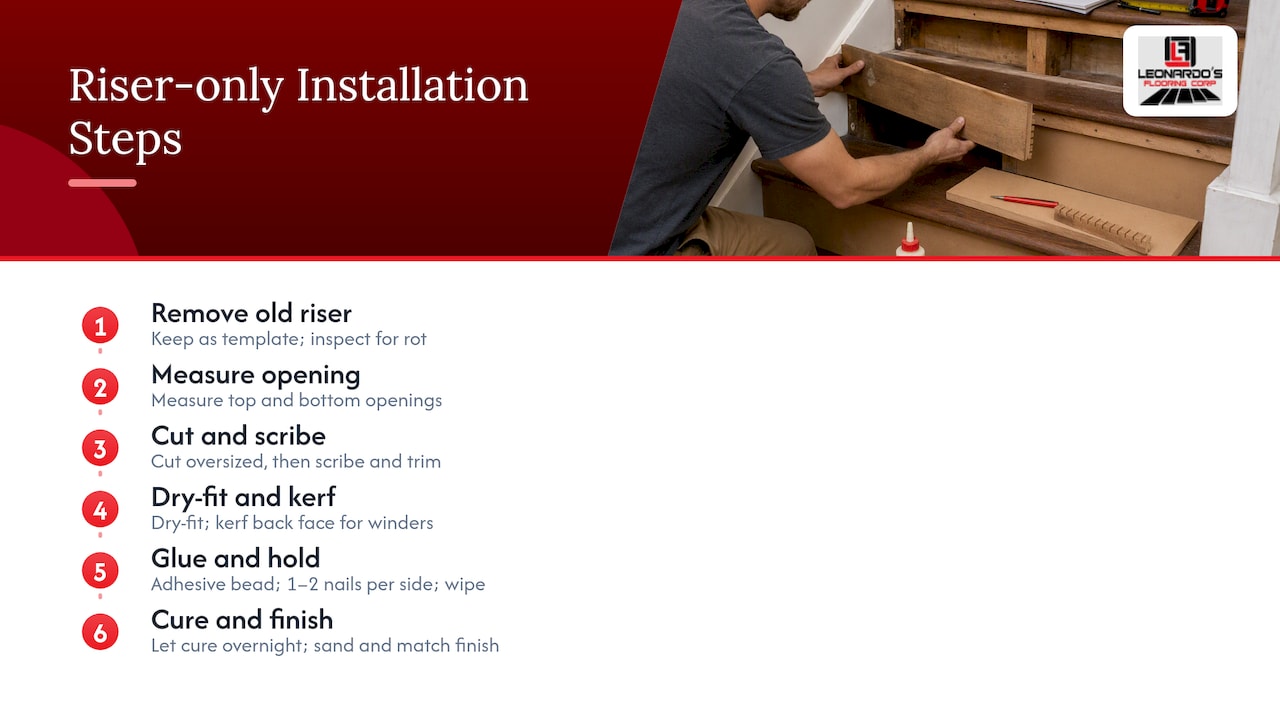
Start by removing the old riser, usually held with finish nails or construction adhesive, and set it aside as a rough template. Inspect the stringer and tread edges behind it for rot or gaps now exposed.
Measure the opening at both the top and bottom since stair openings are rarely perfectly square. Cut the new riser slightly oversized, then scribe and trim it to fit snugly against both adjoining treads.
Dry-fit before any adhesive goes on. Installers who’ve replaced winder stairs describe kerfing the riser’s back face about a third of the way through its thickness to let it flex into place without cracking.
Run a generous bead of adhesive along the back of the riser, set it into position, and use one or two finish nails per side purely to hold it while the glue cures rather than as the primary fastener. Wipe excess adhesive immediately since cured polyurethane is difficult to remove from a finished surface.
Let the adhesive cure fully, typically overnight, before installing the tread above it. Sand any nail holes flush and match the finish to the surrounding treads before calling the step complete.
What a Stair Installer Watches for on Every Job
A few warning signs separate a solid contractor from a risky one: a bid that’s dramatically lower than competitors, a scope of work that doesn’t mention sub-tread inspection, or no warranty offered on labor.
Before signing anything, ask whether the contractor has handled curved or winder treads before, whether templates get approved in writing, and what the project timeline looks like once shop work is involved. A contractor who can’t answer these clearly is one to avoid.
Crews walking every job with this same checklist help ensure quality, because skipping sub-tread inspection is where most stair failures start.
— Jim
Get a Straight Answer on Your Stairs From Leonardo’s Flooring Corp
Hardwood stair projects should be handled by inspecting first, writing up an honest scope, and installing it right the first time. Services can include tread and riser replacement, stair reconstruction, subfloor prep, and refinishing for homeowners who want the work done once and done correctly.

A visit for an inspection typically includes checking sub-treads and rise/run measurements, providing a written scope with photos, and creating templates for any curved or winder sections before ordering material to avoid surprise change orders once work starts.
Options can include tread-only capping or full tread-and-riser replacement depending on the inspection results, refinishing hardwood that’s in good shape, and subfloor prep and stair reconstruction for stairs with structural issues.
If you’re ready to find out whether your stairs need a refinish or a rebuild, request an estimate on our hardwood installation page and we’ll walk you through what we find.
FAQ
How much does it cost to have hardwood stairs installed?
Costs depend heavily on the number of steps, whether any are curved, and your material choice, with per-step and whole-project ranges varying significantly based on those factors. Get a written quote that separates material from labor so you can see exactly what’s driving your total.
How are wooden steps attached to a house?
Treads and risers attach to stair stringers, the angled support boards that run beneath the stairs, using a combination of adhesive and finish nails. Installers typically dry-fit each piece first, then glue and nail it once the fit is confirmed.
Should you install risers or treads first?
Risers typically go in before the tread above them, since the tread usually sits on top of the riser below and conceals its top edge. Working bottom to top, riser then tread, keeps each joint hidden and square.
Is hardwood good for stairs?
Hardwood holds up well on stairs when installed with proper sub-tread support and code-compliant dimensions, and it can be refinished multiple times over its life. The bigger risk isn’t the material itself but skipping inspection steps like checking for rise and run consistency before installation.
Sources
- Step by Step: How to Install Wood Treads & Risers for Boxed-In Stairs | Wood Floor Business
- How Much Does Hardwood Stair Installation Cost? 2026 Data | Angi