
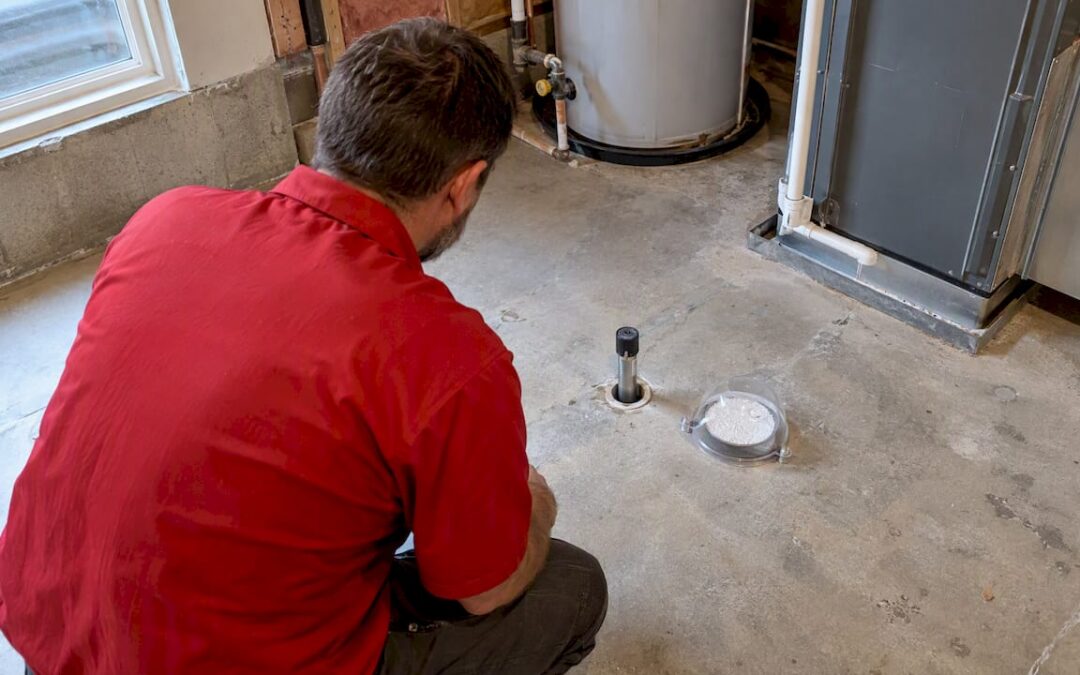
A vapor barrier epoxy is a two-component, membrane-forming coating that reduces moisture vapor coming up through a concrete slab. Use it when moisture tests exceed your flooring manufacturer’s limits. It controls vapor, not groundwater or structural leaks. Your next step is to run an ASTM F2170 or ASTM F1869 test, then bring the results to a qualified installer.
TL;DR:
- Run ASTM F2170 or F1869 after heating and cooling systems operate at normal living conditions; compare written results with flooring and adhesive limits.
- Require mechanical grinding or shotblasting, crack repairs, and thorough vacuuming; leftover sealer or dust can undermine adhesion even when the epoxy itself is suitable.
- Follow the product data sheet for mix ratio, coverage, coats, cure windows, and any required primer, then confirm written compatibility with the flooring and adhesive.
- Choose drainage repairs or structural waterproofing for groundwater and hydrostatic pressure; epoxy controls vapor, while new construction can use a retarder beneath the slab.
Table of Contents
- What a vapor barrier epoxy is and how it works
- How and when to test concrete moisture
- Surface preparation essentials before applying a vapor barrier epoxy
- Application overview: product formats, coverage, and realistic expectations
- Deciding DIY vs. hiring a professional installer and what to ask a contractor
- When to use an epoxy moisture mitigation system vs. other measures
- Basic application steps and what verification and maintenance to expect
- Advantages and limitations of vapor barrier epoxy compared to other moisture mitigation systems
- Common problems and troubleshooting tips during and after epoxy application
- Recommended types and brands of vapor barrier epoxy for residential and commercial use
- Safety precautions and environmental considerations during epoxy application
- Why most homeowners should test first and buy second
- Get your slab tested and prepped by Leonardo’s Flooring Corp
- FAQ
- Sources
- Standards and technical guides to consult
What a vapor barrier epoxy is and how it works
Concrete never fully dries. Water vapor travels through the slab and, when it meets a sealed floor covering, it can push adhesives apart, cause bubbling, or feed mold. A vapor barrier epoxy interrupts that path. It is a two-component, resin-based system (resin plus hardener) that cures into a continuous film on top of the slab.
The industry practice that covers these products is ASTM F3010, which addresses two-component resin-based membrane-forming moisture mitigation systems used under resilient floor coverings. Testing labs describe these systems as formulated to reduce moisture vapor emission rates, and the practice also includes recommendations for surface preparation before application.
The key word is “membrane.” The epoxy does not soak into the concrete and change it from the inside. It sits on the surface and blocks vapor like a skin. That makes it different from penetrating or crystalline moisture-control products, which work within the pores of the slab and fall outside the scope of the membrane-forming practice.
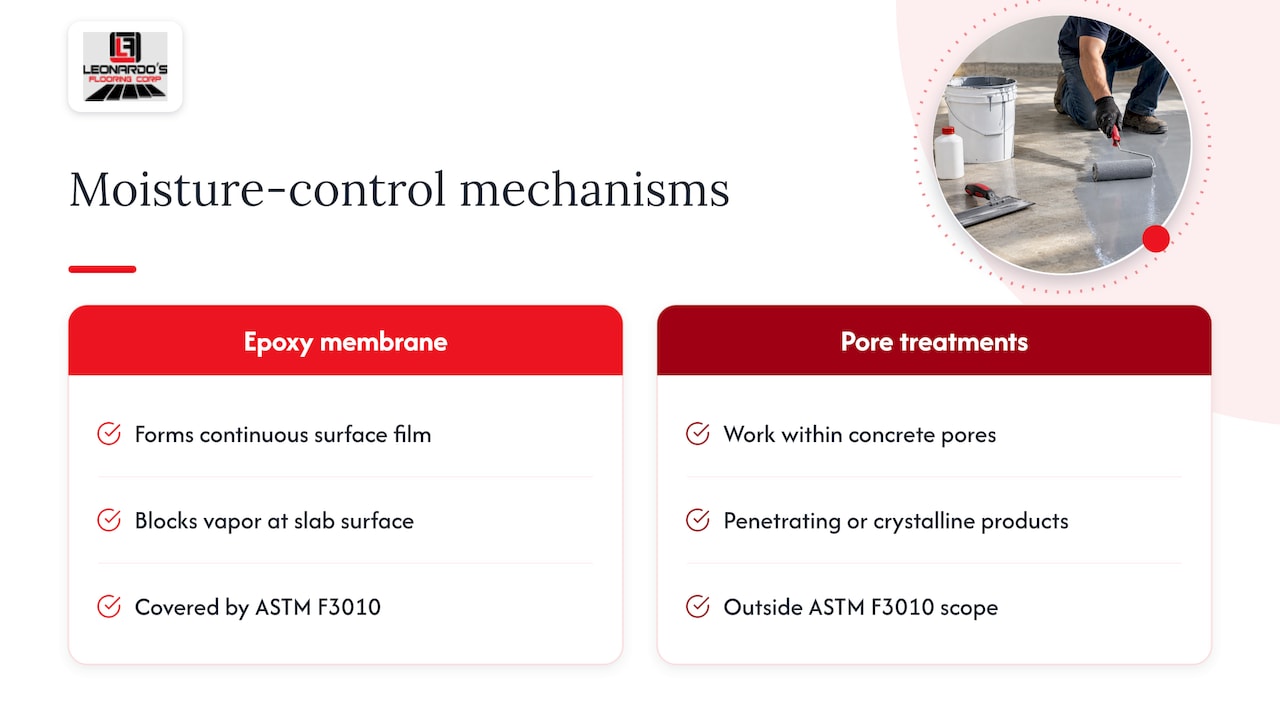
Think of it as a topical mitigation. It protects the floor covering above it, such as vinyl, laminate, or hardwood, from vapor that the slab would otherwise release. Because the film is only as good as its continuity, pinholes, thin spots, and poor bonding are the enemies, and that is why prep and application matter so much in the sections below.
How and when to test concrete moisture
You cannot judge a slab by looking at it or by taping plastic to the floor. Two standardized tests give you numbers a flooring manufacturer will accept:
- ASTM F2170 (relative humidity probe): Probes are set into drilled holes to measure internal slab humidity.
- ASTM F1869 (calcium chloride test): A dish of calcium chloride sits under a sealed cover on the surface to measure the moisture vapor emission rate (MVER).
- Manufacturer limits: Flooring and adhesive makers publish maximum acceptable results, either a relative humidity percentage or a rate in pounds per 1,000 square feet per 24 hours.
- Failing the limit: A reading above the stated maximum is the usual trigger for a mitigation system.
Both methods and their basics are explained by the International Flooring Technical Institute, which also notes that manufacturers set the acceptable limits.
Test under service conditions. ICRI warns that moisture results can be unreliable when tests are not run under normal operating conditions, for example before the HVAC is running. Turn the heating and cooling on, keep the space at living temperature, and follow the ASTM conditions so the numbers reflect how the floor will actually behave.
If you want a step-by-step view of what passing looks like for warranty purposes, our guide to concrete moisture tests for homeowners and contractors walks through it.
Surface preparation essentials before applying a vapor barrier epoxy
A membrane-forming epoxy is only as good as its bond. Most failures we see trace back to what was on the slab before the coating went down, not to the product in the bucket. The same practice that defines these systems, ASTM F3010, includes surface preparation recommendations for exactly this reason.
Here is the sequence a careful crew follows:
- Profile the surface mechanically. Shotblasting or diamond grinding removes curing compounds, old adhesive, sealers, paint, and weak surface paste (laitance), and gives the epoxy a texture to grip.
- Check surface strength. Sound concrete takes a mechanical profile cleanly. Soft, dusty, or flaking areas need further removal or repair before coating.
- Repair cracks, spalls, and divots. Fill them with a compatible repair material and let it cure fully, so the film stays continuous across the repair.
- Vacuum thoroughly. Use an industrial vacuum with a dust-collection system, not a broom. Fine dust left behind acts like a release agent.
- Confirm the slab is clean and dry enough to coat. Wipe-down, inspection under raking light, and a final check against the product data sheet come before mixing anything.
- Mask and protect edges. Walls, drains, and transitions get taped and sealed so the membrane terminates cleanly.
Pro Tip: Ask your installer to show you the profiled slab before any epoxy is mixed. A properly ground or blasted surface looks uniformly matte and slightly rough, with no shiny patches left from old sealers.
Prep is every bit as important as product choice. For more on getting a slab ready, see our subfloor preparation playbook.
Application overview: product formats, coverage, and realistic expectations
Moisture mitigation epoxies usually come as two-component kits: a resin and a hardener, packaged in matched quantities so the mix ratio is built in. Some product pages list the area a single kit covers, but coverage always depends on the product, slab texture, and the thickness the manufacturer specifies.
What to expect on the job:
- Follow the technical data sheet. It sets the mix ratio, working time, application rate, and the number of coats. The data sheet and ASTM F3010 guidance govern the installation, not rules of thumb.
- Rate and coats matter. A thin coat to “stretch” the material leaves pinholes where vapor passes. Many systems call for two coats at a specified rate, applied by roller or squeegee and back-rolled.
- Cure times vary. Temperature and humidity change recoat windows and the time before flooring can go over the top. Expect hours between coats and up to a day or more before turnover, depending on the product.
- VOC and odor. Low-VOC and solvent-free formulas reduce odor, but ventilation is still part of the plan.
- Primer or top coat. Some finished floors need a specific primer or bonding layer over the membrane, and some adhesives want a sanded or broadcast surface. The flooring manufacturer’s requirements decide this.
If your project is a basement, read our guide to basement epoxy flooring first, and see epoxy floor thickness for how film build affects performance.
Deciding DIY vs. hiring a professional installer and what to ask a contractor
A small, dry-ish slab with a low reading and forgiving flooring can tempt a DIY attempt. Hire a professional when the prep is heavy (old mastic, uneven or cracked concrete), when readings are well above limits, or when your finished floor carries strict manufacturer warranty conditions. Equipment alone, such as a dust-controlled grinder, separates a pro result from a patchy one.
Ask any contractor you are considering:
- Which test method did you use, and can I see the written results?
- How will you prepare the surface, and with what equipment?
- Can you provide local references for similar jobs?
- Is the warranty in writing, and who backs it, the installer or the manufacturer?
- How will you verify the installed membrane and the final moisture state?
A professional should also hand you deliverables: ASTM F2170 or F1869 test reports, a written scope of prep, the product data sheets, and a cure and turnover timeline. If a contractor cannot produce those, keep looking.
When to use an epoxy moisture mitigation system vs. other measures
An epoxy membrane is one tool in a larger toolbox, and the right choice depends on where the moisture comes from. Reach for it when the slab’s vapor is the problem: readings above your flooring limits on an existing slab that already has a vapor retarder (or none you can add), and a moisture-sensitive floor covering planned on top. It is especially useful on retrofit work, where lifting the slab to install a retarder underneath is not an option.
Other measures fit other causes:
- Time and drying. On new concrete, waiting and controlling the building environment may bring readings down on their own, if the schedule allows.
- Vapor retarders under the slab. In new construction, a proper retarder beneath the slab is the first line of defense. ACI’s slab guide emphasizes that moisture-related flooring failures are usually system failures involving the subgrade, vapor retarder, slab, and finish, so the whole assembly needs to work together.
- Drainage and grading. If water is entering from outside, fix the gutters, downspouts, and grade first.
- Waterproofing. Practitioner guidance separates moisture mitigation (a topical epoxy to control vapor) from moisture protection (structural waterproofing). Epoxy does not address active groundwater or hydrostatic pressure.
- Sub-slab ventilation. Where soil gases or sub-slab conditions are a concern, a system such as sub-slab depressurization addresses the space under the slab rather than the surface.
Industry discussion of moisture vapor protection for slabs-on-ground covers how to pick among these options. When in doubt, diagnose the source before you pick the product.
Basic application steps and what verification and maintenance to expect
Once the slab is prepared and tested, the work follows a predictable order. Your installer should confirm conditions first: slab and air temperature, humidity, and dew point must fall within the data sheet’s range. Then:
- Measure and mix. Combine resin and hardener at the stated ratio with a slow-speed mixer, for the full mixing time, then pour out promptly.
- Cut in edges. Brush along walls, penetrations, and transitions so the membrane is continuous to the edges.
- Apply the first coat. Spread with a notched squeegee or roller at the specified rate and back-roll to even out the film.
- Inspect and touch up. Look for pinholes, missed spots, and thin areas before the epoxy gels.
- Apply the second coat. Respect the recoat window. Too early or too late can compromise adhesion between coats.
- Cure, then prepare for flooring. Some products require a primer or broadcast aggregate before the finished floor goes over the top.
What verification looks like. Ask for photos or a walk-through of the cured film, and for documentation showing the spread rate that was applied. Moisture tests are snapshots: conditions can change, so a slab that passes one day can behave differently when drainage or environment shifts.
Maintenance. A cured membrane under a finished floor needs no care of its own. Keep gutters and grading working, keep indoor humidity in a normal range, and leave the floor covering intact. If the membrane is the exposed surface, as in a coated basement, routine cleaning is all it needs.
Advantages and limitations of vapor barrier epoxy compared to other moisture mitigation systems
The strongest advantage of a membrane-forming epoxy is that it addresses vapor on an existing slab without tearing anything out. It bonds well to properly prepared concrete, cures into a continuous film, and is formulated to reduce moisture vapor emission rates under resilient floor coverings, which is the use ASTM F3010 standardizes. It also works in a thin profile, which helps where door clearances and transitions are tight, and many systems tolerate high readings that would void a flooring warranty without treatment.
How it compares with the alternatives:
| System | What it does well | Where it fits |
|---|---|---|
| Membrane-forming epoxy | Blocks vapor on existing slabs in a thin film | Retrofit and remodel work under moisture-sensitive floors |
| Sub-slab vapor retarder | Stops vapor before it enters the slab | New construction, before the pour |
| Penetrating or crystalline treatments | Work within the concrete pores | Slabs where a surface film is not wanted |
| Drainage and waterproofing repairs | Remove the water source | Leaks, groundwater, hydrostatic pressure |
The limits are specific. A topical epoxy treats vapor, so it will not stop liquid water pushing through a slab under pressure. It also depends on prep and workmanship: a thin or poorly bonded film will fail where a well-applied one holds. Finally, it belongs in a system. Pairing it with sound drainage, a compatible primer, and the right adhesive is what produces the result the flooring warranty expects.
Common problems and troubleshooting tips during and after epoxy application
Most issues are visible early if you know what to look for, and most trace back to prep, conditions, or mixing.
- Pinholes or bubbles. Often caused by air escaping from the slab as the epoxy warms and cures, or by application when the slab temperature is rising. Apply while temperatures are steady or falling, and back-roll. Fill pinholes with a second coat per the manufacturer’s directions.
- Poor adhesion or peeling. Usually points to residual sealer, adhesive, or dust, or a surface that was not profiled enough. The fix is removal and re-prep, not another coat on top.
- Soft or tacky cure. Typically an off-ratio mix, cold temperatures, or skipped mixing time. Product that has not hardened generally has to be removed and reapplied.
- Fish eyes and craters. Signs of surface contamination such as oil or silicone. Clean and re-profile.
- Blisters later under the flooring. Can indicate moisture the film did not stop, such as hydrostatic pressure, or gaps in coverage. Retest and look at the water source, not only the coating.
- Flooring adhesive failures. Check that the adhesive is approved for use over the specific membrane and that any required primer was applied.
Remember that test numbers can mislead. A technical article on slab moisture testing notes that even passing results can later fail if conditions change. If something goes wrong after install, retest under normal conditions before assuming the product is at fault.
Recommended types and brands of vapor barrier epoxy for residential and commercial use
We are careful about naming “best” brands, because the right product depends on the flooring going over it, the measured moisture level, and the manufacturer’s warranty. What we can say reliably is how to choose by type and by evidence.
Look for these qualities:
- Two-component, 100% solids epoxy. This is the common format for membrane-forming moisture mitigation, with matched kits that remove mixing guesswork.
- Testing to ASTM F3010. Ask for documentation that the product was evaluated under the practice. Independent labs test these systems against it.
- Stated moisture limits. The data sheet should give a maximum RH or MVER it is rated for, and your readings should sit within it.
- Flooring compatibility. The coverings and adhesives you plan to install should be approved over that specific membrane, in writing.
- Residential vs. commercial. Commercial slabs often have higher readings and heavier traffic, so check rated limits and recoat or primer requirements closely. Residential projects, such as basements and slab-on-grade rooms, usually care most about low odor and a clean cure.
When we specify a system, we match it to the slab’s documented readings and the flooring manufacturer’s requirements, then confirm the pairing in writing. Ask any installer for the product data sheet and the warranty terms before you agree to a brand.
Safety precautions and environmental considerations during epoxy application
Epoxy work is safe when it is planned, and not something to improvise. Resin and hardener can irritate skin, eyes, and airways, and grinding concrete releases fine silica dust.
Basic precautions:
- Read the safety data sheet for every component before opening it.
- Wear the right protective gear: chemical-resistant gloves, eye protection, long sleeves, and a respirator rated for the task. Prep work also calls for dust protection.
- Control dust during prep. Use grinders or blasters connected to a HEPA-rated dust collector, and wet-wipe or vacuum afterward.
- Ventilate. Keep fresh air moving, even with low-VOC products, and keep kids, pets, and anyone sensitive out of the work area until it is cured.
- Mind ignition sources and fumes where solvents or cleaners are used, and keep pilot lights and open flames away.
- Watch the temperature. Application conditions affect both worker comfort and cure quality.
Environmental points matter too. Mix only what you can place within the working time, because leftover mixed epoxy cures hot and is hazardous waste in many places. Cure unused components and containers according to local disposal rules, never down a drain. Choosing low-VOC, solvent-free formulations reduces emissions indoors. If the house has people with respiratory conditions, tell your installer up front so the schedule and ventilation can account for it.
Why most homeowners should test first and buy second
Here is the part the product pages skip. The most valuable dollar in a moisture project is not spent on epoxy. It is spent on a proper test and an honest diagnosis. Conventional advice jumps to “which product is best,” as if the bucket were the fix. The research behind this article points the other way: ACI describes flooring failures as system failures, and test results are snapshots that can change.
That has two consequences. First, a passing test does not close the question forever, and a failing test does not automatically mean epoxy. If water is coming in from outside, a membrane is a bandage. Fix the source, then mitigate vapor if the numbers still call for it. Second, brand loyalty is overrated. Prep quality, documented spread rate, and flooring-adhesive compatibility decide outcomes far more than a logo on the kit.
So here is what I would do first: run the F2170 or F1869 test under normal living conditions, get the numbers in writing, and compare them to your flooring manufacturer’s limit before shopping for anything. Then hire for prep, not for price. A crew that shows you the profiled slab and the paperwork is worth more than a cheaper bid that skips both.
— Jim
Get your slab tested and prepped by Leonardo’s Flooring Corp
If the numbers on your slab are above your flooring’s limit, we can help with epoxy floor coating and subfloor preparation. We offer these services to help address your flooring needs.
You get contractor-level surface preparation. We have served the greater Denver area for years, with many five-star reviews behind our work.

Learn about our epoxy floor coating services, and we will tell you plainly which path fits your slab.
FAQ
What is the best epoxy coating for a basement concrete floor?
Test first, then match the product to your readings and the flooring that will go on top. Our basement epoxy flooring guide covers what to know before you coat.
What is the main difference between a vapor barrier and a moisture barrier?
In practice the terms overlap, but the useful distinction is what each controls. Moisture mitigation, such as a topical epoxy, controls vapor passing through the slab, while moisture protection means structural waterproofing against liquid water, as practitioner guidance explains. Our flooring moisture barrier guide goes deeper.
What is a good moisture barrier coating for concrete?
A membrane-forming, two-component epoxy tested under ASTM F3010 is a common choice when vapor readings exceed flooring limits. Confirm its rated maximum against your test results and ask for written compatibility with your floor covering and adhesive.
Does epoxy floor waterproof?
An epoxy floor resists spills on its surface, but a vapor barrier epoxy is not structural waterproofing. It reduces vapor moving through the slab and does not resolve active groundwater or hydrostatic pressure. If liquid water is entering, fix drainage or waterproofing first.
Sources
- Ctlgroup
- Ifti
- F3010 Standard Practice for Two-Component Resin Based Membrane-Forming Moisture Mitigation Systems for Use Under Resilient Floor Coverings
- Icri
Standards and technical guides to consult
- ASTM F3010 for membrane-forming moisture mitigation systems
- ASTM F2170 and F1869 for moisture testing
- ACI 302.2-22 for slabs that receive moisture-sensitive flooring