
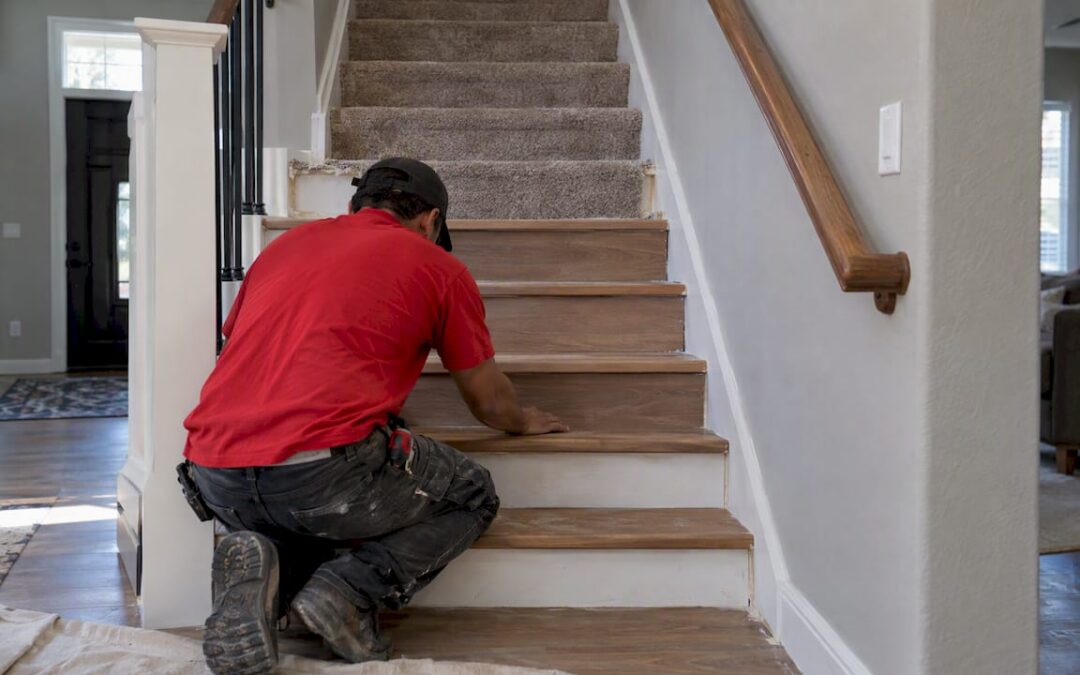
Yes, converting carpeted stairs to wood is a common renovation, and most homeowners should expect to pay $100 to $250 per stair for materials and installation. The IRC stair code sets firm limits on tread depth and riser height, and NARI advises a contingency fund for hidden repairs. Material choice, stair complexity, and subfloor condition are the three biggest swing factors, and a professional like Leonardo’s Flooring Corp can confirm which ones apply to your staircase.
TL;DR:
- Check bare stair dimensions before ordering: treads need at least 10 inches of depth, risers cannot exceed 7 3/4 inches, and flight variation must stay within 3/8 inch.
- Solid hardwood can be refinished repeatedly, while engineered treads resist humidity swings and often cost less but offer limited refinishing once the veneer wears through.
- A straight staircase without structural damage may suit a DIYer, but curved stairs, open risers, and winding treads call for professional installation to meet code.
- A straight run usually takes one to three days, but repairs, curved layouts, or site applied finishes can stretch work to a week or longer.
- Wood treads sound louder than carpet; choose a runner or discuss sound dampening with the installer before work begins, when it is easier to add.
Table of Contents
- What does it cost to convert carpeted stairs to wood?
- Choosing materials: solid vs. engineered treads and finishes
- Step-by-step: how a carpet-to-wood stair conversion works
- Stair code limits you need to confirm before you buy materials
- Should you DIY this project or hire a professional?
- How long does the project take, and how do you prepare?
- Keeping wood stairs looking good for years
- Finish options for stair treads: what holds up best
- Will wood stairs be louder than carpet?
- Why experience matters more on stairs than flat floors
- Ready for an estimate on your stair conversion?
- FAQ
- Sources
What does it cost to convert carpeted stairs to wood?
Most homeowners pay $100 to $250 per stair for hardwood tread installation, with the final number shaped by wood species, finish quality, and how much carpet removal and repair the crew finds underneath. A straight run typically lands in the low to mid-thousands once risers, nosing, and finishing are included.
That per-stair figure covers more than the wood itself. A typical bid breaks down into:
- Treads and risers: the wood pieces themselves, priced by species and grade.
- Labor: cutting, fitting, and fastening each piece to an existing staircase, which is slower work than installing flat flooring.
- Finishing: staining, sealing, or applying a factory finish on site.
- Trim and rail adjustments: shoe molding, stringer trim, and sometimes rail height corrections.
- Subfloor or stringer repairs: squeaky or damaged stringers found once carpet comes up.
Stair complexity changes the math fast. A curved staircase, winding treads, or open risers require custom cutting and fitting for nearly every piece, which pushes labor costs well above a straight run, a pattern industry budgeting guidance consistently points to when it comes to layout-driven labor costs.
NARI recommends setting aside a 10 to 20 percent contingency for a stair remodel, since removing old carpet and padding often reveals squeaks, soft spots, or uneven stringers that were never visible before.
Choosing materials: solid vs. engineered treads and finishes
Solid hardwood treads are cut from a single piece of wood, usually oak, maple, or hickory, and can be sanded and refinished multiple times over their life. Engineered treads use a hardwood veneer over a plywood core, which resists humidity swings better and often costs less, though refinishing options are limited before the veneer wears through.
Species choice drives both cost and wear resistance:
- Oak is widely available, takes stain evenly, and holds up well to daily traffic.
- Maple is harder than oak but can be trickier to stain evenly.
- Hickory is among the hardest common stair woods and resists dents from dropped items.
- Engineered veneer costs less upfront but trades off long-term refinishing options.
Risers can be left as painted wood or covered in matching hardwood, and that choice alone has a noticeable effect on the finished look and the labor bill. A rounded or beveled nosing profile on the tread edge is standard for safety and grip, while a square edge reads as more modern but offers less foot clearance.
Prefinished treads arrive stained and sealed from the factory, which speeds up installation and avoids job-site dust, while site-finished treads let an installer match stain color exactly to existing floors but add cure time before the stairs are usable. Installers typically secure treads with construction adhesive plus finish nails or screws driven into the stringer, which keeps the wood from shifting or squeaking later.
Pro Tip: Ask for a sample tread finished in your chosen stain before committing, since stair wood often reads darker or lighter than a flat floor sample under stairwell lighting.
Step-by-step: how a carpet-to-wood stair conversion works
A typical conversion follows a predictable sequence, whether handled by a homeowner or a licensed flooring installer:
- Remove carpet, padding, and staples from each tread and riser, working from the top step down.
- Inspect stringers and subfloor for squeaks, rot, or uneven cuts that carpet padding had been hiding.
- Repair or shim any damaged stringer sections before new wood goes on.
- Measure each tread and riser individually, since older staircases are rarely perfectly uniform.
- Cut and dry-fit treads and risers, checking that nosing overhang is consistent step to step.
- Attach treads and risers with construction adhesive and fasteners, then fill nail holes.
- Sand and finish on site, or install prefinished pieces and add trim.
- Adjust the bottom riser height if the new tread thickness has thrown off the rise-and-run consistency.
- Reinstall or adjust handrail height if needed to meet the new tread surface.
Our checklist for retrofit stair tread inspections covers what a contractor should be checking at step 2 and 3 before any wood goes down.
Carpet removal and basic cleanup are reasonable DIY tasks for most homeowners. Measuring, cutting, and fastening treads to meet code tolerances is where professional experience matters most, since a tread cut even slightly off can create the riser-height inconsistency that code rules exist to prevent. Pros typically bring a miter saw, pneumatic nailer, and stair gauge for consistent measurements, while a homeowner attempting DIY repairs usually relies on a basic circular saw and a tape measure, which makes precise, repeatable cuts across many steps much harder to achieve.
Stair code limits you need to confirm before you buy materials
Before ordering any wood, confirm your existing staircase meets baseline code dimensions, since adding tread thickness can push an otherwise compliant staircase out of tolerance.
- Minimum tread depth: 10 inches, measured exclusive of any carpet or runner.
- Maximum riser height: 7 3/4 inches.
- Maximum variation within a flight: 3/8 inch between the largest and smallest tread or riser.
These numbers come from the 2024 IRC stair code, as documented by the Stairbuilders and Manufacturers Association, and they apply to the bare stair structure, not the finished surface with carpet on top.
Here’s the practical wrinkle: hardwood treads add thickness that carpet and padding did not have, which can shrink the riser height on the very first or last step beyond that 3/8 inch tolerance. Angi’s cost reporting notes that professionals commonly trim the bottom riser to absorb this difference and keep every step in the flight consistent. Changing tread thickness can also lower the effective rail height relative to the walking surface, so NARI points out that handrails, balusters, or newel posts sometimes need adjustment to stay within safe reach and grip height. Our rise-and-run measurement guide walks through how to check this yourself before ordering materials.
Should you DIY this project or hire a professional?
A straight, simple staircase with no structural issues is within reach for a confident DIYer comfortable with a miter saw and careful measuring. Curved stairs, open risers, winding treads, or any sign of stringer damage push the project firmly into professional territory, since code compliance and structural integrity are harder to verify without experience.
A professional bid should spell out the scope of work, material allowances, a payment schedule tied to milestones, a projected timeline, and a written warranty on workmanship. Before signing anything, ask a contractor:
- How many stair retrofits have you completed, specifically from carpet to wood?
- How do you handle riser-height variation if my staircase is out of tolerance?
- Will rail or baluster height need adjustment, and is that included in the bid?
- Can I see references or photos from a similar past project?
NARI recommends collecting multiple quotes for the same scope of work and building in a 10 to 20 percent contingency before comparing final numbers.
Pro Tip: Ask every bidder the exact same scope questions so the quotes you compare are actually apples to apples, not just different totals on a page.
How long does the project take, and how do you prepare?
A straight run of 13 to 15 stairs with no structural surprises usually takes one to three days from carpet removal to final fastening. Curved stairs, extensive stringer repair, or site-finished stains that need multiple coats and dry time can stretch the timeline to a week or more.
Before work starts, homeowners should:
- Clear the stairway of furniture, decor, and anything stored on or near the steps.
- Protect adjacent flooring and walls from dust, since sanding and cutting generate debris.
- Confirm pets and kids will stay off the stairs during the work window.
- Ask your installer about finish cure time before allowing foot traffic.
Scheduling the project for a week when the household can use an alternate entrance or stay elsewhere during the day tends to cut down on delays and keeps the crew working efficiently.
Keeping wood stairs looking good for years
Wood stairs take more daily impact than almost any other surface in a house, so a little routine care goes a long way. Sweep or vacuum treads weekly to keep grit from scratching the finish, since dirt acts like sandpaper under foot traffic.
Use a damp, not wet, mop with a wood-safe cleaner, since standing water can seep between tread and riser joints and eventually warp the wood or dull the finish. Felt pads under any stair-adjacent furniture and a runner or stair treads in high-traffic households can extend the finish’s life significantly, especially on the first and last steps, which can take the most wear.
Address scuffs or small scratches early with a touch-up kit matched to your finish rather than waiting until a full refinish is needed. Forbes notes that hardwood can last for decades compared to roughly a decade for carpet, but that lifespan depends on keeping grit, moisture, and sun exposure in check. A yearly check of nosing edges and fasteners catches loosening before it becomes a squeak or a safety issue.
Finish options for stair treads: what holds up best
The finish on a stair tread takes more abuse than almost any other wood surface in the home, so durability matters more here than on a flat floor. Oil-based polyurethane is a long-standing choice because it builds a hard, amber-toned film that resists scuffing, though it takes longer to cure and carries stronger fumes during application.
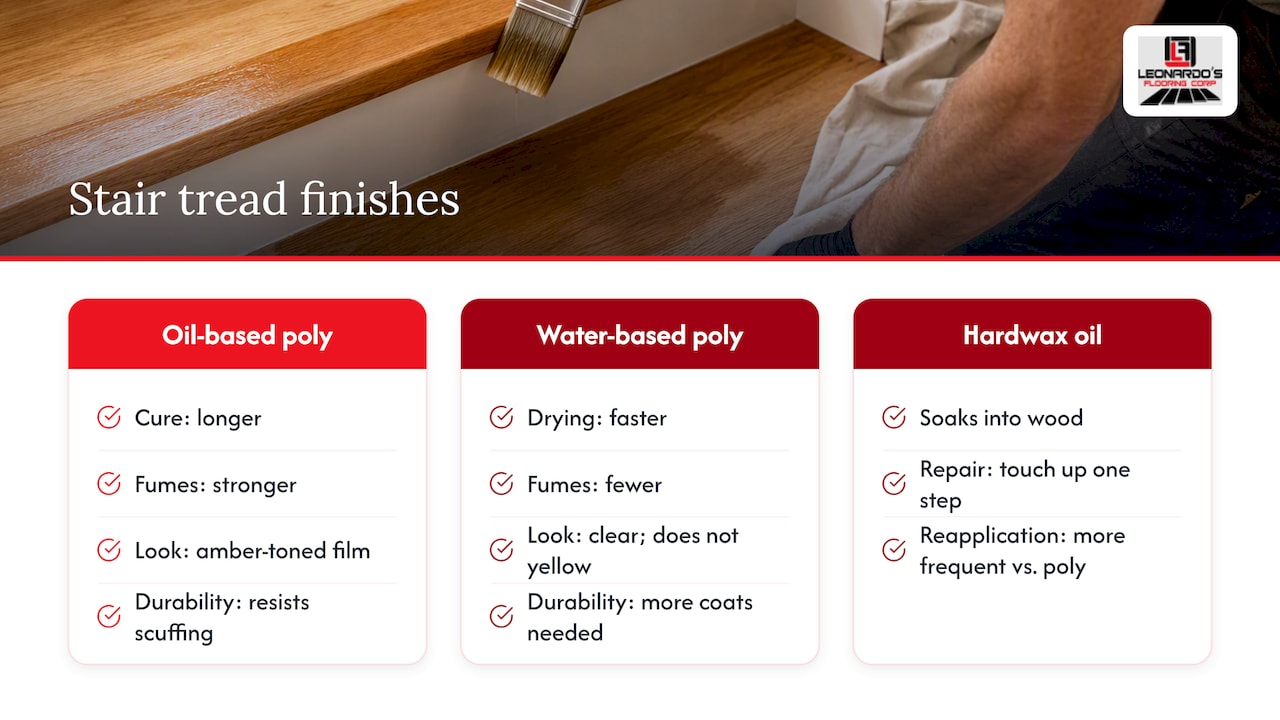
Water-based polyurethane dries faster, has a clearer finish that does not yellow over time, and produces fewer fumes, but it generally needs more coats to match the same durability as an oil-based finish. Hardwax oil finishes soak into the wood rather than sitting on top, which makes spot repairs easier since you can touch up a single worn step without refinishing the whole flight, though they typically need more frequent reapplication than polyurethane.
Matte and satin sheens tend to hide everyday scuffs and dust better than high-gloss finishes, which show every scratch and footprint under stairwell lighting. For risers, many homeowners choose a durable painted finish rather than matching stain, which cuts cost while keeping the focus on the tread wood grain. Whichever finish you choose, confirm cure time with your installer, since walking on an under-cured finish is one of the most common causes of early wear on a new stair job.
Will wood stairs be louder than carpet?
Carpet and padding absorb footstep noise and vibration in a way that bare wood does not, so switching to hardwood treads will almost always make stairs sound louder, especially in homes with bedrooms nearby or an open floor plan below the staircase. This is a real tradeoff worth planning for rather than discovering after installation.
A few approaches reduce the sound difference without giving up the wood look. A runner rug secured down the center of the treads adds cushioning while leaving the wood visible on both sides. Installers can also add a layer of sound-dampening underlayment beneath the tread itself, and construction adhesive used in combination with mechanical fasteners reduces the small amount of flex and squeak that comes from a loose tread hitting the stringer. If noise is a major concern, it is worth raising with your installer before the job starts, since some sound-reduction steps are far easier to build in during installation than to retrofit later.
Why experience matters more on stairs than flat floors
Stairs leave no room for error. A tread cut a fraction off, a riser out of tolerance, or a rail left too low creates a safety hazard, not just a cosmetic flaw. That is why we built our stair work around the same code limits and measurement discipline covered above.
Leonardo’s Flooring Corp has served the greater Denver area for over 10 years, backed by 125 or more five-star reviews, handling everything from hardwood tread installation to subfloor repair and finish carpentry. Getting it right the first time protects your family’s safety and your home’s resale value.
— Jim
Ready for an estimate on your stair conversion?
We handle the entire job, from hardwood stair treads and riser work to subfloor prep, trim, and finishing, so you are not coordinating multiple contractors for one staircase.

- Request an on-site estimate so we can measure your actual rise, run, and stringer condition.
- Ask to see sample treads and finish swatches in your home’s lighting before you choose.
- Confirm our schedule before work begins.
With over 10 years serving Denver homeowners and 125+ five-star reviews behind our work, we treat every staircase like it’s going into our own home. Get your stair estimate started today.
FAQ
How do you carpet wood stairs?
Carpeting wood stairs involves stapling or tacking carpet padding to each tread and riser, then stretching and securing carpet over the padding with a tackless strip at the base of each riser. This is the reverse process of what this guide covers, and it does not require meeting the same bare-wood tread and riser code tolerances since carpet adds a cushioned surface.
What is the 10-inch and 3/8-inch rule for stairs?
Under the IRC stair code, treads must be at least 10 inches deep and risers no taller than 7 3/4 inches, with no more than 3/8 inch of variation between the largest and smallest step in a flight. These measurements are taken on the bare stair structure, not over any carpet or runner.
How much does it cost to convert carpeted stairs to wood?
Most homeowners pay $100 to $250 per stair for hardwood tread materials and installation, with the total shaped by wood species, finish choice, and any stringer or subfloor repairs found once carpet comes up. NARI advises budgeting an extra 10 to 20 percent as a contingency for surprises.
Can you just paint stairs after removing carpet?
If the subfloor and stringers underneath the carpet are plywood or an unfinished material, painting alone will not hold up to foot traffic and is not a substitute for installing proper tread material. Painting is only a reasonable option when solid wood treads are already present underneath the carpet and simply need refinishing rather than full replacement.
Can I store items under my stairs during a conversion?
Yes, and many homeowners use the stair renovation as a chance to plan better under-stair storage once the structure is exposed. Our partner guide to under-stair storage builds walks through practical layout options worth considering before the stairs are closed back up.
Sources
- R318.7.5 Stair treads and risers – Stairbuilders and Manufacturers Association
- Remodeling Budgeting & Financing Tips-NARI
- How Much Does It Cost to Carpet Stairs? 2026 Guide | Angi
- How Much Does A Stair Replacement or Remodel Cost? – Forbes Home