
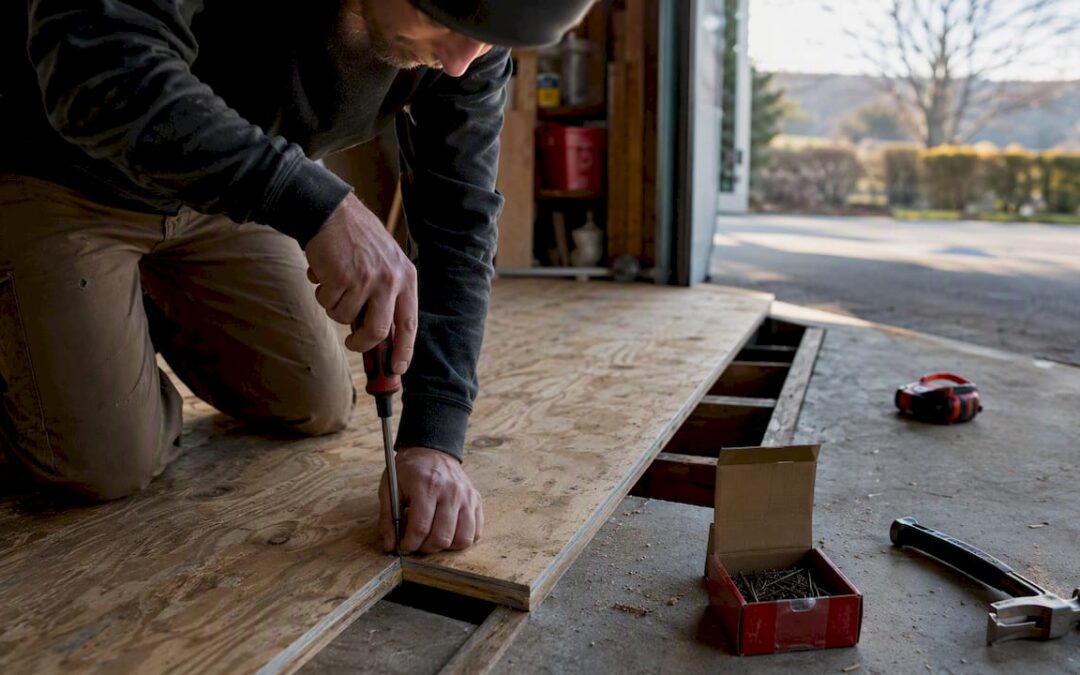
Most squeaky subfloors come down to one problem: the subfloor panel has separated from the joist beneath it, and every step flexes the gap just enough to produce that familiar creak. Securing the panel back to the joist, either with screws from above or from below, stops the movement and stops the noise. Here’s how to get there:
- Walk the floor to map every squeak and mark each spot with painter’s tape.
- Check your access. Can you reach the underside from a basement or crawlspace? If yes, below-floor repair is faster and cleaner. If not, you’ll work from above.
- Gather basic tools: a drill/driver, countersink bit, subfloor screws, and a stud finder.
- Drive targeted screws (or insert shims/adhesive) at the marked spots, then test by walking the area again.
If the floor sags visibly, feels spongy over a wide area, or you spot rot or mold, stop. That’s a structural issue, not a fastener fix, and a professional inspection is the right next step.
Key Takeaways
Securing the subfloor panel back to the joist with screws or adhesive, matched to the correct cause, resolves the majority of residential squeaky subfloor problems without removing the finished floor.
| Point | Details |
|---|---|
| Primary fix | Drive subfloor screws into the joist to close the panel-to-joist gap causing most squeaks. |
| Diagnose before fastening | Identify the cause (gap, friction, moisture, deflection) before choosing a repair method. |
| Above vs. below access | Below-floor repair is cleaner and more durable; above-floor kits work well for carpet-safe fixes. |
| Cost range | Common repairs run $200–$1,000; subfloor replacement for a 300 sq ft room averages $900–$3,000. |
| Leonardosflooringcorp | Denver homeowners can request a professional subfloor assessment and repair estimate from Leonardosflooringcorp. |
Table of Contents
- What causes a squeaky subfloor?
- How to pinpoint exactly where the squeak is
- How to fix squeaky subfloor from above
- How to fix squeaky subfloor from below
- What tools and materials do you actually need?
- When should you replace the subfloor or call a pro?
- What pros know that most DIY guides skip
- A contractor’s honest take on squeaky floors
- Denver homeowners: get a professional subfloor assessment
- Sources
What causes a squeaky subfloor?
Squeaks are mechanical noise, not mysterious. Wood moves, fasteners loosen, and gaps open up. Knowing which gap or friction point you’re dealing with determines which repair actually works.
Common mechanical causes:
- Subfloor-to-joist gap: The most frequent culprit. The subfloor panel lifts slightly off the joist, and each footstep drives it back down with a creak.
- Panel-edge friction: Adjacent subfloor panels rub against each other at their edges when the floor deflects underfoot.
- Finish-floor-to-subfloor rubbing: The hardwood, laminate, or vinyl layer moves against the subfloor beneath it. This sounds identical to a subfloor squeak but lives one layer up.
- Loose fasteners: Original nails back out over time (especially in older homes with ring-shank nails that have lost grip), leaving the panel free to bounce.
- Joist deflection: An undersized or damaged joist flexes too much, causing the entire panel to move rather than a single point.
- Moisture and rot: Wet wood swells and shrinks with humidity cycles, and rotted wood loses its grip on fasteners entirely.
A panel that’s tight in summer may squeak all winter. It’s worth knowing that before you add a dozen screws and wonder why the noise returns in January.
Subfloor deflection and panel-edge movement from under-rated plywood thickness or improper joist spacing are also common structural contributors to repeated squeaks.
| What you hear / where you walk | Likely cause |
|---|---|
| Single creak at one fixed spot | Subfloor-to-joist gap or loose fastener |
| Creak travels across a 2–3 ft zone | Panel-edge friction or panel-to-panel movement |
| Squeak only under carpet, not at edges | Finish-floor rubbing on underlayment |
| Soft, spongy feel with noise | Joist deflection or moisture damage |
| Squeak worsens in winter, disappears in summer | Humidity-driven wood shrinkage |
| Noise near a wall or threshold | Finish floor rubbing against trim or transition strip |
Experts caution that a squeak is often a symptom, not the problem itself. Professionals prioritize ruling out joist integrity issues, moisture damage, and improper notching before reaching for a screw gun.
How to pinpoint exactly where the squeak is
Guessing wastes time and puts unnecessary holes in your floor. A two-person locate-and-mark process gets you to the right spot in under ten minutes.
- Walk the floor alone at a normal pace. Stop at each squeak and stand still. Shift your weight forward, backward, and side to side to narrow the creak to the smallest possible area.
- Mark each spot with a piece of painter’s tape. Write a number on each piece so you can track multiple problem zones.
- Run a two-person press test. One person kneels on the floor and presses down firmly with both hands at the marked spot while the other person walks nearby. The kneeling person feels for movement and deflection, which tells you whether the panel is lifting off the joist or rubbing at its edge.
- Tap with a coin or screwdriver handle across the marked area. A solid thud means the panel is tight to the joist; a hollow knock means there’s a gap.
- Locate the joist. Use a stud finder set to deep-scan mode, or knock along the floor and listen for the tone to change from hollow to solid. Joists in residential construction typically run 16" on center, so once you find one, you can measure to find the rest.
- For carpeted floors: Press down firmly through the carpet at the squeak location and feel for the joist edge. A wire coat hanger bent into an L-shape can probe through carpet fibers to feel the subfloor surface and detect hollow spots without pulling up the carpet.
- Mark the joist centerline with tape arrows on both sides of the squeak so you know exactly where to drive your screw.
Pro Tip: If you have basement access, have a helper walk the floor above while you watch from below with a flashlight. You’ll see the subfloor panel flex at the squeak point, and you can mark the joist location directly on the underside of the subfloor with a pencil.
Distinguishing a localized squeak from a broad-area squeak matters here. A single creak that you can cover with one hand is a fastener or gap fix. A creak that spans several feet is panel-to-panel movement, and that calls for blocking or adhesive rather than a single screw.
How to fix squeaky subfloor from above
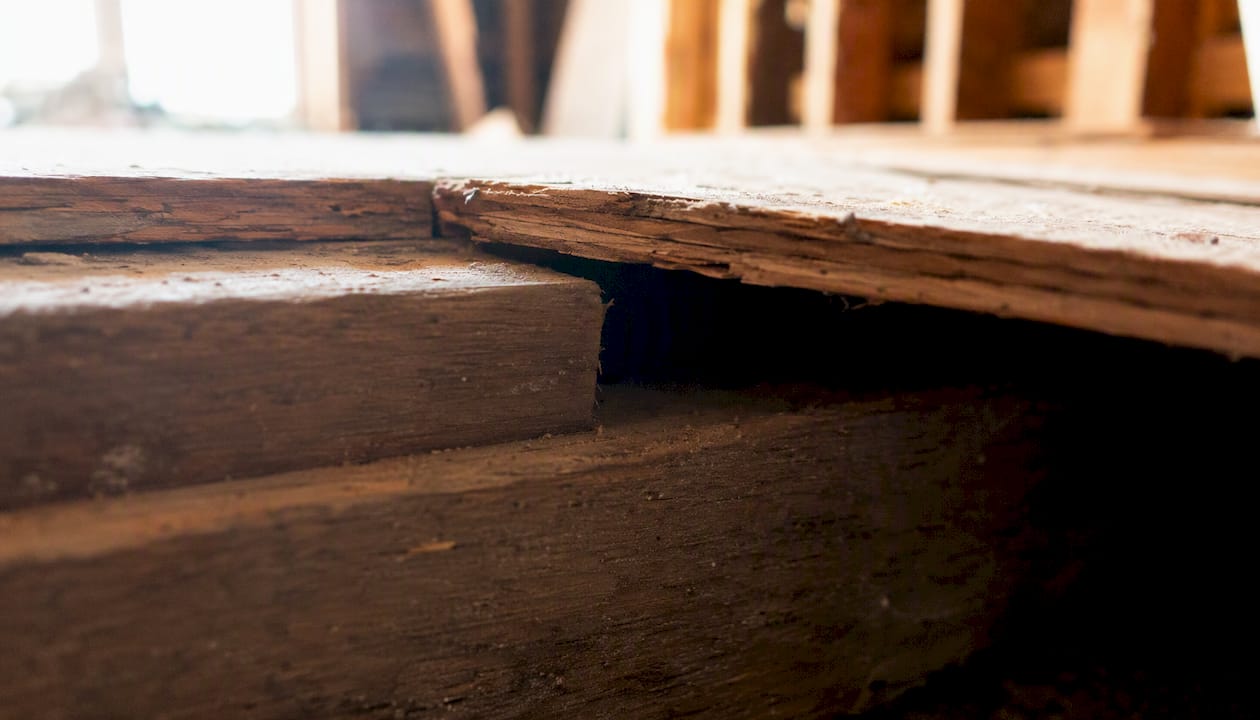
Working from above is the right path when you have no basement access, or when the squeak is under carpet and you want to avoid pulling it up. The goal is to pull the subfloor panel tight to the joist without creating a visible hump in the finished surface.
Materials you’ll need:
- Subfloor screws (SPAX-style subfloor/framing screws, sized to reach the joist without penetrating the finish floor)
- Countersink drill bit
- Drill/driver
- Wood filler or plugs (for hardwood)
- Construction adhesive (optional, for panel-edge gaps)
- Squeak repair kit (such as Squeak No More or Squeak Relief style kits for carpet-safe fixes)
Step-by-step:
- Confirm joist location using your stud finder or the knock test. The screw must land in the joist, not between joists.
- Drill a pilot hole through the subfloor at a slight angle toward the joist center. On hardwood, a pilot hole prevents splitting the finish layer.
- Drive the subfloor screw until the head sits just below the surface. Subfloor framing screws driven into joists are a recommended, durable method to stop panel movement when the cause is a loose subfloor-to-joist connection.
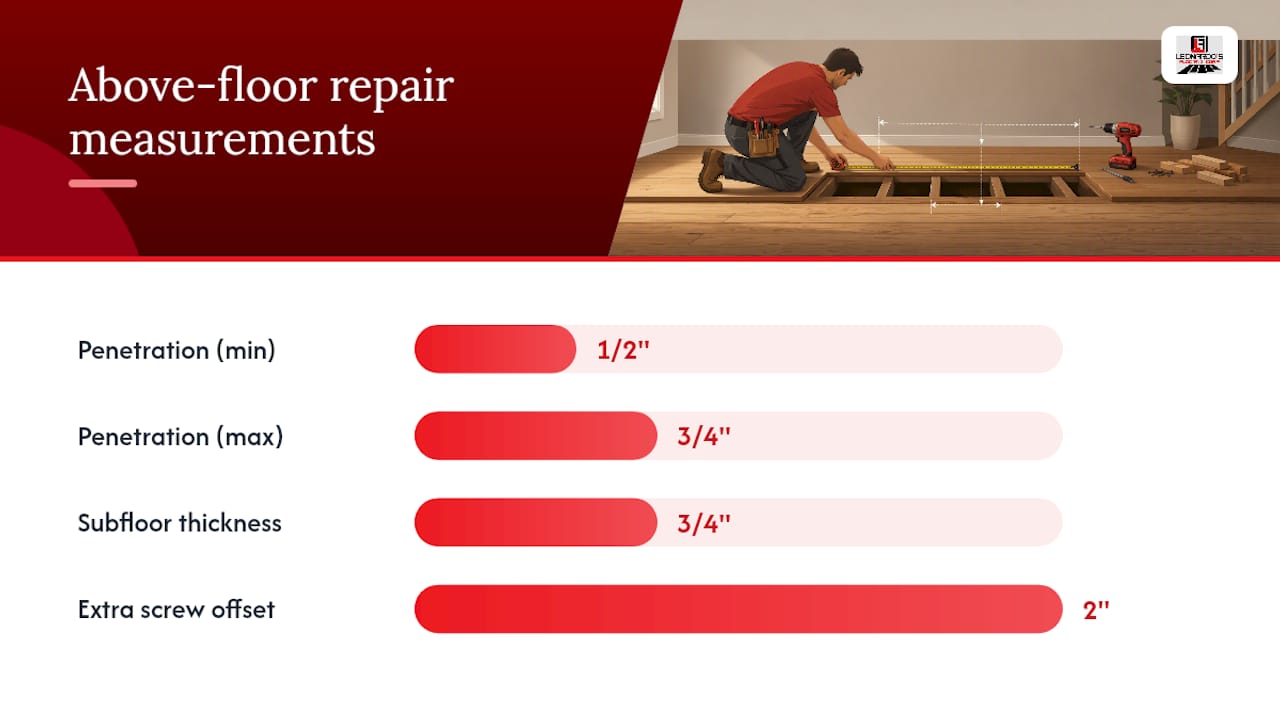
- Check screw length. A practical rule: the screw should penetrate the subfloor and enter the joist by roughly 1/2" to 3/4", without passing through the finish floor above. Measure your subfloor thickness (usually 3/4") plus joist penetration depth before buying.
- Fill the hole with wood filler on hardwood or vinyl patch compound on other surfaces. Sand flush when dry.
- Walk-test the repair. If the creak persists, add one more screw 2" away from the first, still on the joist centerline.
For carpet: Use a Squeak No More or Squeak Relief style kit. These include a depth-control fixture that snaps the screw at the correct depth through carpet backing without pulling fibers, and the screw head stays below the subfloor surface so you feel nothing underfoot.
Skip the WD-40. Spraying lubricant into a squeaky floor is the single most common homeowner mistake. It temporarily quiets friction between wood surfaces, but it does nothing to close the gap or re-secure the panel. The squeak returns within weeks, and now you have an oily subfloor that resists adhesive. Fix the structure, not the symptom.
Pro Tip: Stop driving the screw the moment resistance increases sharply. Over-tightening pulls the panel up into a hump that you’ll feel with every step. Back the screw out a quarter turn if the surface crowns.
Above-floor repairs work well for localized squeaks with a clear joist target. They’re a temporary fix when the underlying cause is moisture damage, joist deflection, or widespread panel movement. If the squeak returns within a few weeks, the cause is structural and needs a deeper look. Multiple homeowner-facing methods, including screws, shims, and repair kits, are valid options when matched to the correct cause.
How to fix squeaky subfloor from below
Basement or crawlspace access is the cleaner repair path. You can see the joist, feel the panel movement, and apply adhesive or blocking without touching the finished floor at all.
Before you start: Identify any electrical conduit, plumbing lines, or HVAC ducts running near your work area. Wear safety glasses and a dust mask, especially in a crawlspace. Set up a work light so you can see the subfloor clearly.
- Locate the squeak from below. Have a helper walk the floor above while you watch. The subfloor panel will flex visibly at the problem spot. Mark the joist and the panel edge with a pencil.
- Check for a gap between the subfloor and joist top. Slide a thin shim into any visible gap. Insert it only until it makes light contact with the subfloor. Forcing a shim or driving it too far raises the panel and creates a hump in the finished floor above.
- Apply construction adhesive where panel edges meet or where the panel lifts off the joist face. Products like LOCTITE PL Subfloor adhesive are designed for this application. Run a bead along the joist top and press the panel down firmly, then hold it with a clamp or temporary screw while the adhesive cures.
- Drive subfloor screws up through the joist into the subfloor panel. Use a washer under the screw head when the joist wood is soft or the screw tends to pull through. Drive until snug, not until the panel crowns.
- Add blocking for panel-edge movement. Cut a piece of 2x lumber to fit between joists at the panel edge seam. Nail or screw it to both joists, then drive screws up through the blocking into the subfloor panel edge. This eliminates the panel-to-panel rubbing that causes broad-area squeaks.
- Walk-test from above before closing up the space.
Pro Tip: For broad-area squeaks, adhesive plus blocking beats screws alone. Screws pull the panel down at a point; blocking and adhesive distribute the load across the panel edge and eliminate the rocking motion that causes the noise.
| Repair type | Best used when | Screw/fastener placement |
|---|---|---|
| Screw into joist from below | Single-point squeak, clear joist access | Near panel center, into joist top |
| Shim + adhesive | Visible gap between panel and joist | Along joist face, shim first then adhesive |
| Blocking at panel edge | Broad-area creak, panel-to-panel movement | Between joists at panel seam |
| Washer + screw | Soft joist wood, screw pull-through risk | At joist center with washer under head |
Stop and call a pro if you find: soft, crumbling joist wood; active water dripping or staining; black mold on the subfloor underside; or a joist that is notched, cut, or visibly bowed. Fastening into compromised wood does not hold, and it can mask a structural failure that gets worse.
What tools and materials do you actually need?
You don’t need a truck full of gear. Most above-floor repairs need five items; below-floor repairs add a few more.
Tools:
- Drill/driver (cordless, 18V or higher for driving subfloor screws)
- Countersink drill bit (for above-floor work on hardwood)
- Stud/joist finder (magnetic or electronic deep-scan)
- Tape measure
- Safety glasses and dust mask (crawlspace work)
- Work light or headlamp
- Clamp (for holding panels while adhesive cures)
Fasteners and consumables:
- SPAX subfloor/framing screws or equivalent coarse-thread screws with a self-drilling tip. Coarse thread grips OSB and plywood better than drywall screws, which can snap under shear load.
- Trim screws for above-floor work through hardwood (smaller head, easier to countersink and fill).
- Construction adhesive such as LOCTITE PL Subfloor for gap-filling and panel-edge bonding.
- Wood shims (cedar shims from any hardware store work well).
- Washers for below-floor screw work in soft wood.
- Squeak No More or Squeak Relief style repair kit for carpet-safe above-floor fixes.
- Wood filler or color-matched putty for patching screw holes in finished hardwood.
Quick buying tips: Choose screws with corrosion-resistant coating (ACQ-rated or stainless) for crawlspace work where moisture is present. Standard zinc screws rust quickly in damp conditions and lose grip within a few years. For screw length, add your subfloor thickness (typically 3/4") to your target joist penetration (1/2"–3/4") and round up to the next standard size.
When should you replace the subfloor or call a pro?
Most squeaks are a fastener or gap problem. But some are a warning sign that the floor structure itself needs attention, and adding screws to a failing panel only delays the inevitable.
Red flags that mean DIY repair is not enough:
- The floor sags or feels spongy underfoot over an area larger than one panel (roughly 4×8 ft).
- Visible rot, black mold, or soft crumbling wood on the subfloor or joists.
- A joist that is notched, cut, cracked, or visibly deflecting more than neighboring joists.
- Active moisture: dripping water, staining, or standing water in the crawlspace.
- Repairs you’ve already made have failed within a few months.
- The finished floor surface shows a visible dip or rise that wasn’t there before.
Cost context: Fixing squeaky floors typically costs $200 to $1,000 for common repairs, with access difficulty and extent of damage driving costs higher. Subfloor replacement for an average 300 sq ft room commonly ranges $900 to $3,000, with most homeowners averaging around $1,560. Accessible repairs from an unfinished basement cost less than repairs requiring finished floor removal, which adds labor and material costs on top of the subfloor work itself.
DIY vs. pro timeline:
- Targeted screw fix (1–3 spots): 30–60 minutes DIY.
- Above-floor repair through carpet with a kit: 1–2 hours DIY.
- Below-floor blocking and adhesive (one room): 2–4 hours DIY.
- Partial subfloor panel replacement (pro): 1–2 days including floor removal and reinstallation.
- Full subfloor replacement (pro): 3–5 days depending on room size and finish floor type.
A professional subfloor preparation inspection is worth scheduling when you see any of the red flags above, when repairs keep failing, or when you’re planning a new floor installation over an existing subfloor. Installing new hardwood or tile over a compromised subfloor is one of the most expensive mistakes a homeowner can make.
What pros know that most DIY guides skip
Misdiagnosis is the most common reason a squeak repair fails. A homeowner hears a creak, drives a screw, and the noise stops for two weeks. Then it’s back. The screw didn’t fail; the diagnosis did.
Common DIY mistakes:
- Treating friction with lubricant instead of fixing the structural gap (see the WD-40 note above).
- Driving screws between joists because the stud finder gave a false reading. A screw that misses the joist does nothing.
- Over-fastening. Adding ten screws to a panel that needs two creates localized tension and surface humps. Professionals monitor for panel tension and back off before creating surface humps, a subtlety that’s easy to miss when you’re focused on stopping the noise.
- Ignoring moisture. A panel that squeaks because it’s wet will squeak again after you fasten it, because the wood keeps moving with humidity cycles.
- Shimming too hard. Forcing a shim raises the panel and creates a high spot in the finished floor.
How professionals inspect: A contractor doing a proper assessment uses a moisture meter to check the subfloor and joists before recommending any repair. If moisture readings are elevated, the source gets fixed first. Endoscopic cameras can check inside wall cavities or tight crawlspaces for hidden rot or plumbing leaks. Joist spacing and fastener spec checks confirm whether the original installation met code, since under-rated plywood or improper joist spacing causes repeated squeaks regardless of how many screws you add.
When joist damage is confirmed, the repair is sistering: a new joist is fastened alongside the damaged one to restore load capacity. That’s not a DIY task for most homeowners.
The durable fix combines mechanical fasteners with adhesive. Screws pull the panel down; adhesive fills the micro-gaps that screws can’t close. Used together, they eliminate both the movement and the friction that causes noise. Either alone is less reliable over time.
Pro Tip: Control indoor humidity year-round. It’s cheaper than re-fastening the same panels every spring.
Leonardosflooringcorp’s subfloor preparation work follows this same sequence: diagnose first, address moisture, then fasten and level before any finish floor goes down.
A contractor’s honest take on squeaky floors
The truth about squeaky floors is that most of them are a 45-minute fix. Find the joist, drive two screws, done. The homeowners who call us after months of frustration usually made one of two mistakes: they fixed the wrong layer (the finish floor instead of the subfloor), or they skipped the moisture check and the squeak came back with the next humidity swing.
Where it gets complicated is when the squeak is a symptom of something bigger. A floor that creaks across an entire room, or one that’s developed a noticeable dip, is telling you something about the structure below. That’s when a professional set of eyes saves you real money, because a new floor installed over a failing subfloor is a floor you’ll be replacing again in five years.
If you’re in Denver and you’re not sure which category your floor falls into, we’re happy to take a look.
Denver homeowners: get a professional subfloor assessment

When the DIY fix doesn’t hold, or you’d rather know what you’re dealing with before picking up a drill, Leonardosflooringcorp offers professional subfloor assessments and full subfloor preparation services across the Denver metro. With 10+ years of experience and 125+ five-star reviews, the team diagnoses the actual cause before recommending a repair, whether that’s targeted fastening, panel replacement, or a full prep before new hardwood floor installation. No guesswork, no upsell on work you don’t need. Request an estimate and get a clear picture of what your floor actually needs.
Sources
These resources provide deeper cost data, manufacturer guidance, and professional inspection advice for homeowners who want to go further:
- How Much Does It Cost to Repair a Sagging Floor? 2025 Data
- How to Fix Squeaky Floors With Subfloor Screws
- Squeaky floor repair
- How to Fix Squeaky Floors: 7 Methods That Work
- Squeaky Floor Repair Cost Guide – Current Cost