
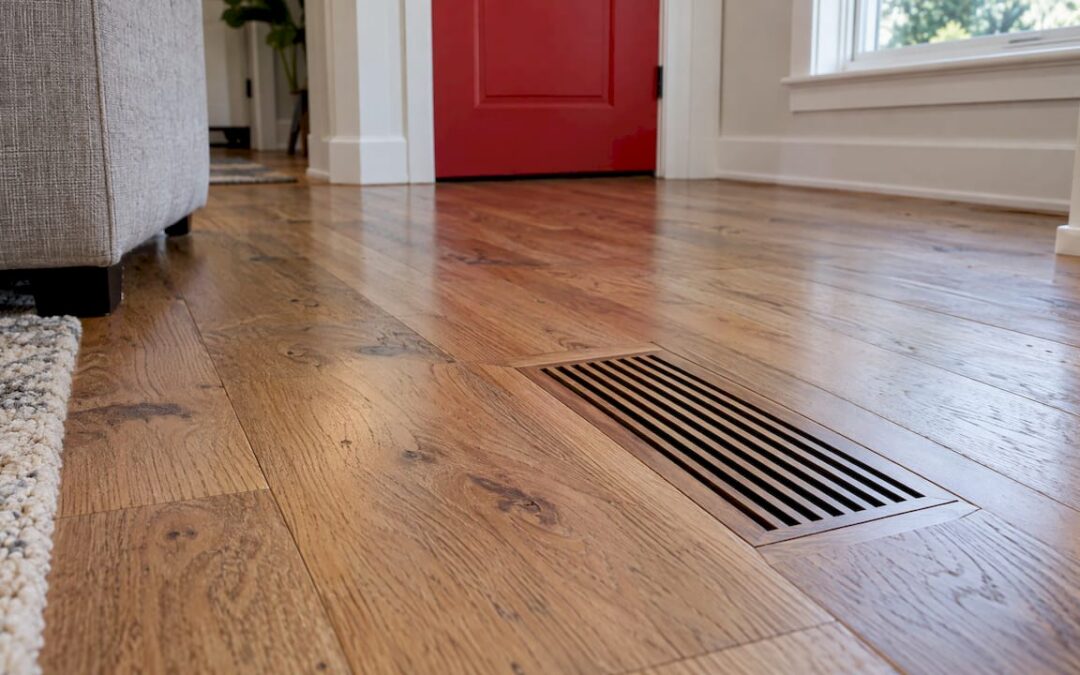
A flush mount floor vent is set into the floor so its surface sits level with the flooring around it. There is no raised frame or lip, so you get a clean, continuous look. The catch is timing: the vent is planned and fitted together with the flooring, so the best moment to decide is before your installer starts, not after the last plank is down.
This guide explains what flush vents are, how they differ from the drop-in registers most homes have, which floors and thicknesses they work with, how to size one, and what to settle before installation day.
What are the key facts about flush mount floor vents?
- A flush mount vent is integrated into the floor so it sits level with the surface, instead of resting on top like a standard drop-in register.
- They are usually installed during new construction or a major flooring renovation, because the flooring is cut and fitted around them.
- Size refers to the duct opening, not the outer cover. Measure the opening, and check the finished floor thickness against the vent’s stated range.
- Hardwood, engineered wood, tile, vinyl and laminate are commonly listed as compatible, but each product has its own thickness limits, so confirm before ordering.
- Settle vent type, size and finish with your flooring contractor before the floor goes in.
Table of Contents
- What a flush mount floor vent is
- Flush mount vs. drop-in: which one fits your project
- Materials and designs
- Which floors and thicknesses work
- Getting the size right
- When to install a flush mount vent
- Our perspective
- Work with us on your flooring and vents
- Keeping flush vents clean and working
- FAQ
- Sources
What a flush mount floor vent is
A floor register is a grille-and-damper assembly that covers an opening in the floor and regulates the airflow from your HVAC system into the room. Most homes have the familiar drop-in type: a cover with a flange that rests on top of the finished floor.
A flush mount version works differently. According to one vent maker’s comparison, flush-mount registers are integrated directly into the flooring so the vent sits level with the surrounding surface. That takes precise cutting and fitting while the floor is being installed, which is why they are mostly chosen for new construction or large renovations.
Register, grille and diffuser: the vocabulary
Shoppers often mix these terms up, and the product listings do not help. In plain terms:
- Register: a supply vent with a moveable damper that controls airflow.
- Diffuser: a vent that aims the air in a specific direction.
- Grille: a fixed vent with no damper, typically used for return air.
Those definitions come from a vent cover manufacturer’s FAQ. A related point from an HVAC supplier’s guide: all registers are vents, but not all vents are registers. A return air grille pulls air back into the system and usually has no damper, so it is not called a register.
Why it matters for you: if you are replacing a supply vent in a bedroom, you want a flush register with an adjustable damper. If you are replacing a return, a fixed grille is the right match.
Flush mount vs. drop-in: which one fits your project
The choice usually comes down to how much you value the seamless look and when you are installing the floor.
| Flush mount | Drop-in | |
|---|---|---|
| Look | Level with the floor, minimal visible edge | Cover and flange sit on top of the floor |
| When installed | During flooring installation, typically new builds and big renovations | Any time, including over existing floors |
| Cleaning | Easier to clean, less debris collects on the surface | Debris can collect around the raised edge |
| Removal | Not as quick to remove, built for the long term | Lifts out quickly |
| Best for | Full flooring projects where appearance is a priority | Quick replacements and updates |
The cleaning and removal points come from a February 2026 comparison, which says flush types keep debris from accumulating on the surface and are easier to clean, while being designed for long-term installation rather than quick removal.
If you are already replacing the floor in a room, a flush vent is a natural upgrade. If you are keeping your floor, a drop-in register is the simpler route.
Materials and designs
Flush vents come in more styles than most people expect, and the design is a real part of how the finished room looks.
Metal
One manufacturer notes that aluminum is the most common base metal for flush floor vents, with steel second. The same guide says cast-metal vents, with heavy castings and detailed grille patterns, suit traditional, historic or luxury interiors. Slotted and linear patterns tend to read as modern.
Solid wood
Wood flush registers are popular with hardwood floors because they can match the boards. One maker offers solid hardwood flush registers in 32 wood species, shipped unfinished and sanded so they can be stained and sealed at the same time as the surrounding floor. That same-batch finishing is what helps the vent blend in. It is offered in ten sizes, from 2-1/2 by 10 inches up to 6 by 14 inches.
Tile, vinyl and carpet inserts
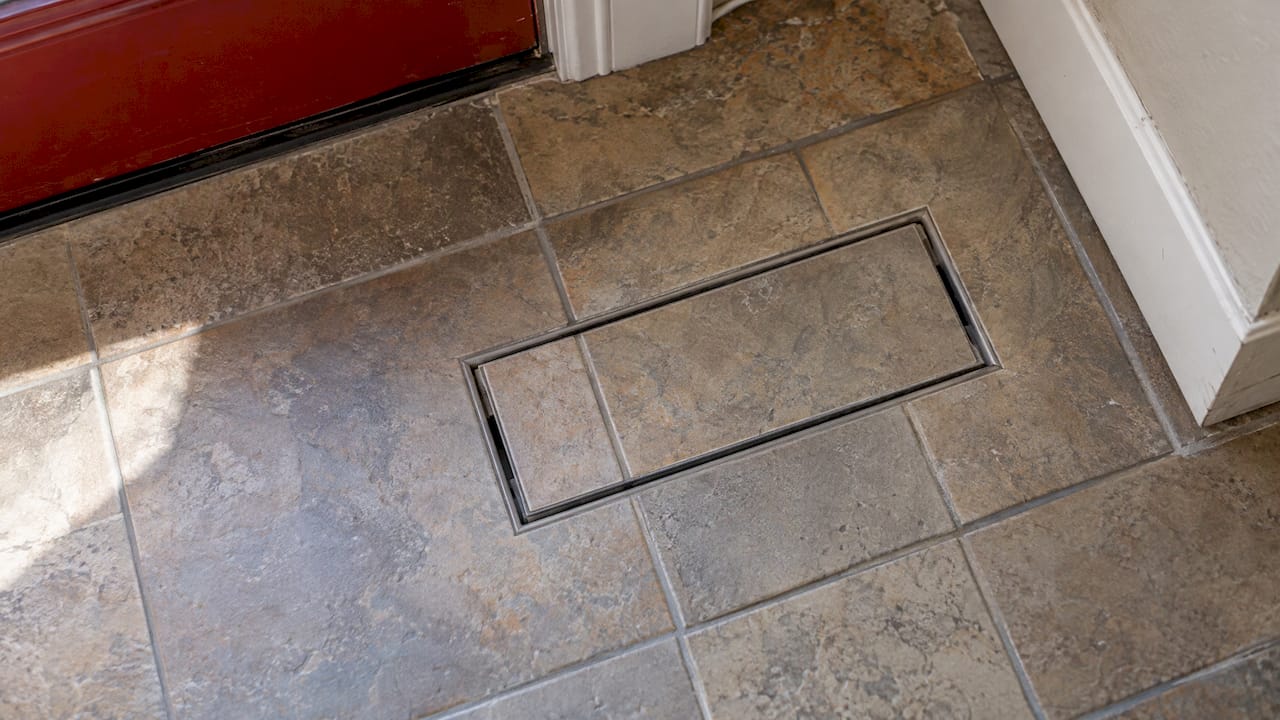
Some flush systems are built to be customized: the vent has a recess or frame that accepts a piece of your tile, vinyl or other flooring material so the surface pattern continues across the vent. These are especially handy in tile rooms, where a metal cover would otherwise interrupt the grout lines.
Which floors and thicknesses work
There is no single rule, because each product has its own thickness window. Here is what the manufacturers publish:
- One wood vent maker says its flush-mount vents can fit hardwood, engineered floors, tile and laminate, and that floating floors are typically the only ones that cannot accept flush vents. Its models without frames can be made flush for floors at least 5/16 inch (8 mm) thick, and models with frames for floors at least 7/16 inch thick.
- Another says its Luxe models are compatible with tile, hardwood, carpet, vinyl, laminate, cork and more, with surface material between 1/8 and 7/8 inch thick.
- A third states its flush vents suit ceramic tile, stone, laminate, wood, LVP and carpet, and that the 1/2 inch metal frames let most tile floors be set flush.
The takeaway: know your finished floor thickness, including underlayment or setting material, before you pick a model. A finished floor is rarely one layer, and different flooring products create different finished heights. Adjustable-height systems with spacers exist for exactly that reason, and they help when you are replacing an old floor with a material of a different thickness.
A note on floating floors
Laminate and many vinyl plank floors float, meaning they are not fastened to the subfloor and expand and contract slightly. Because of that, vent instructions treat them differently. One manufacturer recommends cloth-reinforced tape to connect the vent frame to the surrounding floor where expansion and contraction are a concern. Tell your installer early if your floor floats, so the vent choice and the expansion gap are planned together.
Getting the size right
The most common mistake is measuring the cover instead of the opening. A register’s size refers to the duct opening it covers, not its outer dimensions. The cover is typically about 1.25 inches larger on each side so it overlaps the surrounding surface. Flush vents work a little differently because they sit in the floor, so always read the product’s own dimension chart.
What to measure:
- Measure the length and width of the duct opening in the subfloor, to the nearest 1/16 inch.
- Note the depth available from the subfloor surface to the planned finished floor surface.
- Check whether the opening is square and clear of obstructions.
Common sizes help you sanity-check your numbers. 4×10, 4×12, 6×10 and 6×12 are widely used in post-1960 homes, though many older or renovated homes have non-standard openings, and custom sizes are available. Another guide agrees that 4×10 is the most common residential size, with larger or custom registers more typical in commercial buildings.
One more practical detail: some makers build their flush vents slightly oversized to standard sizes so the metal frame rests on the surrounding subfloor for support, giving some placement flexibility, according to one installation guide. Another reason to follow the specific instructions that come with your model.
When to install a flush mount vent
Timing is the heart of this topic. Most flush vents are planned before the finished flooring goes down. One manufacturer states that its Luxe model must be installed before the finished flooring is in place, with the base undermounted to the subfloor or installed with a waterproof membrane, and that professional installation during the subfloor phase is required. Its stated installation time for a pro is 30 minutes per vent.
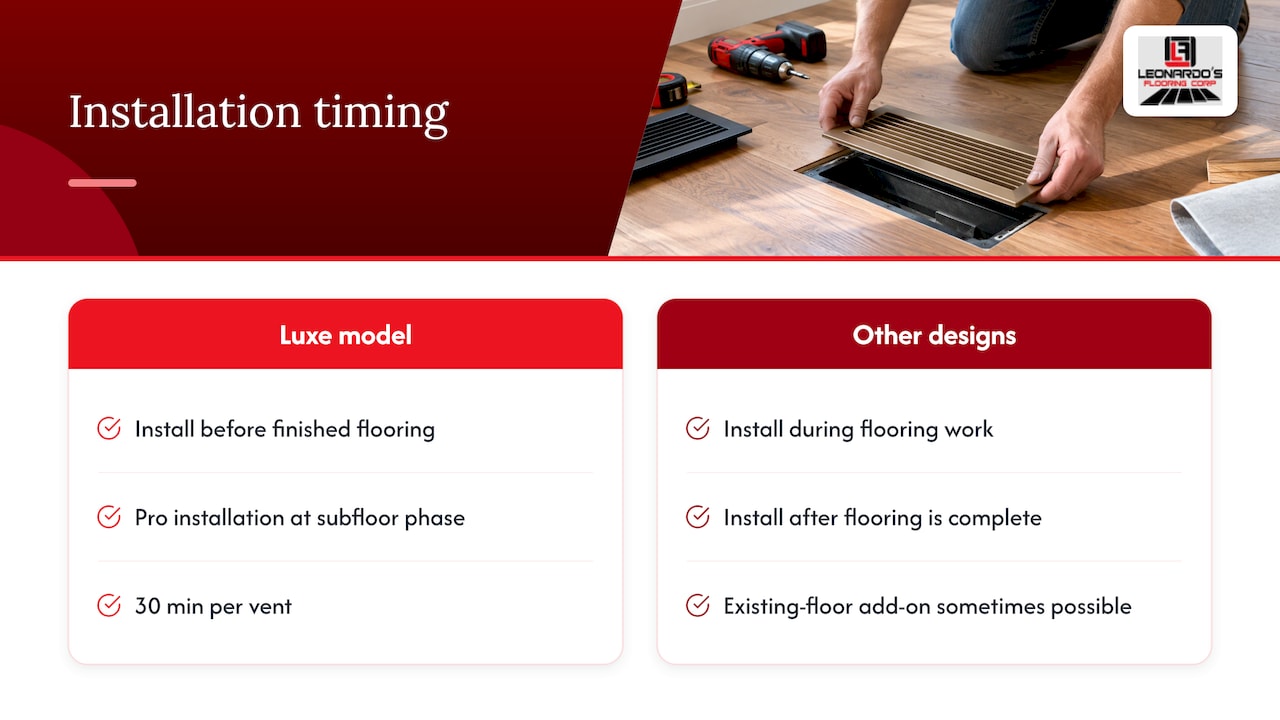
Other designs are more forgiving. A different manufacturer says its flush mount vents can be installed during the flooring installation or after it is complete. So the answer to “can I add one to an existing floor?” is: sometimes, depending on the product, but the cleanest result comes from planning the vent into the floor from the start.
A planning checklist before flooring day
- Walk each room with your contractor and mark every supply and return location.
- Decide which vents go flush and which stay drop-in.
- Choose the vent material and finish to match the floor. For wood vents, order them unfinished if you want them stained with the floor.
- Confirm the finished floor thickness, including underlayment, against the vent’s range.
- Make sure the vents are on site before the installer needs them.
- Agree who will cut the opening and set the vent, and in what order relative to subfloor preparation.
Subfloor condition matters here too. A vent frame rests on or is fixed to the subfloor, so an uneven or damaged subfloor is better corrected first. Our subfloor preparation and flooring installation services are built around that sequence. If you want a wider view of how installers plan around fixtures like vents, this flooring installation overview is a handy companion.
Pairing vents with your floor type
Hardwood has the most vent options, since wood registers can be stained to match. Our write-up on hardwood installation timelines for Denver owners covers how the schedule unfolds, which is useful for deciding when vents need to arrive. For vinyl plank, particularly in humid rooms, see our guide on making LVP last in bathrooms, which covers leveling and acclimation. Both affect how a vent frame sits in the floor.
Our perspective
Vents are the detail people notice last and regret most. A beautiful floor with an awkward, raised register in the middle of it undercuts the whole room, and it is a simple thing to get right if it is planned early.
What we do on every project is listen first. Your budget, your timeline and the way you use each room decide whether flush vents are worth it. In a living room with new hardwood, they usually are. In a rental-style quick refresh, a good drop-in might be all you need. We tailor the plan to you rather than pushing one approach.
Our approach is to settle the details before the first board goes down: where the ducts open, how thick the finished floor will be, and what the vent should look like against the floor. That is how we aim to install it right the first time, and treat each floor like it is going into our own home.
Jim
Work with us on your flooring and vents
If you are replacing floors in the Denver area, we can plan the vent locations as part of your installation, whether the project is hardwood, laminate, vinyl or tile. We have served the greater Denver metro for over 10 years, with 125+ five-star reviews from homeowners and businesses. Tell us what you want the finished room to look like, and we will build the plan around your needs, budget and timeline.

See everything we install on our services page, or start with our flooring installation page to request an estimate for your project.
Keeping flush vents clean and working
Flush vents are easier to keep tidy because dust does not pile up against a raised edge, but they still need regular care. One professional cleaning guide recommends this routine:
- Turn off the HVAC system.
- Lift the register out, soak it in warm soapy water for about 15 minutes, and scrub with a soft brush.
- Rinse and dry it completely.
- Vacuum the duct boot below with a crevice tool.
The same guide suggests monthly vacuuming, washing registers every 3 months, and deep-cleaning accessible ducts every 6 months, plus an annual professional inspection if dust or allergies are a concern. It also cautions against putting water on unfinished duct boots and against replacing a damp cover, since trapped moisture can warp wood floors.
Because flush vents are designed for the long term rather than quick removal, be gentle when lifting them out and take care not to chip the surrounding floor edge. If a vent sticks or the frame has shifted, ask your flooring contractor or an HVAC professional to look at it instead of prying.
FAQ
What is the difference between a floor vent and a register?
Vent is the broad term for any opening that moves air. A register is a specific kind of supply vent that includes a damper you can adjust to control airflow. A return grille is also a vent, but it is fixed and has no damper.
Can I install a flush mount floor vent over an existing floor?
Sometimes. Some products are designed to be installed before the finished flooring, while others can be added during or after the flooring work. Cutting into a finished floor is more delicate, so the cleanest result comes from planning the vents before new flooring is installed.
Will a flush vent work with my flooring?
Most products list hardwood, engineered wood, tile, vinyl and laminate. Floating floors are the usual exception, though some manufacturers give taping or expansion guidance. What decides it is the finished floor thickness against the vent’s stated range, so measure first.
What size flush mount vent do I need?
Measure the duct opening in the subfloor, not the old cover. The most common residential size is 4×10 inches, followed by 4×12, 6×10 and 6×12. Older homes sometimes have unusual openings that call for a custom size.
Are flush vents harder to clean than regular registers?
No, they are generally easier to keep clean because debris does not collect on a raised edge. They are less quick to lift out than drop-in registers, so plan on a gentle lift-and-wash routine every few months.
Sources
- Floor register definitions and guide
- Vent cover FAQ: registers, grilles and common sizes
- Flush mount vs. drop-in registers comparison, February 2026
- Flush floor vent materials guide
- Solid hardwood flush registers: species and sizes
- Flush-mount vent fit options by floor type
- Flush floor vent compatibility and thickness range
- Floor vent cover installation guide
- Adjustable-height vent system and finished floor heights
- How to measure for new grilles
- Flush floor vent installation instructions
- Professional guide to cleaning floor vents