
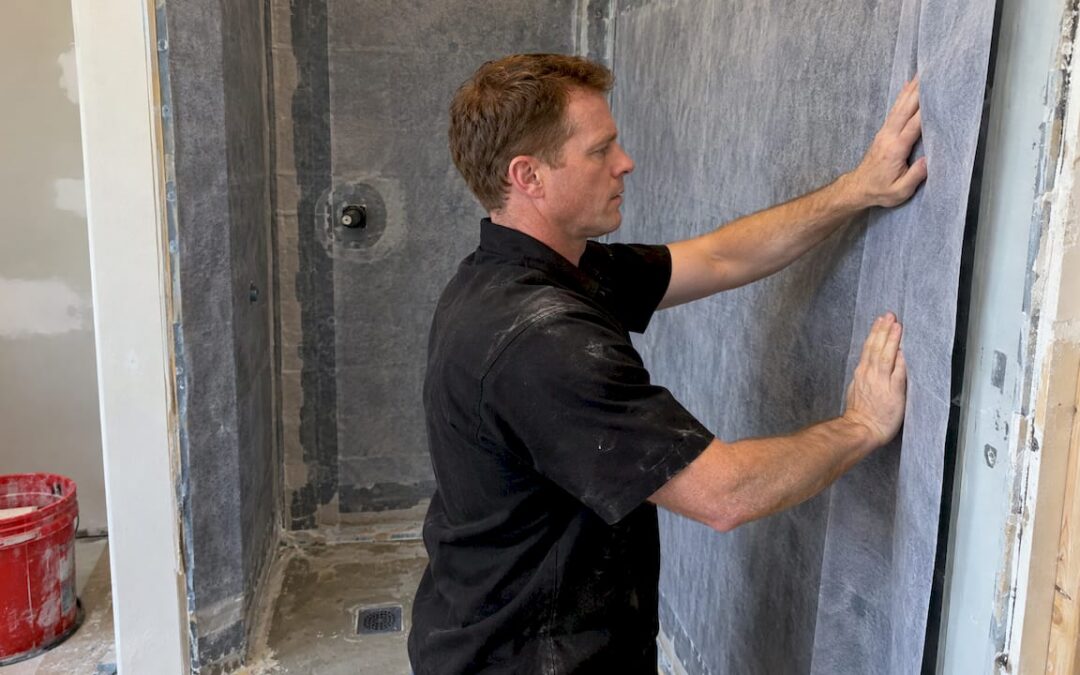
A tile waterproofing membrane is a continuous, bonded layer under the tile that keeps water from reaching the framing, subfloor or slab. In a shower or any other wet area, it is the part that actually keeps the room dry, and it only works when the whole assembly is installed as one continuous system. Tile and grout do not do that job. If you are planning a shower, a wet room or a tiled basement in the Denver area, the decision is less about picking a brand and more about getting a continuous layer with sealed seams, corners and drain connections.
We install tile and prepare subfloors across the Denver metro. This guide explains what you need to know before anyone spreads the first bucket of thinset.
What is a tile waterproofing membrane and why is it important?
- A tile waterproofing membrane is crucial because tile and grout are not inherently waterproof. Except for porcelain, tile bodies absorb water, and grout lines allow moisture through, making a membrane behind the tile essential to protect the building structure. There are three main categories: liquid-applied, fabric-reinforced, and sheet membranes, all effective when installed correctly. Always look for ANSI A118.10 on the product, which is the standard for bonded waterproof membranes under thin-set tile. It's important not to mix liquid and sheet membranes from different manufacturers due to compatibility issues, and always confirm Denver-area building code requirements before starting work.
Table of Contents
- Why tile alone does not keep water out
- The three types of tile waterproofing underlayment
- What to look for on the product label
- How a membrane gets installed, step by step
- The hybrid trap: do not mix systems
- Finishing touches that protect the membrane
- Denver-area code and permit considerations
- What this costs and how to compare bids
- Where we come in
- Our perspective
- FAQ
- Sources
Why tile alone does not keep water out
People assume tile is waterproof because water beads on the surface. The Ceramic Tile Foundation explains that only porcelain has an essentially non-absorptive body, and that the only way to stop water moving into the building structure is a positive water barrier behind the tile. Grout is porous too, and it cracks over time. Water that passes through ends up in the mortar bed, the backer board and eventually the wood or concrete underneath.
That is why a membrane is not an upgrade in a shower. The same source notes that the Tile Council of North America’s shower wall method B415 specifies a waterproof membrane (A118.10) or a vapor-retarder membrane to prevent moisture intrusion and protect adjacent walls and building materials.
Where it matters most:
- Shower floors, curbs, benches and walls. Water sits and splashes here every day.
- Tub surrounds with a shower head.
- Steam showers, which need a membrane that also controls vapor.
- Laundry rooms and bathroom floors where a leak or overflow is likely.
- Tiled basement slabs, where the concern is moisture coming up from the ground. We cover that case in our moisture-first plan for tiling a basement slab.
A dry hallway or living room floor does not need a shower-grade membrane. If you are unsure whether your room qualifies as a wet area, that is a good question for a site visit.
The three types of tile waterproofing underlayment
The Ceramic Tile Foundation sorts membranes into three basic categories: liquid-applied, fabric-reinforced and sheet. Stone World describes the same field as cementitious, liquid-applied (elastomeric or acrylic) and sheet-applied methods. Here is how they differ in practice.
| Type | How it goes on | What to watch |
|---|---|---|
| Liquid-applied | Rolled or troweled on over the backer in coats, then cured | Thickness depends on the installer; coats must meet the maker’s stated film thickness |
| Fabric-reinforced | Liquid or coating with embedded fabric at seams and corners | Fabric and liquid must be from the same tested system |
| Sheet | Bonded to the substrate with thin-set, seams overlapped or banded | Overlaps, corners and penetrations must be sealed exactly as specified |
Uncoupling membranes can also provide waterproofing, according to the same foundation article, but only when their joints and wall connections are installed per the manufacturer’s recommendations. Not every uncoupling mat is a waterproofing product, so confirm the specific product is rated for it.
Liquid versus sheet: how to choose
Homeowners often search for a head-to-head such as RedGard versus KERDI. RedGard is a well-known liquid-applied product, and KERDI is a well-known sheet. The honest answer is that neither type wins on every job. They are different systems with different strengths:
- Liquid flows around odd shapes, niches, benches and many penetrations, and it suits irregular surfaces. It relies on the installer applying the right thickness everywhere.
- Sheet arrives at a factory-controlled thickness, so there is no wet-film guesswork. It needs careful cutting, overlapping and sealing at every corner and pipe.
What matters more than the type is the installation. Either one fails when a corner is skipped, a coat is thin, or a seam is not sealed.
Your choice may also depend on the project. Some institutional buyers specify one type only. For example, the University of Colorado Anschutz Medical Campus design standards call for a chlorinated polyethylene sheet membrane under tile above occupied space and do not permit fluid-applied membranes. Commercial property managers in the metro area should check whether their building standards or tenant requirements set a type before bidding the job.
What to look for on the product label
The benchmark is ANSI A118.10, the standard for load-bearing, bonded, waterproof membranes under thin-set tile. Schluter’s KERDI data sheet shows how a manufacturer documents this: it identifies the product as an ANSI A118.10 sheet membrane and vapor retarder, then spells out the approved mortars, the sealing accessories and the limitations.
Those limitations are the kind of detail to read on any product you choose. The KERDI sheet, for instance, says the membrane is not for primary exterior waterproofing, is not intended for continuous-use steam rooms (a different product in the line handles that), should not be used with moisture-sensitive stones such as green marble, and is not for locations with hydrostatic pressure. Every liquid and sheet product has its own list. Matching the product to the room is half the job.
A second product detail that gets overlooked: steam. A steam shower needs a membrane that stops vapor as well as liquid water. Sika’s U.S. page describes a sheet-applied waterproofing and vapor-control membrane for steam rooms and steam showers, which shows the sort of rating you want to see on the box if you plan to install one.
How a membrane gets installed, step by step
Exact steps depend on the product, and the manufacturer’s instructions govern. The sequence below applies to most bonded systems.
- Prepare the substrate. The backer or slab must be flat, solid, clean and correctly sloped to the drain. A shower floor needs its pre-slope before any membrane goes on. Subfloor problems turn up later as cracks and leaks, which is why we treat subfloor preparation as a core part of any tile job. If you are still deciding on a backer, see our comparison of HardieBacker and Durock.
- Treat the corners, seams and transitions first. Inside corners and joints between floor and wall are where water gets in. Sheet systems use a banding or seam product for these. Fabric-reinforced liquid systems embed fabric there.
- Apply the membrane. For liquid, that means coats at the film thickness the manufacturer states, with full coverage. For sheet, it means bonding with the right mortar and pressing out voids. Stone World notes that sheet membranes are applied with thin-set mortar, typically overlap 2 inches at connections and use specialized collars at shower head and mixing valve penetrations.
- Seal the drain. The membrane must connect to the drain’s bonding flange using the manufacturer’s specified bonding product. The KERDI data sheet, for example, requires a specific bonding compound to attach the sheet to the stainless-steel drain flange.
- Let it cure, then flood test. The same data sheet calls for a complete flood test after curing and recommends tile installation within 72 hours. A flood test means plugging the drain, filling the shower floor with water and watching the level.
- Set the tile. Use the thinset the membrane maker approves. Our guide to modified versus unmodified thinset explains how the two differ and why the membrane’s instructions decide which one you use.
Where do these steps go wrong? A rushed schedule is the usual culprit: tile goes down before the membrane cures, or before anyone has tested it. A flood test costs a day. A leak inside a finished wall can cost the whole shower.
The hybrid trap: do not mix systems
One common shortcut is using a liquid product to seal the seams of a sheet membrane from another brand, or the reverse. TileLetter’s Joseph Mattice warns about these hybrid systems: the liquid may need a mechanical profile to bond, or the sheet fabric may keep it from fully integrating, which can let water travel behind the liquid layer. His advice is to use only component combinations the manufacturer has confirmed through lab testing.
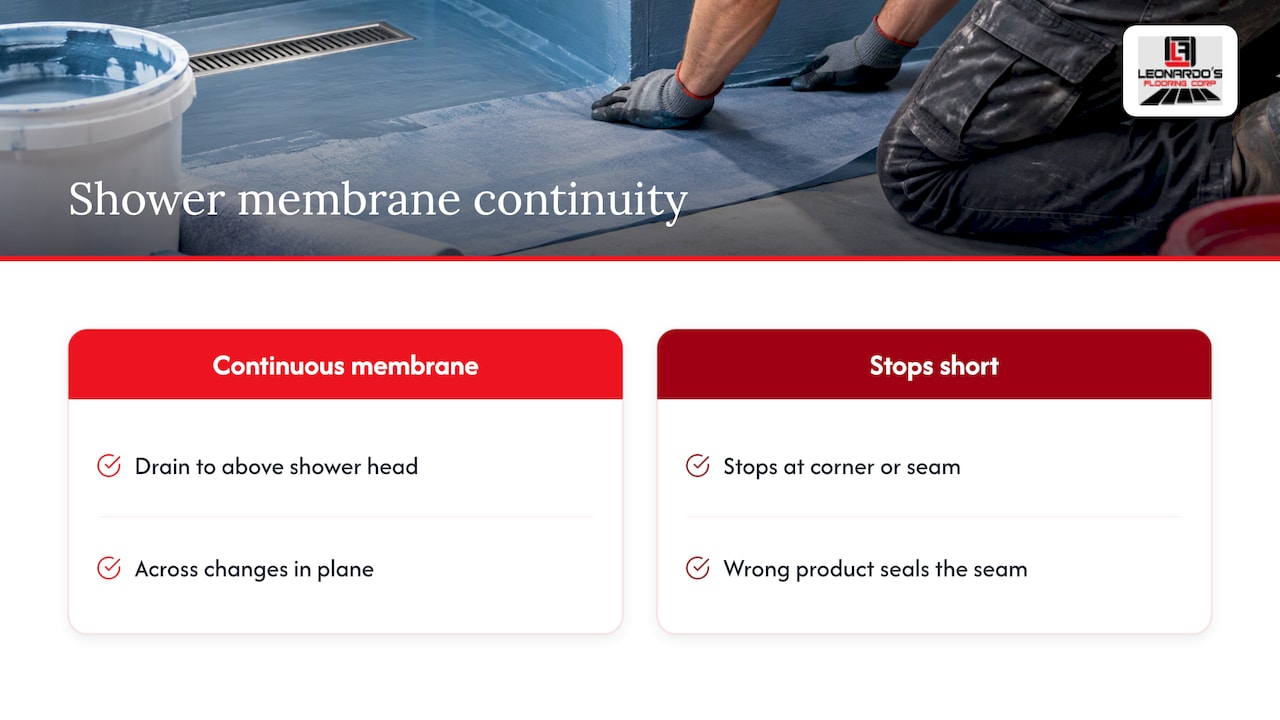
The same article explains that TCNA shower methods call for an A118.10 membrane that runs continuously from the drain to above the shower head, including at changes in plane. Continuity is the point of the whole system. A membrane that stops short of a corner, or a seam sealed with the wrong product, is the equivalent of a roof with a hole in it.
When you get a bid, ask which complete system will be used, from one manufacturer, for the floor, walls, corners and drain. That is a fair question, and a good contractor will answer it plainly.
Finishing touches that protect the membrane
The membrane lives under the tile, but what goes on top affects how long the shower stays dry.
- Grout. Cement grout is porous and needs sealing. Epoxy grout resists staining and water differently, and this comparison of epoxy and cement grout helps you weigh the two for a bathroom. If you go with cement grout, our guide on when to seal grout gives you the timing.
- Movement joints. Tile floors need room to move, and the membrane layer works best when the tile above it is not stressed. See our tile expansion joint rules.
- Caulk, not grout, at changes of plane such as the corner where the wall meets the floor.
Denver-area code and permit considerations
Codes are local, so check with your own building department. Here is what the published material shows.
Denver’s residential code for 2025 is based on the 2024 International Residential Code with amendments, effective from December 31, 2025. That is the current cycle, and it governs permitted bathroom work in the city. Nearby cities adopt their own versions and amendments, so a project in Aurora, Lakewood or Boulder may be handled differently from one in Denver.
For a sense of what inspectors in a Denver-area city look for, Broomfield’s remodel handout requires nonabsorbent surfaces at least 6 feet high on shower and tub-shower walls, bars water-resistant gypsum board over a Class I or II vapor retarder in these compartments, and requires a shower-base pressure test at inspection. That pressure test works the same way as the flood test above: plug the drain, fill the base and mark the water level.
If your project moves plumbing, adds fixtures or opens walls, a permit is likely needed, and Colorado requires licensed tradespeople for permitted plumbing and electrical work. Ask your building department before you start, and keep any inspection records for your files.
What this costs and how to compare bids
Waterproofing is a small share of a shower’s cost compared with the tile and labor, and it is the one layer you cannot afford to redo. Because pricing depends on the size of the shower, the drain type, the substrate and the finish tile, we quote per project rather than publish a flat figure. When comparing bids, check that each one states:
- the complete membrane system by product name, from one manufacturer,
- how seams, corners, niches and the drain are handled,
- whether a flood test is included before tile goes down,
- which thinset and backer are being used,
- who pulls the permit, if one is needed.
Two bids that look the same on price can be very different if one skips a step on this list.
How can Leonardo's Flooring Corp help with your tile waterproofing needs in Denver?
If you are tiling a shower, bathroom floor, kitchen or basement in the Denver metro, our tile floor installation service covers the job from subfloor preparation through finished tile for homes and commercial properties. We have served greater Denver for over 10 years, and our 125+ five-star reviews come from clients who wanted the work explained and done right the first time. Pricing is honest, with no hidden fees, and each project is tailored to your needs, budget and timeline.
To talk through your project, start on our services page and tell us what you are planning.
Our perspective
Most of the tile problems we are called about start below the tile, not in it. A cracked grout line is a symptom. The cause is usually a floor that was not flat, a substrate that was not prepared, or a layer that was rushed.
That is why we start with the subfloor. A membrane, a backer board or a tile can only be as good as what is underneath it, and the time spent on preparation is the cheapest insurance a homeowner can buy.
We also listen before we recommend. A small guest bath, a family shower and a commercial restroom do not need the same plan, and your budget and schedule matter as much as the product. Our approach is to tailor each job to the property in front of us, explain the options plainly and install it right the first time. Treat your floor as if it were going into your own home, and the rest follows.
Jim
FAQ
Do I need a membrane under tile?
In a shower, tub surround or other wet area, yes. Tile and grout let moisture through, and a bonded membrane is what protects the framing and substrate. On a dry floor in a living room or hallway, a shower-grade membrane is not usually needed, though some floors benefit from crack-isolation products. A site visit settles it.
Is liquid or sheet membrane better?
Both are recognized ways to waterproof tile when installed to the manufacturer’s instructions. Liquid adapts well to complex shapes, while sheet comes at a factory-set thickness. The best choice depends on the room, the substrate and the product’s rating, so pick one complete system and stay with it.
What does ANSI A118.10 mean?
It is the American National Standard for load-bearing, bonded, waterproof membranes used under thin-set ceramic and stone tile. When a product lists it, the product meets the minimum performance criteria for bonded shower membranes, which is the first thing to check on any label.
Can I use a membrane under tile on a basement floor?
Often, yes, but a basement slab has its own moisture questions, such as vapor coming up through the concrete. Test the slab and choose a product rated for that purpose. Our basement tile guide walks through the moisture-first approach.
Sources
- What Do You Need to Install Tile in Wet Areas? (Ceramic Tile Foundation)
- Determining Appropriate Waterproofing for a Wet Area Tile Application (Stone World)
- KERDI Technical Data Sheet 8.1 (Schluter)
- Waterproofing (Sika USA)
- The hazards of hybrids (TileLetter)
- University of Colorado Anschutz Medical Campus tiling standard
- Denver Residential Code 2025 (UpCodes)
- Broomfield remodel handout