
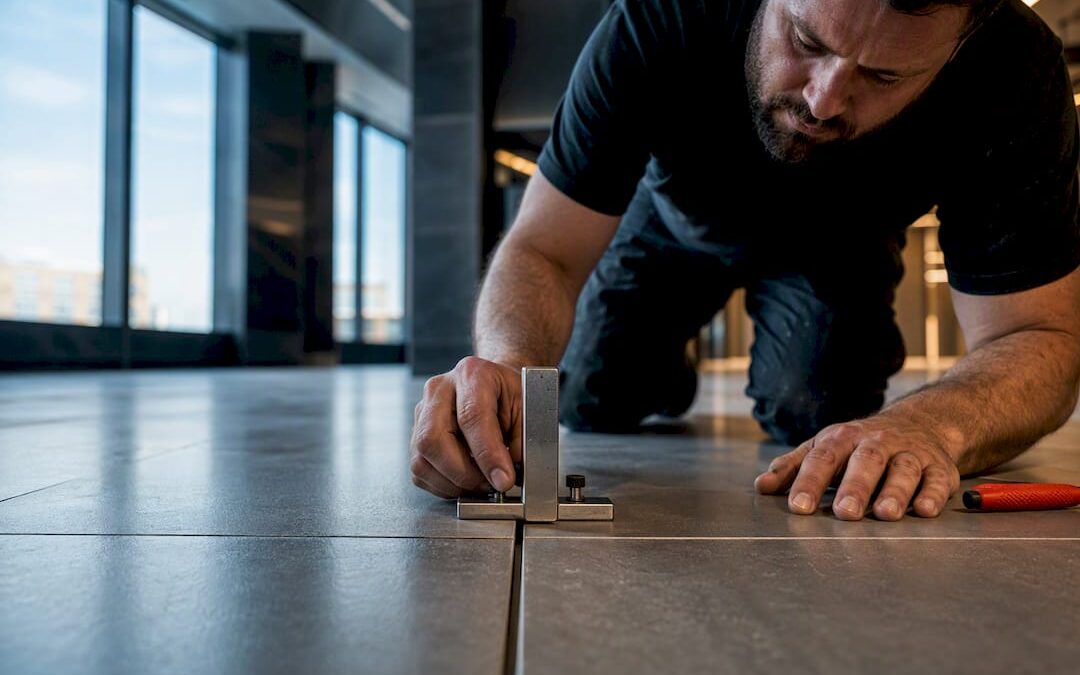
Industry standards accept 1/32 inch of lippage for grout joints under 1/4 inch and 1/16 inch for joints 1/4 inch or wider, plus a tile’s own inherent warpage. Substrate flatness and the lighting in a room both change how visible that variance looks, even when the numbers are within spec. The sections below cover where these figures come from, how to measure them on site, and how to prevent or fix lippage before it becomes a dispute.
TL;DR:
- Lippage allowances according to industry standards are up to 1/32 inch for joints less than 1/4 inch and up to 1/16 inch for wider joints, plus tile warpage.
- Substrate flatness must be within 1/8 inch over 10 feet for large tiles and verified with proper tools before installation to prevent ongoing lippage issues.
- Inspect tiles and joints under permanent lighting conditions at normal viewing distance, documenting any variances that exceed ANSI tolerances before finishing the job.
- Fixes for excessive lippage include grinding affected tiles, resetting on a flat substrate, or installing transition strips, depending on how far outside tolerance the variance is.
- Leveling clips do not replace substrate preparation and cannot fix uneven surfaces; proper flatness checks are essential for a successful, long-lasting tile installation.
Table of Contents
- Where the numbers come from: ANSI, TCNA, and NTCA tolerance tables
- What causes lippage and how to prevent it on site
- Concrete, subfloor, and flatness specs before tile goes down
- How to measure and inspect lippage before calling a job done
- Realistic fixes when lippage exceeds acceptable limits
- What installers actually check before a tile job passes inspection
- Standards matter more than the leveling system you buy
- How Leonardo’s Flooring Corp can help with your tile project
- Standards and trade guidance worth reading
- Sources
- FAQ
Where the numbers come from: ANSI, TCNA, and NTCA tolerance tables
The tile industry doesn’t rely on one single rulebook. Workmanship and acceptance criteria trace back to the ANSI A108/A118/A136.1 compilation, a set of voluntary standards that installers, inspectors, and manufacturers treat as the baseline for judging a finished floor or wall. The Tile Council of North America folds these into its annual Handbook, and trade publications like TileLetter translate them into plain language for installers.
The core allowance, from ANSI A108.02, breaks down like this:
- Grout joints narrower than 1/4 inch: up to 1/32 inch of lippage, about the thickness of a credit card.
- Grout joints 1/4 inch or wider: up to 1/16 inch of lippage, about the thickness of a penny.
- Both allowances are added to whatever warpage the tile itself carries under ANSI A137.1, so a slightly warped tile can legitimately show more lippage than the base number suggests.
The allowance is not a flat number. ANSI A108.02 states lippage tolerance is 1/32 inch or 1/16 inch depending on joint width, plus inherent tile warpage, which means two floors built to the same standard can look different depending on the tile batch.
Grout joint width also isn’t arbitrary. TCNA guidance recommends a minimum joint of at least three times the tile’s facial dimension variation, with common practice landing at 1/8 inch for rectified tile and 3/16 inch for calibrated tile. When writing a project spec, reference the tile’s actual facial variation rating alongside these minimums rather than picking a joint width by eye.
What causes lippage and how to prevent it on site
Some lippage is baked into the product before it reaches the job site. Tile is manufactured to a facial warpage tolerance, and even tile that passes inspection can curve slightly at the edges or center. The rest of the risk comes from decisions made during installation.
- Confirm substrate flatness before setting tile, since an uneven slab or subfloor causes more lippage than any clip or wedge system can correct.
- Back-butter and comb mortar consistently to avoid hollow spots that let one tile corner sit lower than its neighbor.
- Limit running-bond offsets on tiles with a side longer than 15 inches, since patterns near a 50% offset put the most-warped part of one tile next to the flattest part of another.
- Plan grout joint width around the tile’s facial variation rather than defaulting to the narrowest joint that looks good in a showroom.
- Build a mock-up using the actual tile, layout, and lighting planned for the room, then get sign-off before full installation.
Pro Tip: Order tile from a single production lot when possible: mixing lots increases the odds of pairing tiles with different warpage profiles side by side.
Concrete, subfloor, and flatness specs before tile goes down
Substrate flatness fails more installations than bad tile ever does. For large-format tile, meaning any tile with a side longer than 15 inches, ANSI guidance calls for flatness within 1/8 inch over 10 feet and 1/16 inch over 2 feet. Smaller-format tiles carry more forgiving tolerances, but the same principle applies: a substrate that fails these checks will telegraph through the finished floor no matter how carefully the tile is set.
Before ordering tile, walk the subfloor preparation process and decide which fix applies:
- Self-leveling underlayment for broad, gradual dips across a concrete slab.
- Patching compound for localized low spots or transitions between materials.
- Backer board when the existing subfloor needs a stable, uniform surface rather than height correction.
Verify flatness with a straightedge and feeler gauge or shims, recording measurements at multiple points across the room rather than trusting a single check near the doorway. Leveling clips and wedge systems fine-tune tile edges during setting, but they were never designed to compensate for a substrate that’s out of flat to begin with. Skipping this step is the single most common reason lippage complaints happen after installation, not during it.
How to measure and inspect lippage before calling a job done
A straightedge laid across adjoining tiles, combined with feeler gauges, gives the most reliable read on lippage. For a quick field check, a credit card slipped under the straightedge roughly matches the 1/32 inch allowance, and a penny roughly matches the 1/16 inch allowance for wider joints.
- Inspect the floor or wall standing at normal viewing distance, without magnification, under the lighting that will be permanent in the space.
- TCNA guidance references viewing distances of about 36 inches for walls and 60 inches for floors, since inspecting from too close exaggerates minor variance that won’t be noticeable in daily use.
- Raking light from a window or a low-angle fixture makes even compliant lippage look worse than it will under normal room lighting.
Lighting changes what “acceptable” looks like: installers are advised to inspect tile work under its intended permanent lighting rather than temporary job-site lights, because raking light can make a floor that meets ANSI tolerances look uneven to an untrained eye.
Document acceptance with dated photos, a written measurement log against the ANSI numbers, and a signed mock-up approval when large-format tile or an unconventional layout is involved. Cosmetic variance within tolerance gets accepted and logged; lippage that catches a fingernail, creates a trip hazard, or measures outside the ANSI allowance gets flagged for repair before the job is considered complete.
Realistic fixes when lippage exceeds acceptable limits
Not every lippage problem requires tearing out tile. The right fix depends on how far the variance sits outside tolerance and how many tiles are affected.
- Grind and profile the high edge when a single tile or joint sits just outside the ANSI allowance and the tile material can be safely ground without damaging its finish.
- Isolate and remove the affected tiles when lippage is widespread or caused by a substrate problem, rather than grinding down a symptom that will resurface elsewhere.
- Verify substrate flatness again in the isolated area before resetting, since reinstalling on the same uneven base just repeats the original failure.
- Reset with corrected mortar coverage and joint width, then re-check with a straightedge before grout goes in.
- Install a transition strip where lippage occurs at a threshold or material change that can’t be fully corrected, treating it as a safety measure rather than a cosmetic patch.
Pro Tip: Keep the signed mock-up and measurement log on file: if a manufacturer or warranty claim comes up later, that documentation is what shows the installation met the referenced ANSI and TCNA tolerances at the time of the work.
For DIYers tackling a wood-look plank tile layout, the same escalation logic applies: small, isolated high spots get ground down, while widespread lippage traced back to the subfloor means resetting the affected section rather than chasing symptoms tile by tile.
What installers actually check before a tile job passes inspection
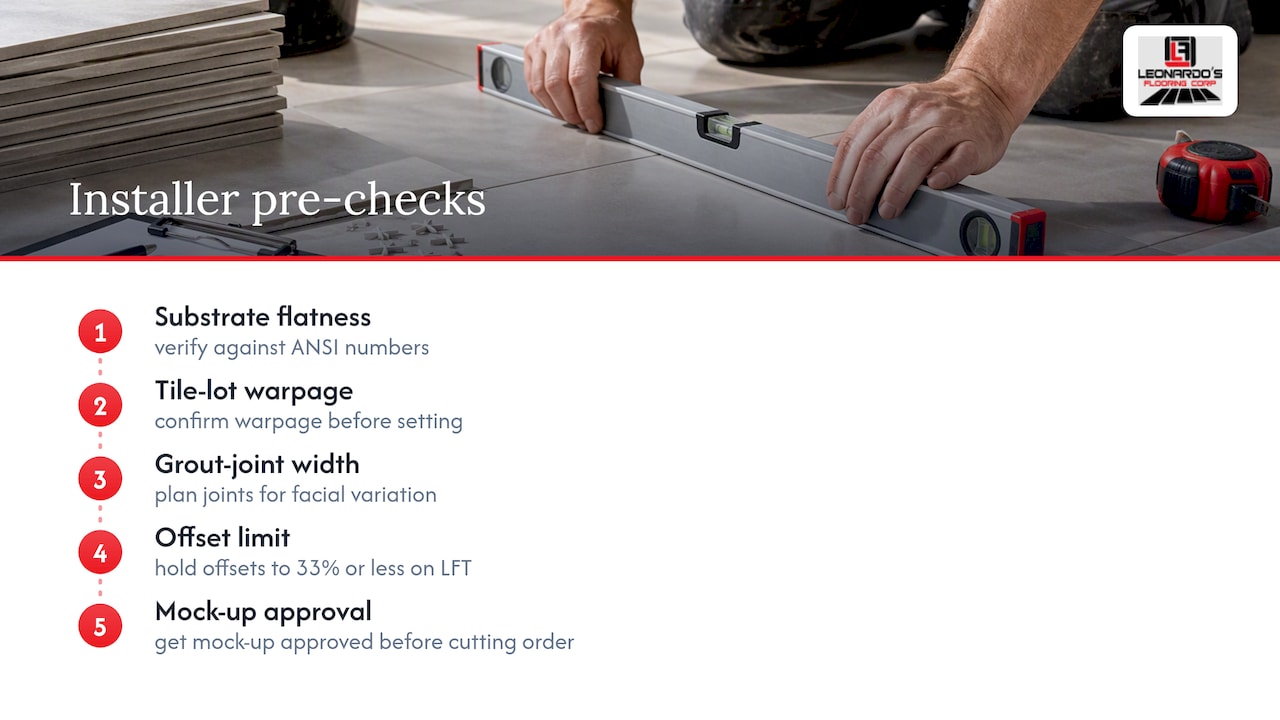
An installer’s field checklist tends to run in the same order every time: verify substrate flatness against the ANSI numbers, confirm the tile lot’s warpage before setting, plan grout joint width around the tile’s facial variation, hold offsets to 33% or less on large-format tile, and get a mock-up approved before cutting a full order of material.
A flooring contractor has handled residential and commercial tile floor installation in the greater Denver area for over 10 years, working from these same standards-based checks on every job rather than treating lippage tolerance as a matter of opinion. Their approach reflects tailoring each project’s layout, substrate prep, and grout planning to the specific tile and space, not a one-size-fits-all install.
Standards matter more than the leveling system you buy
Leveling clips get marketed like they solve lippage on their own, and that’s the most overrated idea in tile installation. They fine-tune edge alignment during setting, but they cannot correct a substrate that fails the ANSI flatness numbers, and no amount of clip tension will fix mortar that wasn’t combed and buttered properly in the first place.
The conventional advice skips straight to buying a leveling system and skims past the substrate check that actually determines whether a floor will lie flat. Homeowners shopping for tile installers should ask what flatness tolerance the substrate will be checked against and whether a mock-up is standard practice, not what leveling clips the crew prefers.
If there’s one number worth memorizing from the ANSI tables, it’s this: 1/32 inch for narrow joints, 1/16 inch for wide ones, plus whatever warpage the tile itself carries. Everything else, from mortar technique to offset limits to lighting at inspection time, exists to keep the finished floor inside that range rather than to chase a number that doesn’t exist in the standards.
— Jim
How Leonardo’s Flooring Corp can help with your tile project
Getting lippage right starts before the first tile is set, with a substrate check, a tile spec that states the facial warpage rating, and a mock-up you can approve in your own lighting. A flooring contractor handles tile floor installation for homes and businesses across the Denver metro, working from these same ANSI and TCNA benchmarks on every job.

Before reaching out, have on hand:
- The tile you’ve chosen, including its size and whether it’s rectified or calibrated.
- Any known issues with your existing subfloor or slab.
- Your expectations for grout joint width and layout pattern.
Browse the full range of flooring services or reach out directly to request a quote on your tile project.
Standards and trade guidance worth reading
- ANSI A108/A118/A136.1 compilation, the baseline for installation workmanship and acceptance.
- TileLetter’s lippage allowance and offset articles, the source for the numeric tolerances cited throughout.
- TCNA Handbook flatness and lippage tables, referenced in NTCA and TileLetter inspection guidance.
Sources
FAQ
How much tile lippage is acceptable?
Under ANSI A108.02, up to 1/32 inch is acceptable for grout joints narrower than 1/4 inch, and up to 1/16 inch is acceptable for joints 1/4 inch or wider. Both figures are added to whatever inherent warpage the tile itself carries, so the practical allowance can be slightly higher depending on the tile batch.
What is the 3/4/5 rule for tiling?
This rule refers to squaring a layout using a 3-4-5 triangle method, not a lippage tolerance, so it isn’t part of the ANSI or TCNA lippage tables covered here. If you’ve seen it linked to lippage numbers, that’s a mix-up with the joint-width and offset guidance discussed above.
What is lippage in tile settings?
Lippage is the height difference between the edges of two adjoining tiles, measured across a joint with a straightedge. Some lippage is expected in every installation because of tile warpage and joint width, which is why ANSI sets numeric allowances rather than requiring a perfectly flush surface.
What is the 1/3 rule for tiles?
This commonly refers to limiting running-bond or brick-pattern offsets to no more than 33% on tiles with a side longer than 15 inches, a rule set out in ANSI A108.02. Offsets closer to 50% pair the most-warped part of one tile against the flattest part of the next, which raises the risk of visible lippage on large-format tile.