
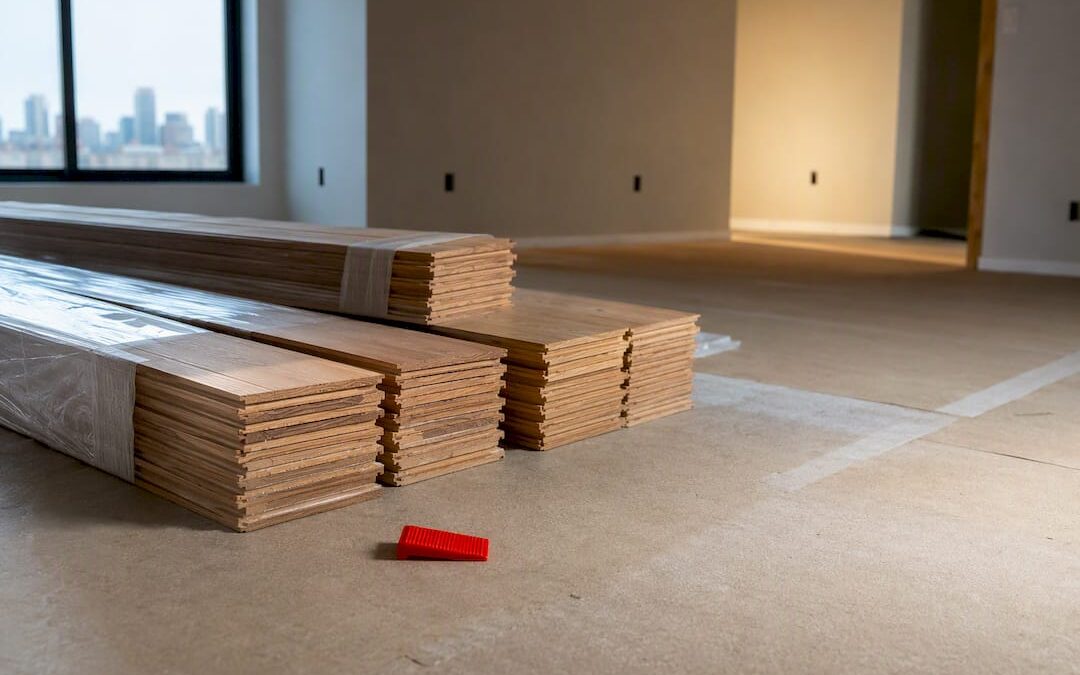
Yes, acclimate your hardwood before installation, unless the manufacturer explicitly says otherwise. Condition the flooring at the home’s normal living temperature and humidity, typically within a comfortable indoor temperature range and moderate relative humidity, and don’t install until the wood’s moisture content matches closely enough to the subfloor’s, with allowable differences varying by plank width and species. Skip this step and you’re gambling on gaps, cupping, or worse.
TL;DR:
- The typical acclimation process is crucial for hardwood to reach moisture content equilibrium, preventing gaps, cupping, or buckling after installation.
- Moisture content differences between wood and subfloor should be within manufacturer-specified tolerances, often 48 to 72 hours, depending on conditions.
- Temperature, humidity swings, plank width, and wood type significantly influence how long acclimation takes and whether adjustments are necessary.
- For concrete slabs or radiant heat systems, moisture mitigation and longer waiting periods are essential before installing wood flooring.
- Professionals should verify moisture levels on-site with proper testing and documentation to avoid warranty issues and ensure long-lasting flooring.
Table of Contents
- What Hardwood Floor Acclimation Actually Does
- Why Skipping Acclimation Wrecks Floors
- The Acclimation Checklist: From Delivery To Install Day
- How To Measure Moisture Content The Right Way
- When The Rules Change: Engineered Wood, Radiant Heat, And Wide Planks
- Fixing Problems Before Installation Day
- What Installers Actually Watch For On The Job
- The One Rule That Actually Matters
- Let Leonardo’s Flooring Corp Handle The Guesswork
- Where To Verify These Guidelines Yourself
- Sources
- FAQ
What Hardwood Floor Acclimation Actually Does
Wood is hygroscopic. It pulls moisture from the air when humidity is high and releases it when the air is dry, constantly chasing a balance point called equilibrium moisture content, or EMC. That balance point shifts with every change in temperature and relative humidity in the room.
This is the entire reason acclimation exists. A board milled in a humid mill yard and shipped to a dry Denver winter is carrying moisture it doesn’t need. Install it right away and it shrinks as it dries out, leaving gaps between boards once your furnace kicks on for the season. The reverse happens in humid climates: boards absorb moisture after installation and swell, pushing against each other with nowhere to go.
The National Wood Flooring Association and most manufacturers write acclimation and testing protocols into their guidelines for exactly this reason. A few things drive how fast wood reaches EMC:
- Species and plank width (wider boards move more and equalize slower)
- Solid versus engineered construction
- Ambient temperature and relative humidity swings at the jobsite
- How the wood was stored and shipped before delivery
Why Skipping Acclimation Wrecks Floors
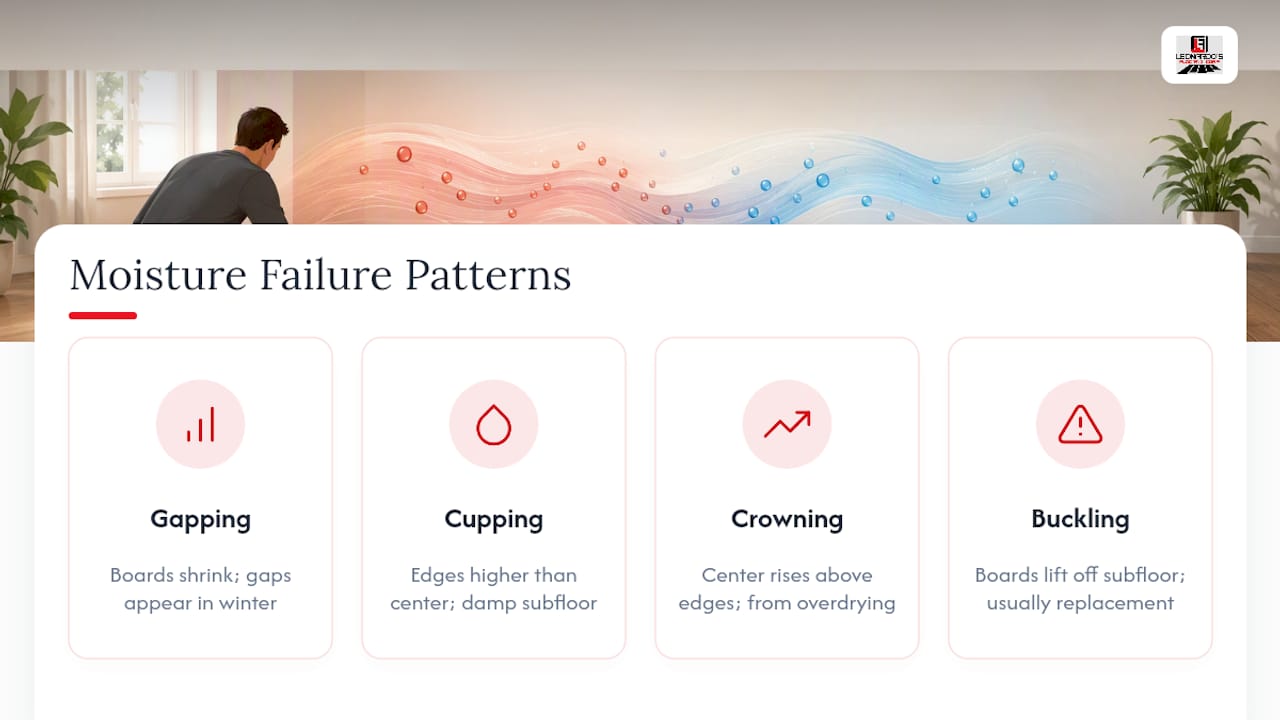
Four failure patterns show up when wood installs at the wrong moisture content, and they don’t always appear on day one.
Gapping happens when boards dry out and shrink after installation, usually showing up the first winter when heating systems drop indoor humidity. Cupping is the opposite: edges rise higher than the board’s center because the bottom absorbed more moisture than the top, often from a damp subfloor. Crowning is cupping’s mirror image, with the center rising above the edges, frequently the result of overdrying a floor that had already cupped and then correcting too aggressively. Buckling is the worst case: boards separate from the subfloor entirely, arching up off the ground.
A quick gut check: if your floor develops visible gaps only in winter and closes up again by summer, that’s normal seasonal movement, not a defect. If gaps or ridges persist year round, moisture content was wrong at installation.
Gapping and mild cupping are often fixable through refinishing. Buckling almost always means replacing boards, sometimes the whole floor, because the wood-to-subfloor bond and structural integrity are compromised. This is exactly the failure pattern covered in more detail in our breakdown of installation mistakes homeowners run into most often.
The Acclimation Checklist: From Delivery To Install Day
Getting this right isn’t complicated, but the order of operations matters; following a proper step-by-step finishing checklist ensures the jobsite is ready for flooring installation. Skip a step and you undermine everything that follows.
- Finish the building envelope first. Windows and exterior doors need to be installed and the structure fully enclosed before flooring arrives on site.
- Run the HVAC system for at least five days before delivery. Permanent heating and cooling, not a construction-site space heater, needs to be operating and holding steady temperature and humidity. Trade guidance is blunt about this: deliver too early and the wood acclimates to construction-phase humidity instead of the conditions it will actually live in.
- Confirm all wet trades are done. Drywall mudding, painting, and concrete work all add moisture to the air. Get those finished and dried out before flooring shows up.
- Place the flooring in the actual installation rooms, not a garage, basement storage area, or covered porch where temperature and humidity aren’t controlled.
- Stack it crosswise in small courses with 1 to 2 inches of space between rows so air circulates around every piece rather than trapping moisture underneath.
- Start daily monitoring immediately. Track room temperature, relative humidity, and wood moisture content, and write the numbers down with dates.
- Compare wood MC to subfloor MC daily until the readings fall inside the manufacturer’s tolerance.
- Don’t install until parity is confirmed. Manufacturer specs vary, but the Preverco acclimation bulletin puts a common guideline at 48 to 72 hours minimum, with the caveat that measured moisture content matters more than the clock.
Pro Tip: Keep your daily readings on a single sheet taped near the stacked flooring. If a moisture or humidity problem shows up later, that log is what proves the floor was installed correctly, and it’s what most manufacturers ask for during a warranty claim.
How To Measure Moisture Content The Right Way
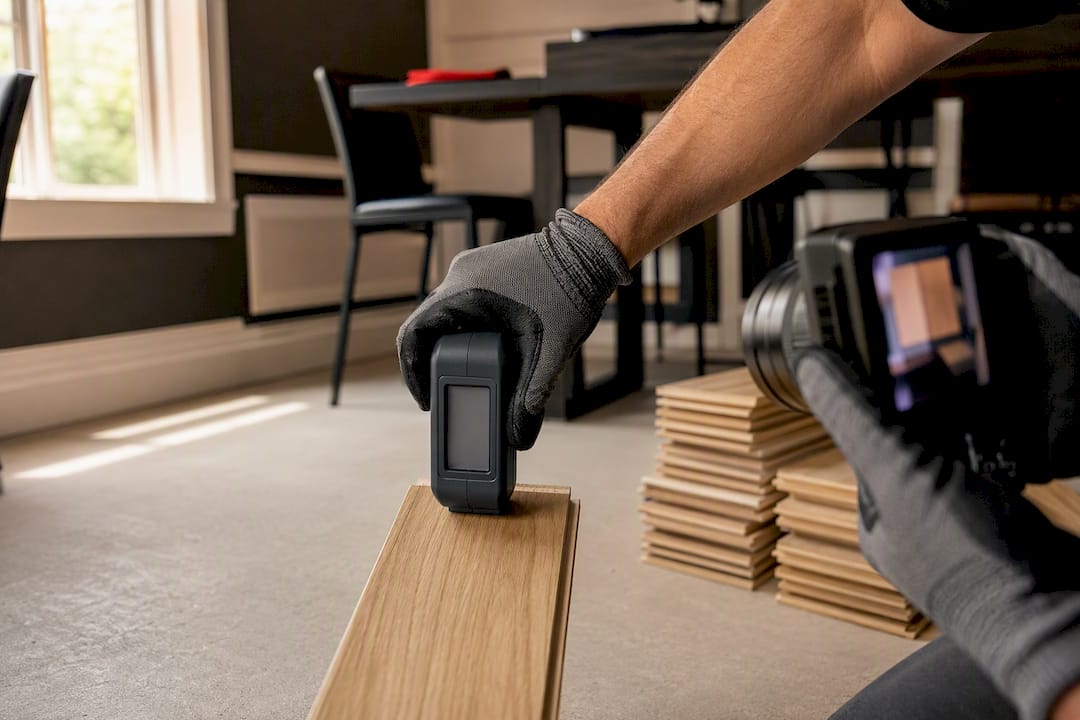
Two meter types handle this job. Pin meters push small probes into the wood and read resistance between them. They’re accurate and let you test below the surface, which matters because moisture often sits deeper in a board than the surface shows. Pinless meters use electromagnetic sensors and don’t puncture the wood, which is faster for scanning lots of boards but can be thrown off by density variations between species.
Testing one or two boards tells you nothing useful. The NWFA’s sampling protocol calls for a baseline of 40 moisture readings per 1,000 square feet of flooring, with additional readings for every extra 100 square feet beyond that. Subfloors get tested too, at a baseline of 20 readings per 1,000 square feet.
| Flooring type | Typical acceptable moisture content difference from subfloor |
|---|---|
| Solid wood, wide plank | Small percent difference |
| Solid wood, narrow plank | Moderate percent difference |
| Engineered hardwood | Moderate percent difference |
Concrete subfloors need their own test entirely. Calcium chloride testing or a concrete relative humidity test tells you whether the slab is dry enough for wood flooring, and NWFA technical guidelines are clear that installing over a known moisture condition in concrete is asking for a callback. If a slab fails that test, moisture mitigation happens before flooring goes down, not after. Our guide on prepping a subfloor walks through what that mitigation actually looks like.
When The Rules Change: Engineered Wood, Radiant Heat, And Wide Planks
Not every installation follows the same timeline, and treating every job identically is where a lot of DIY acclimation attempts go sideways.
- Engineered hardwood has a plywood or composite core that resists moisture-driven movement far better than solid wood, so acclimation windows are often shorter. Still confirm MC before installing; “engineered” isn’t a substitute for testing.
- Radiant heat systems need a longer runway. The heating system should be running and cycled for a period before flooring conditioning even starts, and adhesives used with radiant systems need their own off-gassing time. This is specialized enough that our radiant heat guide is worth reading before you commit to a plank width or install method.
- Wide planks and reclaimed wood move more per percentage point of moisture change than narrow strip flooring, so parity tolerances get stricter and stabilization periods run longer.
- Extreme climate swings, whether Denver’s dry winters or a humid coastal summer, can stretch acclimation well past the 48 to 72 hour guideline. When in doubt, call the manufacturer directly rather than guessing.
Fixing Problems Before Installation Day
A solid jobsite readiness checklist boils down to four things: the building envelope is sealed, permanent HVAC has been running steadily, wet trades are complete, and if there’s a crawlspace, it’s properly encapsulated against ground moisture.
When readings show a problem, you have options before it becomes an installation-day crisis:
- If flooring MC is reading too high, extend HVAC runtime, add a dehumidifier to the room, or delay delivery until conditions stabilize.
- If the wood was stored somewhere uncontrolled, move it into the conditioned installation space and restart your monitoring clock.
- If the subfloor itself is reading wet, especially over concrete, that’s a mitigation job (sealers, moisture barriers, or in some cases a full subfloor prep service) before any wood goes down.
Pro Tip: A cheap digital hygrometer left in the room for a week tells you more than a single moisture-meter reading ever will. Humidity that swings 15 points between morning and night means your HVAC isn’t holding steady yet, and no amount of acclimation time fixes that on its own.
What Installers Actually Watch For On The Job
After extensive experience installing flooring, this company treats moisture readings as essential before proceeding to the next step. Each job involves photo-documented meter readings, dated, prior to installation, providing a record that can protect the homeowner if a warranty question arises.
Some situations are worth handing to a professional outright: concrete slabs with unclear moisture history, radiant heat systems, or any jobsite where humidity keeps bouncing around despite a running HVAC system. Those variables interact in ways that punish guesswork. Attention to detail and tailoring projects to each home’s specific conditions can distinguish a floor that lasts decades from one that requires replacement after a few years.
The One Rule That Actually Matters
If you remember nothing else from this guide, remember this: don’t install until the wood’s moisture content matches the subfloor within manufacturer tolerance, and don’t start that clock until permanent HVAC has been running steadily for several days. Everything else, hour counts, stacking patterns, even the temperature range, exists to serve that one number.
DIY acclimation works fine for straightforward jobs: a dry basement isn’t involved, there’s no radiant heat, and you’re willing to test daily and log it. Once concrete moisture, radiant systems, or unexplained humidity swings enter the picture, hiring a pro stops being a convenience and starts being the cheaper option. And whichever route you take, follow the manufacturer’s written instructions to the letter. Most warranty denials trace back to skipped acclimation steps, not bad wood.
— Jim
Let Leonardo’s Flooring Corp Handle The Guesswork
Professional flooring services can provide homeowners with a documented, tested installation that aims to avoid surprises after move-in. Hardwood projects typically start with subfloor moisture testing and a conditioning plan tailored to the home’s HVAC, plank width, and specific climate exposure, rather than relying on a generic timeline.

A professional inspection covers moisture testing on both the flooring and the subfloor, a written go/no-go decision with dated readings, and mitigation recommendations if the slab or crawlspace needs work first. That’s the same documentation standard the NWFA recommends, applied to your actual house. Whether you’re staring down a concrete slab, a radiant heat system, or just want someone else double-checking your numbers before the crew shows up, request an inspection through our hardwood installation services page and get a straight answer on timeline and cost before anything gets delivered to your door.
Where To Verify These Guidelines Yourself
For homeowners who want the source documents directly: the NWFA Installation Guidelines cover sampling and MC parity rules in full detail, Hardwood Floors Magazine explains jobsite conditioning timing, Preverco publishes manufacturer-specific acclimation targets, and Wagner Meters has a practical video walkthrough of moisture-meter technique.
Sources
- NWFA Installation Guidelines
- Acclimation: Environmental Conditions Before, During, and After the Installation – Hardwood Floors Magazine
- Acclimation of Hardwood Flooring | Preverco
- Wood Floor Acclimation – How Long Does It Take? — Wagner Meters
FAQ
How Long Should Hardwood Flooring Acclimate?
Most manufacturers suggest 48 to 72 hours as a starting guideline, but the actual determining factor is moisture content, not a fixed number of hours. Some jobs need a week or longer if the wood arrived far outside the target range or the site’s humidity is unstable.
What Happens If You Don’t Acclimate Hardwood Floors?
Skipping acclimation leads to gapping, cupping, crowning, or in severe cases buckling, once the wood equalizes to room conditions after installation instead of before it. Gapping and light cupping are often repairable through refinishing, while buckling usually means replacing the affected boards.
Why Does Hardwood Flooring Need To Acclimate At All?
Wood is hygroscopic, meaning it absorbs and releases moisture based on the surrounding temperature and humidity until it reaches a stable equilibrium moisture content. Installing it before that balance point is reached means the wood keeps moving after the floor is down, which is what causes visible gaps and warping.
Does Vinyl Plank Flooring Need To Acclimate Too?
Yes, though the timeline is shorter and less moisture-driven than solid hardwood. Our LVP acclimation guide covers the specific timing for vinyl plank, which typically runs on the order of a few days depending on the product and room temperature.
Can I Skip Acclimation If The Manufacturer Says It’s Not Required?
Some engineered products and pre-finished lines ship already conditioned to a target moisture content, and manufacturers will occasionally waive the requirement if jobsite conditions already match the specified range. Always confirm this in writing from the manufacturer rather than assuming, since skipping the step against instructions can void your warranty.