
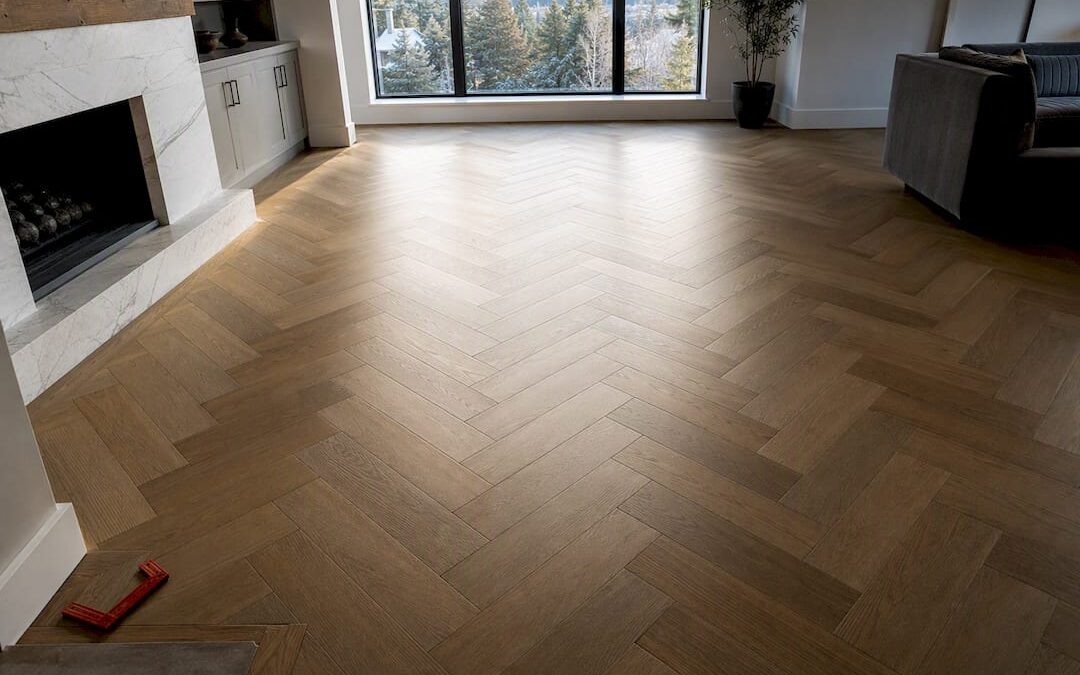
Herringbone hardwood is a high-precision install best left to professionals for solid wood, but experienced DIYers can handle engineered or click-lock herringbone using glue-down or floating methods. The recommended approach for most homes is glue-down engineered herringbone over a flat, moisture-tested concrete or plywood subfloor. The biggest risks are subfloor flatness, layout drift, and errors that stay visible for the life of the floor.
TL;DR:
- Proper flatness testing with a straightedge is crucial, as herringbone requires tighter tolerances than straight-lay to prevent visible drift over time.
- Engineered herringbone is preferred for DIY projects due to its stability and compatibility with glue-down or floating methods, especially over concrete slabs.
- Precise layout planning, including dry-laying and verifying control lines every few rows, is essential to avoid pattern misalignment and costly fixes later.
- Using the correct adhesive and application technique significantly impacts the long-term success of a glue-down installation; manufacturer guidelines must be followed meticulously.
- Professional installation is recommended for solid hardwood herringbone or multi-room projects, with DIY suitable only for small, contained spaces in engineered or LVP options.
Table of Contents
- What Do You Need Before Starting a Herringbone Hardwood Installation?
- How Flat Does a Subfloor Need to Be for Herringbone?
- How Do You Lay Out a Herringbone Floor Before Installing?
- Glue-Down vs. Floating: Which Herringbone Method Fits Your Project?
- What Are the Installation Steps for a Herringbone Floor?
- How Long Does Herringbone Adhesive Take to Cure?
- What Are the Most Common Herringbone Installation Mistakes?
- What Leonardo’s Flooring Corp Looks for on Every Herringbone Job
- What Safety Precautions Should You Take During DIY Installation?
- What Room Conditions Are Best for Herringbone Installation?
- How Do You Clean and Maintain a New Herringbone Floor?
- When Should You Hire a Pro Instead of DIYing Herringbone?
- Ready to Install Herringbone Flooring in Centennial or Denver?
- Sources
- FAQ
What Do You Need Before Starting a Herringbone Hardwood Installation?
Herringbone punishes sloppy prep more than any other flooring pattern. Straight-lay plank hides a slightly wavy subfloor or a stray 1/16-inch gap. Herringbone doesn’t. Every joint sits at a 90-degree angle to the next, so any drift compounds row after row until it’s staring back at you from across the room.
Start with layout tools, not flooring. A laser level and a 10-foot straightedge are non-negotiable for checking subfloor flatness and keeping your control lines true. A chalk line and a framing square handle the geometry; a miter saw with a fine-tooth blade and a jigsaw take care of field cuts and the trickier perimeter angles herringbone always produces.
Full tool and material checklist:
- Laser level and 10-foot straightedge (flatness checks and control lines)
- Chalk line and framing square (layout and 90-degree verification)
- Miter saw with fine-tooth blade, plus a jigsaw for tight cuts
- Moisture meter (pin or pinless, rated for wood and concrete)
- Knee pads and bright work lights (you’ll be down there a while)
- Adhesive trowel in the size your adhesive manufacturer specifies
- 75 to 100 lb floor roller for adhesive transfer
- Painter’s tape (something like Scotch 2080) and weighted sandbags to hold rows in place
- Underlayment matched to your subfloor and adhesive system
On materials, you’re choosing between solid hardwood blocks, engineered herringbone planks, and LVP or laminate herringbone. Engineered products give you a real wood veneer over a stable plywood core, which tolerates seasonal humidity swings far better than solid blocks. That stability is exactly why most installers, professional and DIY alike, lean toward engineered for herringbone. Pair it with a urethane or MS polymer adhesive rated for your specific product. Check the manufacturer’s installation guidelines before buying adhesive, since using the wrong chemistry can void your warranty even if the floor looks fine.
Herringbone wastes more wood than straight-lay because every perimeter row requires an angled cut, and the offcuts rarely work anywhere else in the room.
Pro Tip: Buy your adhesive trowel based on the manufacturer’s spread rate, not the size that “looks about right.” An undersized notch starves the bond and causes hollow spots months later; an oversized one wastes adhesive and can bleed through joints.
How Flat Does a Subfloor Need to Be for Herringbone?
Herringbone demands a tighter tolerance than a straight-lay floor. Where standard hardwood typically allows for 3/16-inch of variation over 10 feet, parquet and herringbone patterns are commonly specified at 1/8 inch over the same 10-foot span. That’s a meaningful difference when you’re trying to keep dozens of small joints reading as straight lines.
Run your 10-foot straightedge across the subfloor in multiple directions, including diagonally, and mark any spot where a gap appears under the edge. Anything outside spec needs grinding down or filling with a leveling compound before you touch a trowel to it.
Pre-installation checklist, in order:
- Measure the room and sketch it, noting doorways, closets, and any fixed obstacles.
- Check subfloor flatness with a straightedge in at least three directions per room.
- Test moisture. Concrete slabs should generally read below the threshold your adhesive manufacturer specifies (commonly in the range of 3 to 4.5% for calcium chloride tests, but always check your product’s data sheet); wood subfloors should read within a few points of the hardwood itself.
- Address deflection. Bouncy or springy floors need a structural underlayment, or in some cases an added layer of plywood, before nail-down or glue-down work begins.
- Acclimate the wood on-site with HVAC running, typically for several days, before opening a single box.
- Recalculate your material order once the room is finalized, building in your waste allowance.
Moisture is where DIYers get burned most often. A concrete slab that looks and feels dry can still be transmitting enough vapor to break down adhesive within a year. If your meter readings sit anywhere near the manufacturer’s limit, don’t guess. Either wait, apply a moisture mitigation product, or bring in someone who deals with slab remediation regularly.
Deflection matters too, particularly in older homes or additions built over crawl spaces. A floor with excessive bounce will eventually telegraph movement into your adhesive bond line, and herringbone shows that failure faster than straight-lay because the joints have less forgiving geometry.
On acclimation timing, plan for a minimum of two to seven days with climate control running, though the exact window depends on your specific product and your regional climate. Homes at higher elevation with dry winter air, which describes much of the Front Range in Colorado, often need the longer end of that range. Wood that’s acclimated too fast can shrink after installation and open gaps along every one of those angled joints.
Herringbone installation usually takes significantly longer than straight-lay flooring of the same size due to more complex layout and additional cuts. Budget your timeline accordingly, whether you’re doing it yourself over a series of weekends or scheduling a contractor.
How Do You Lay Out a Herringbone Floor Before Installing?
Getting the layout right is the single step that determines whether your finished floor looks intentional or slightly off. Rushing this stage to “get to the fun part” is the most common reason DIY herringbone jobs end up with visible drift by the far wall.
Start by finding the room’s true center, then decide which direction the pattern should run. Most installers orient the herringbone toward the main light source, usually the largest window or the entry door, because that’s the angle your eye naturally follows when you walk in.
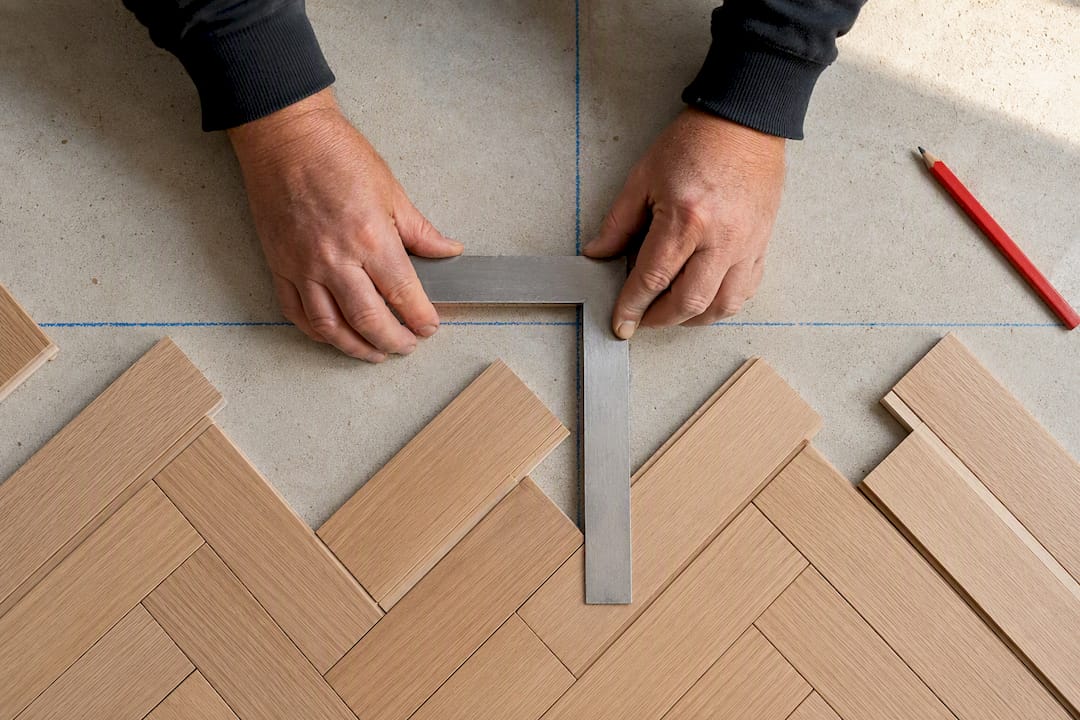
Build two starter pieces, commonly labeled A and B, and lay them together to form the classic herringbone “V.” Measure the diagonal offset between them, often called the X measurement, and use that number to position your control line precisely. This step is where manufacturer installation systems get specific, because the X measurement varies slightly depending on plank width and length.
Layout sequence:
- Snap a primary center line down the room’s longest sightline.
- Assemble A/B starter triangles and measure the X offset to establish your secondary control line.
- Snap the secondary line perpendicular to the first, confirmed square with a framing square.
- Dry-lay the first four to six rows without adhesive to check symmetry against both walls.
- Adjust the centerline if you’re ending with slivers under 2 inches at either perimeter wall.
- Recheck square with a framing square and straightedge before spreading any adhesive.
Dry-laying those first rows is the step most DIYers skip to save time, and it’s the one that saves the most grief. If your planned layout leaves a 1-inch sliver against the fireplace wall, you want to know that now, not three rows into a glued-down floor. Shifting the centerline by an inch or two before adhesive touches the subfloor costs you nothing. Shifting it after costs you a demolition project.
Once you’re happy with the dry layout, check your control lines one more time with the framing square. Industry best practice calls for verifying square every three to six fillets as you work, and that habit starts before the first drop of adhesive goes down, not after.
Glue-Down vs. Floating: Which Herringbone Method Fits Your Project?
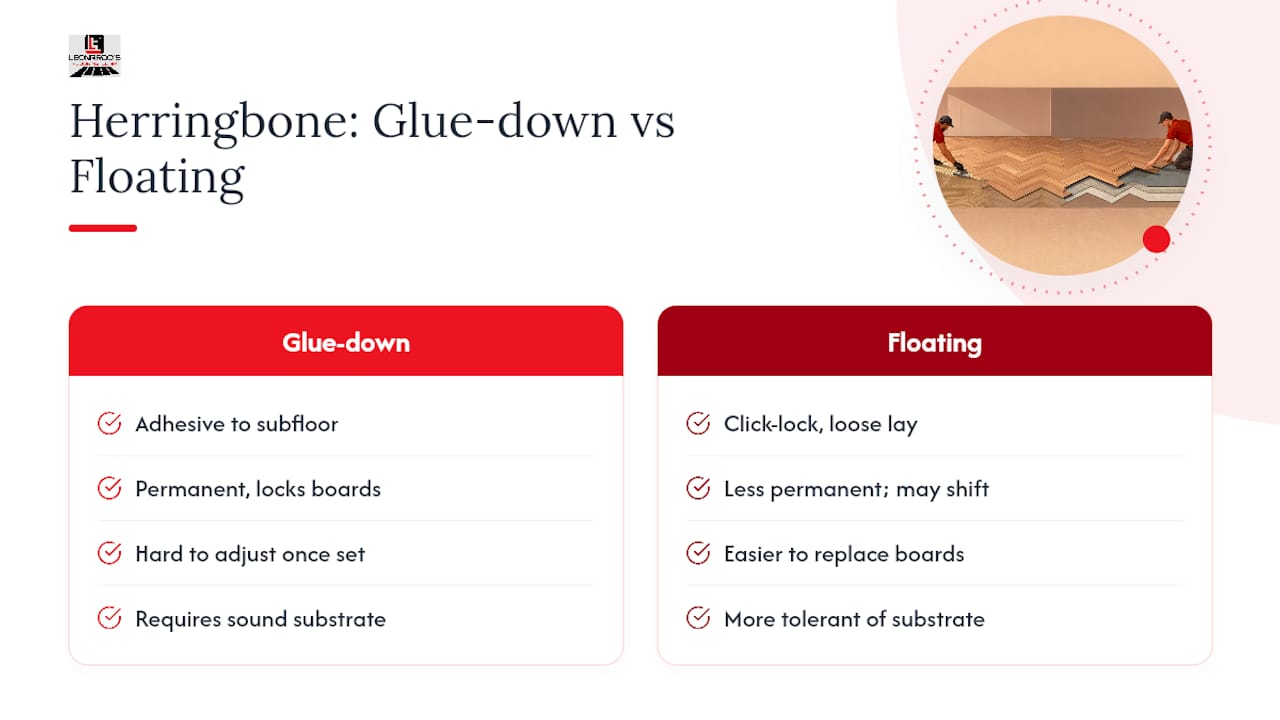
Glue-down is the method most manufacturers and installers recommend for herringbone, and for good reason: it locks every board in place permanently, which matters when a pattern this intricate relies on each piece staying exactly where you put it. Floating, or click-lock, herringbone has carved out a real niche for DIYers, but it comes with tradeoffs worth understanding before you commit a whole room to it.
Why glue-down is the standard for herringbone
Glue-down works for both solid and engineered herringbone over concrete or plywood subfloors, and it’s the only method that gives you the rigidity herringbone patterns benefit from. Because every plank locks into its neighbors through adhesive rather than a mechanical click, there’s no room for the floor to “breathe” in ways that shift individual pieces out of alignment over time.
Urethane and MS polymer adhesives dominate this category. Urethane tends to offer stronger long-term bond strength and better moisture resistance, which makes it the frequent choice for below-grade installs or homes with less predictable humidity. MS polymer adhesives cure faster and produce less odor, a real consideration if you’re working in an occupied home.
Trowel technique matters more than most first-timers expect. You’re not painting the floor with adhesive, you’re building a controlled ridge pattern that the plank presses down into, creating full contact without excess squeeze-out. Hold the trowel at a consistent angle, work in sections small enough to lay planks before the adhesive skins over (usually 15 to 20 minutes depending on temperature and humidity), and never spread more than two or three rows ahead of where you’re actually placing wood.
Glue-down also plays well with radiant heat systems, since the adhesive layer conducts heat more evenly than a floating assembly with air gaps beneath it. If your home has hydronic or electric radiant heat under the floor, glue-down engineered herringbone is generally the safer bet, and it’s worth reviewing how hardwood performs over radiant heat before finalizing your product choice.
When floating herringbone makes sense
Click-lock herringbone, usually in engineered wood or LVP, exists specifically for people who want the pattern without committing to adhesive. It’s genuinely more forgiving for a first-time DIYer: mistakes are easier to correct because you can pull up a section and redo it without solvents or scraping.
The tradeoff is stability. Floating floors rely on the interlocking mechanism and a foam or cork underlayment to stay put, and herringbone’s short board lengths and angled joints put more stress on those locking mechanisms than straight-lay does. Some homeowners report a slightly hollow sound underfoot, particularly in larger rooms, and manufacturer warranties on floating herringbone often carry specific caveats about room size and subfloor flatness that are stricter than their straight-lay warranties.
Not every floating product is rated for herringbone at all. Check your specific manufacturer’s installation instructions before assuming a click-lock system works in this pattern, since some locking profiles simply aren’t engineered for the geometry.
What about nail-down?
Nail-down herringbone is rare, and for a practical reason: the short plank lengths in most herringbone layouts don’t leave enough surface area to nail without risking splits near the ends. Solid hardwood blocks in a parquet-style herringbone can sometimes be nailed or stapled to a plywood subfloor, but even then, many installers still prefer to glue solid blocks for the added stability. If you’re working with a product explicitly rated for nail-down, follow that manufacturer’s fastener schedule to the letter, since spacing errors show up as squeaks later.
Decision checklist
- Substrate: Concrete slab pushes you toward glue-down. A structurally sound plywood subfloor opens up floating as an option.
- Product: Solid hardwood, glue-down only in nearly every case. Engineered, either method depending on manufacturer rating. LVP herringbone, floating is common and well-supported.
- Tools on hand: No trowel or roller? Floating removes that barrier, though it doesn’t remove the layout precision requirement.
- Timeline: Glue-down needs cure time before heavy furniture returns. Floating lets you walk on it almost immediately.
- Risk tolerance: If a mistake needs to be fixable without demolition, floating gives you that safety net. Glue-down doesn’t.
Pro Tip: If you’re torn between methods, call the manufacturer of the exact product you’re buying before you decide. Herringbone-specific installation instructions vary more between brands than straight-lay instructions do, and installing against spec is the fastest way to void a warranty.
What Are the Installation Steps for a Herringbone Floor?
Once your layout is dry-checked and your control lines are snapped, the actual installation follows a repeatable rhythm: spread, place, check, repeat.
- Spread adhesive in a workable zone. Cover only enough area for two to three rows at a time, holding your trowel at the angle specified on the product data sheet to hit the correct spread rate.
- Set the starter triangle on your control line. This first piece anchors everything that follows, so double check it against both the primary and secondary lines before moving on.
- Build alternating A and B rows outward from the starter. Work in one direction first, then return to complete the opposite side, keeping consistent pressure on each board as it seats into the adhesive.
- Check square every three to six fillets. Use your framing square and straightedge to confirm you haven’t drifted, since small errors are cheap to fix now and expensive to fix twenty rows later.
- Tape and weight as needed. Painter’s tape across freshly placed joints, combined with sandbags or weighted boxes, keeps boards from creeping while the adhesive grabs.
- Cut and fit perimeter pieces last. Herringbone’s angled field pattern means every wall produces a mix of angled cuts, so work the border after the field is fully set rather than trying to cut ahead.
- Leave your expansion gap. Maintain the manufacturer’s specified clearance, commonly around 3/8 to 1/2 inch, between the flooring and the wall, then cover it with baseboard or quarter-round trim.
- Roll the floor. Use a 75 to 100 lb roller within the first hour of placement, then again after roughly two hours, to ensure full adhesive transfer across the full back surface of each board.
- Clean squeeze-out immediately. Adhesive that skins over on the surface is far harder to remove than adhesive wiped while wet.
- Handle transitions last. Install metal thresholds or isolation strips at doorways and material changes, allowing room for seasonal wood movement on both sides.
A few things trip people up during this stage. Undercutting door casings so the flooring slides beneath the trim, rather than butting awkwardly against it, gives you a cleaner finished look and is worth the extra ten minutes per doorway. Reinstall base trim only after the floor is fully placed and any final cuts are confirmed, not before.
Practical checks to run as you go:
- Wipe excess adhesive with the solvent your manufacturer recommends, not whatever’s under the sink.
- Confirm your expansion gap at every wall, not just the first one, since rooms are rarely perfectly square.
- Watch for adhesive skinning over in warmer rooms. If it happens, scrape it back and reapply rather than laying wood over a compromised bond.
- Photograph your control lines and early rows before covering them. If a problem surfaces later, those photos help diagnose exactly where drift started.
How Long Does Herringbone Adhesive Take to Cure?
Glue-down herringbone installations achieve initial set quickly, but full cure may require a day or more; rolling the floor within the first few hours aids adhesive transfer.
Post-installation care checklist:
- Restrict foot traffic for 6 to 12 hours after final placement, per most manufacturer instructions.
- Wait a full 24 hours before moving furniture back into the room.
- Walk the entire floor with a flashlight at a low angle to catch gaps, lippage, or surface defects before you call the job done.
- Tap sections lightly with a mallet handle to listen for hollow spots that suggest a bond failure underneath.
- Remove any leftover adhesive residue with the solvent specified by the manufacturer, never an all-purpose cleaner that might discolor the finish.
Prefinished herringbone lets you use the room almost as soon as adhesive cures. Site-finished floors need additional days for sanding, staining, and coating, which stretches your total project timeline but gives you a perfectly level, seamless surface across every joint. Keep indoor humidity in a stable range through this whole window, and place rugs at entryways to catch grit before it works its way into fresh seams.
What Are the Most Common Herringbone Installation Mistakes?
Pattern drift is the mistake that ends most DIY herringbone attempts. It rarely shows up in the first few rows. It shows up ten or fifteen rows in, when someone finally holds a straightedge across the field and realizes the joints have quietly walked off-square.
Catch it early and the fix is manageable: pull the last few rows, re-check your control lines, and rebuild from where things were still true. Catch it late, and you’re looking at pulling up a much larger section of finished flooring.
Troubleshooting guide:
- Hollow spots underfoot: Usually a sign the adhesive didn’t transfer fully. Small areas can sometimes be fixed with an adhesive injection kit; larger areas may need the board pulled and reset.
- Visible gaps at joints: Often traced back to acclimation that was cut short, or a room where humidity swung sharply after installation.
- Perimeter slivers under 2 inches: Rather than fighting a thin sliver, consider a border detail or adjust threshold placement to absorb the discrepancy gracefully.
- Recurring high moisture readings: This isn’t a DIY fix. Persistent moisture points to a subfloor or vapor barrier issue that needs professional remediation before you install anything else.
- Excessive deflection or bounce: Same story. Structural issues need a contractor’s assessment, not another layer of underlayment.
Pro Tip: If you catch drift within the first ten rows, fix it immediately rather than telling yourself you’ll “true it up” further down the room. Herringbone doesn’t self-correct, and every additional row you lay on a crooked foundation makes the eventual fix bigger.
For a broader look at where these jobs go wrong, common hardwood installation mistakes covers issues that apply across pattern types, not just herringbone.
What Leonardo’s Flooring Corp Looks for on Every Herringbone Job
Every herringbone quote Leonardo’s Flooring Corp writes starts with documented moisture readings, not a verbal estimate. We also ask to see photos of any past herringbone or parquet work before taking on a hire, because pattern experience matters more here than general flooring experience does.
What we build into a Centennial-area proposal:
- An itemized subfloor leveling allowance, so you know exactly what remediation costs before work starts.
- A realistic waste percentage based on your room’s dimensions and cut complexity, not a flat industry average.
- Clear finish options, prefinished versus site-finished, with the timeline difference spelled out.
Centennial and the broader Denver metro run cold, dry winters that pull moisture out of both hardwood and the air inside a home fast. That means acclimation in winter months often needs the longer end of the recommended window, and scheduling around big humidity swings, say installing right before a family arrives for the holidays and cranks the heat, matters more here than in milder climates.
With over 10 years serving the Denver area and 125+ five-star reviews, we’ve built our proposal process around avoiding the surprises that turn a herringbone project into a headache. Full details on service areas and offerings sit on our services page.
What Safety Precautions Should You Take During DIY Installation?
Herringbone installation involves more kneeling, cutting, and chemical exposure than a standard plank floor, simply because of the volume of angled cuts and adhesive coverage involved.
Wear knee pads from the first hour, not just when your knees start complaining. You’ll spend far more cumulative time on the floor with herringbone than with straight-lay, and cheap foam pads pay for themselves in a single weekend.
Ventilate the room continuously while working with urethane or MS polymer adhesives. Open windows, run a fan, and take breaks outside the room if you start noticing a headache or throat irritation. Read the adhesive’s safety data sheet before opening the container, and keep a respirator rated for organic vapors on hand if you’re working in a room without good airflow.
Miter saws and jigsaws are the two tools most likely to cause an injury on a project like this, mainly because herringbone’s constant angled cuts tempt people into rushing repetitive motions. Keep your fingers well clear of the blade path, use a push stick or clamp for small pieces, and never fully trust a piece that’s too small to hold safely with both hands away from the blade.
Eye protection stays on for the entire cutting process, not just the “big” cuts. Small offcuts kick up just as easily as large ones. If you’re working with an adhesive that requires a solvent for cleanup, keep that solvent’s container closed except when actively in use, and never mix cleaning chemicals without checking compatibility first.
Finally, watch your back. Setting boards at floor level for hours invites bad lifting habits. Keep adhesive buckets and material stacks at a height that doesn’t force repeated bending, and take standing breaks every thirty minutes or so.
What Room Conditions Are Best for Herringbone Installation?
Wood flooring performs best when the room it’s installed in mimics the conditions it will live in long term, which is why acclimation and post-install climate control both matter as much as the installation itself.
During installation, aim to keep the room between 60 and 80 degrees Fahrenheit with relative humidity in the 30% to 50% range, running for at least a few days before work begins and continuing through the entire install. This range keeps the wood’s moisture content stable while the adhesive cures and the boards settle into their final positions.
Avoid installing during an active HVAC transition, such as the first week the furnace kicks on for the season or right after a swamp cooler gets shut down for winter. Wood that acclimates in one humidity range and then experiences a sudden shift right after installation is far more likely to gap or cup at the joints, and herringbone shows both problems faster than a straight-lay floor because of its higher joint density.
After installation, hold that same humidity range as closely as you can year-round. A whole-home humidifier is worth considering in dry climates, particularly through winter, when indoor humidity can drop into the teens without one. Avoid extremes in either direction: too much humidity risks cupping, too little risks shrinkage gaps that open right along your control lines.
Direct sunlight through large windows can also fade or slightly warp boards nearest the glass over time, so UV-filtering window film or window treatments are worth considering in rooms with a strong southern exposure.
How Do You Clean and Maintain a New Herringbone Floor?
The first thirty days set the tone for how well a herringbone floor ages, since the adhesive is still fully curing and the wood is still settling into its final moisture equilibrium.
Start with a dry microfiber dust mop daily for the first week, avoiding any wet mopping until the finish has fully cured, which your installer or the finish manufacturer can confirm. Vacuum with a hard-floor attachment, never a beater-bar brush designed for carpet, since that can scratch a fresh finish.
Ongoing maintenance sequence:
- Dust mop or vacuum weekly to remove grit before it grinds into the finish underfoot.
- Clean spills immediately with a dry or barely damp cloth, since standing liquid finds its way into joints faster on a pattern floor.
- Use a hardwood-specific cleaner recommended by your finish manufacturer, applied lightly, never poured directly onto the floor.
- Place walk-off mats at every exterior entry to catch grit and moisture before it reaches the herringbone field.
- Add felt pads under furniture legs and check them every few months, since herringbone’s short board lengths mean scratches show against multiple adjacent joints instead of one long plank.
- Recheck indoor humidity seasonally, adjusting a humidifier or dehumidifier as needed to stay in that 30% to 50% range.
- Schedule a professional recoat every few years for site-finished floors, following your finish manufacturer’s specific recommendation.
Avoid steam mops entirely. The heat and moisture they introduce work directly against the humidity control you worked so hard to establish during installation, and they can compromise adhesive bonds over time.
When Should You Hire a Pro Instead of DIYing Herringbone?
Choose a professional for solid hardwood herringbone or any multi-room job, especially when coordinating complex trades like those covered in basement finishing services in BC, Alberta & Saskatchewan. DIY is realistic for click-lock engineered or LVP herringbone in a single, contained room. Invest in professional installation for focal spaces like a foyer, dining room, or main living area, where mistakes are seen daily; save DIY ambition for lower-visibility rooms like a bedroom or den. Before hiring, ask for photos of completed herringbone work, references from similar jobs, a written flatness report, and an itemized remediation estimate.
— Jim
Ready to Install Herringbone Flooring in Centennial or Denver?
If you’ve read this far and you’re leaning toward “call someone,” you’re not alone. Herringbone is one of the few flooring patterns where the layout math and subfloor tolerances genuinely outweigh what most weekend DIYers want to take on, and Our highlighted herringbone proposal process is built around removing that guesswork entirely.

A typical Leonardo’s herringbone proposal for a Centennial or Denver-metro home includes a full subfloor inspection, documented moisture testing, a clear leveling allowance if your subfloor needs remediation, a waste allowance based on your actual room dimensions, and finish options, laid out with realistic timelines attached. No vague line items, no surprise change orders once work has already started.
To get an accurate on-site estimate, have your room measurements ready, take a few photos of the space, note whether your HVAC system is running consistently, and flag anything that might affect job access, like tight stairwells or furniture that needs moving. From there, our team walks the space, checks flatness and moisture directly, and builds a proposal around what your home actually needs.
Ready to see what a herringbone floor looks like in your own home? Request an on-site estimate through our hardwood floor installation page and get a proposal built around your Denver-area home, not a generic template.
Sources
A few technical documents are worth bookmarking if you’re planning this project yourself:
- Herringbone installation supplement — Pioneer Millworks (2025)
- Traditional Herringbone Installation System — Floorexpert (2026)
- Herringbone flooring installation guide — SKOV (2025)
- Herringbone vs straight lay hardwood: DMV installer cost guide — Potomac Floors
Use the Floorexpert and Shaw documents for adhesive selection and flatness remediation questions, and the Potomac Floors guide when you’re trying to sanity-check a quote against typical market pricing.
FAQ
How Much Does It Cost to Install Herringbone Hardwood Floors?
Herringbone typically runs roughly $3.50 to $5.50 per square foot more than straight-lay hardwood due to added labor and layout time, with leveling adding another $1.50 to $3.50 per square foot when the subfloor needs remediation. Itemized quotes reflect specific room and subfloor conditions rather than a flat rate.
How Should Herringbone Flooring Be Laid?
Herringbone is laid outward from a center starter triangle established with an X measurement offset, using control lines snapped perpendicular to each other and verified with a framing square every three to six fillets as rows are added.
Is Herringbone Flooring More Difficult to Install Than Straight-Lay?
Yes. Herringbone requires tighter subfloor flatness tolerances, roughly 30% to 50% more installation time, and 10% to 15% more material waste than straight-lay hardwood, mainly because of the layout precision and angled perimeter cuts involved.
Is Herringbone Hard to Install for a First-Time DIYer?
It’s demanding, not impossible. Solid hardwood herringbone is generally best left to a professional because errors as small as 1/16 inch become visually obvious across a full room, but engineered or click-lock herringbone in a single, contained space is realistic for an experienced DIYer who follows manufacturer instructions closely.