
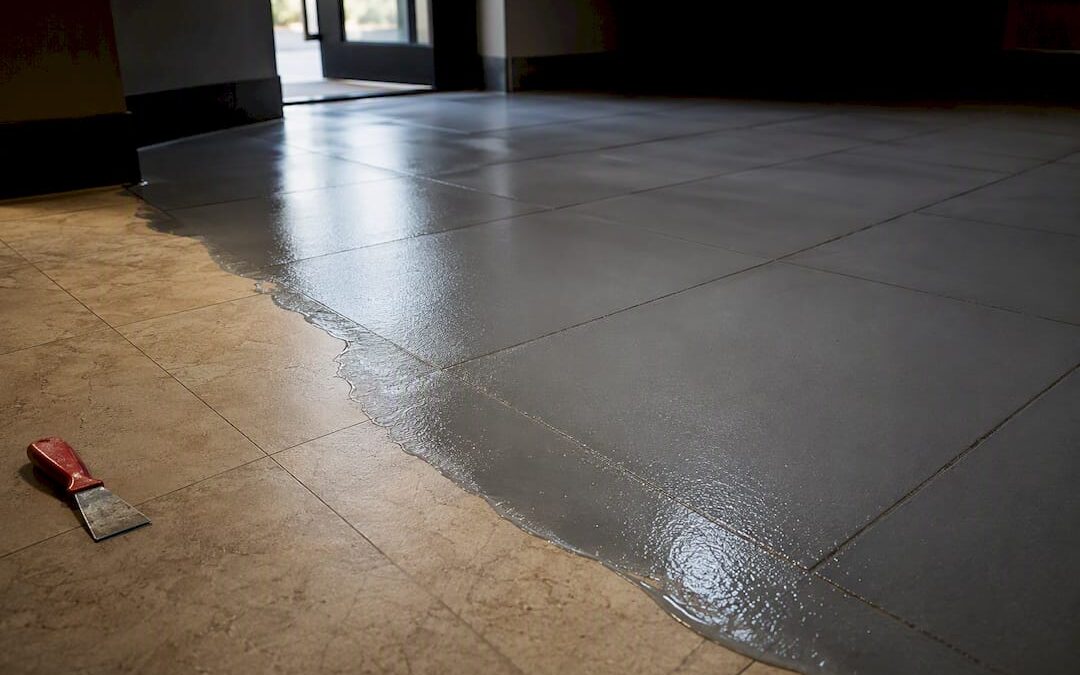
Yes, you can apply epoxy over tile floor surfaces, but only when three conditions hold: the tiles are firmly bonded with no hollow spots, the surface can be ground and cleaned to bare, abraded ceramic or porcelain, and there’s no moisture pushing up from below. Skip any one of those and you’re looking at peeling, blistering, or a coating that lifts within a year. The real work isn’t the epoxy. It’s the prep, and sometimes the honest answer is to pull the tile instead.
TL;DR:
- Proper epoxy adhesion requires thorough grinding, cleaning, and moisture testing; skipping these steps leads to peeling or blistering within a year.
- Large, unglazed, or matte tiles with wide grout lines bond better than glazed porcelain or small mosaics, which need extra prep work like diamond grinding.
- If tiles are loose, cracked, heavily stained, or moisture is present, removing tiles and coating the concrete is more durable and cost-effective long-term.
- Critical tests include the tap test, water wet-out test, moisture patch test, and grout clearance check; failing any indicates the need for tile repair or replacement.
- Professional evaluation should include an on-site inspection, moisture readings, and a detailed prep plan to avoid common failures and ensure lasting results.
Table of Contents
- When Epoxy Over Tile Makes Sense (And When It Doesn’t)
- Pros and Cons of Coating Tile With Epoxy
- What Tests Tell You Before You Commit
- How to Prep and Apply Epoxy Over Tile, Step by Step
- Choosing the Right Primer, Epoxy, and Topcoat System
- What Epoxy Over Tile Actually Costs and How Long It Takes
- When You Should Call a Professional Instead of DIYing It
- Why Most Epoxy-Over-Tile Failures Are Preventable, Not Inevitable
- Get an On-Site Epoxy Assessment From Leonardo’s Flooring Corp
- Sources
When Epoxy Over Tile Makes Sense (And When It Doesn’t)
Tile candidates matter more than most homeowners expect. Large format tiles with wide, well-filled grout lines are easier to work with than a checkerboard of small mosaic pieces, because fewer seams mean fewer places for the coating to telegraph or crack. Unglazed quarry tile and matte porcelain take an epoxy bond more readily than shiny glazed tile, which resists adhesion by design. Glazed porcelain isn’t off the table, but it demands aggressive diamond grinding and a dedicated bonding primer to get any real mechanical grip.
The alternative path, tearing out the tile and coating bare concrete, becomes the smarter move under a few specific conditions:
- Widespread drummy or loose tiles across more than a small fraction of the floor
- Multiple cracked tiles scattered through high-traffic areas, not just one or two
- Grout lines packed with years of grease, sealant, or deep biological staining that won’t lift with cleaning
- Confirmed moisture coming up through the slab
One flooring resource puts it plainly: when tiles are loose, cracked, or the floor has significant lippage, removing tile and coating the concrete is often the more durable, long-term solution. That’s not a scare tactic. It’s math. Grinding down every glazed tile, releveling a dozen grout channels, and patching failed spots can eat up the same labor hours as demolition, minus the cleaner result you get from a flat slab. An on-site inspection settles this fast. A contractor walking the floor with a hammer and a moisture meter will know within twenty minutes which category your tile falls into.
Pros and Cons of Coating Tile With Epoxy
The appeal is obvious once you’ve priced out a tile demolition job. Coating over existing tile skips the jackhammer work, the dumpster rental, and the days of dust that come with ripping up a floor. Garages and basements are the classic win: the tile is usually utility-grade, nobody cares about matching a design aesthetic, and an epoxy layer turns a dated, grubby surface into something seamless and easy to hose down.
Benefits worth weighing:
- Faster turnaround than full demolition and re-tile, often days instead of weeks
- A seamless, easy-to-clean surface with no grout lines to scrub
- Lower material cost than removal, hauling, and new tile installation
- Works well in basements, garages, and utility rooms where floor height gain is not a concern
Drawbacks that catch people off guard:
- Adhesion failure on glazed surfaces if grinding was rushed or skipped, where the underside of peeled epoxy shows a glossy, untouched tile face
- Moisture blistering when vapor drive wasn’t tested before coating
- Grout lines “telegraphing” or tenting through the new surface, especially with movement in the substrate
- Added floor height that can crowd door swings and transition strips
Kitchens and bathrooms with lots of movement, plumbing penetrations, or existing moisture issues tend to be the losing bets. Garages, basements, and utility spaces with sound, unglazed tile tend to be the wins.
What Tests Tell You Before You Commit
Four checks, done in order, tell you almost everything about whether a tile floor is a candidate. Skip them and you’re gambling with a coating that costs real money to redo.
- Tap test. Walk the entire floor tapping each tile with a hammer handle or a hard mallet. A solid tile gives a sharp, high-pitched knock. A hollow or “drummy” sound means the tile has debonded from the substrate below. More than a handful of drummy tiles in one area signals a bigger substrate problem, not an isolated fix.
- Water wet-out test. After degreasing and rinsing, pour water on a section of tile. If it beads up rather than spreading into a flat sheet, glaze or oily residue is still present and the epoxy won’t grip. This same test doubles as your confirmation that grinding removed the glaze properly, since a proper water wet-out is the sign that abrasion was thorough enough.
- Moisture patch test. Tape a clear polyethylene sheet over a section of tile and seal the edges. Leave it 72 hours. Condensation under the plastic or a darkened tile surface points to vapor drive coming up through the slab. If results are borderline, a calcium chloride test or an in situ relative humidity probe can give a more precise reading before you commit.
- Grout depth and clearance check. Measure how deep the grout lines run and check for lippage between tiles. Then check door swings and transition heights against how much thickness a skim coat or slurry fill will add.
Pro Tip: If even one section fails the tap test badly, don’t try to “epoxy over” the problem. Patch that section back to solid substrate first, or reconsider the whole plan. A coating is only as strong as what’s underneath it.
How to Prep and Apply Epoxy Over Tile, Step by Step
This is the part that actually determines whether the floor lasts five years or five months. The coating itself is almost the easy part.
- Deep clean the entire floor. Use a degreaser strong enough to cut through years of sealed-in grime, mop it out, and rinse repeatedly until water sheets flat across the surface instead of beading. Let it dry completely, ideally 24 hours, before touching a grinder.
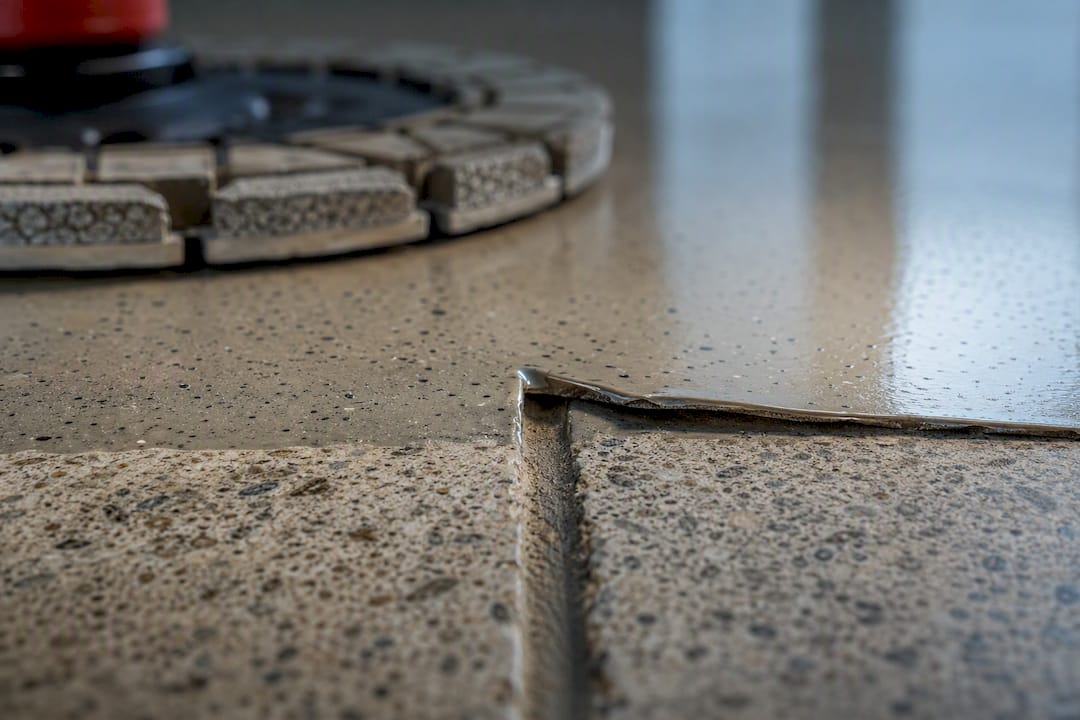
- Grind the glaze off. This is non-negotiable on glazed ceramic or porcelain. Diamond grinding tooling in the 30 to 60 grit range, run with a vacuum shroud to control dust, is the professional method for creating mechanical tooth on glazed surfaces; chemical deglossers and acid etching simply don’t cut deep enough into dense porcelain to matter. Rent a walk-behind grinder for anything larger than a small bathroom; a handheld grinder will take forever on a full garage floor.
- Repair or replace damaged tiles. Re-adhere any tile that failed the tap test with a compatible thin-set, or cut it out and patch with a matching-height filler. If a significant portion of the floor failed, stop and reconsider full removal instead.
- Fill and level grout lines. An epoxy slurry works for shallow grout; a cementitious skim coat handles wider or deeper channels and gives you a flatter final surface. Either option adds thickness, and that added buildup can shift how doors and transition strips fit, so measure clearances before you commit to a full skim coat.
- Confirm moisture status. If your polyethylene test showed condensation, stop and address the moisture source, or move to a moisture-tolerant primer system built for that purpose. Don’t coat over a floor you know is venting vapor.
- Apply bonding primer. Roll or squeegee a primer designed for dense, non-porous substrates. This step is what actually locks the epoxy to the tile mechanically and chemically.
- Mix and apply the epoxy base coats. Work in batches sized to the product’s pot life, usually 30 to 45 minutes, and apply with a squeegee followed by a back-roll to even out thickness. Broadcast decorative flake here if you want texture and slip resistance.
- Apply the topcoat and cure. A polyurethane or polyaspartic topcoat locks in the flake and adds UV and abrasion resistance. Cure times vary by product, but expect 24 hours before light foot traffic and several days before heavy loads or furniture.
Pro Tip: Keep the room between 65 and 85 degrees Fahrenheit with low humidity during application. Epoxy that goes down too cold cures slowly and unevenly; too hot, and you’ll lose working time before you finish rolling out a section.
Choosing the Right Primer, Epoxy, and Topcoat System
Material choice isn’t a minor detail on a tile overlay. It’s the difference between a coating that grips and one that lifts at the first temperature swing.
- 100% solids epoxy is the standard recommendation for tile jobs because it builds thicker per coat and resists the shrinkage that thinner, solvent-reduced formulas can suffer during cure.
- Bonding primers designed for dense or vitrified porcelain give the epoxy something to physically key into. Pairing a 100% solids epoxy with the right bonding primer and topcoat is what separates a floor that lasts from one that doesn’t.
- Polyaspartic and polyurethane topcoats add scratch and UV resistance, which matters if the space gets sunlight or heavy vehicle traffic. Decorative flake or metallic pigment can go under either topcoat for a custom look.
- Ventilation and PPE aren’t optional extras. Grinding kicks up silica dust that needs a respirator rated for it, and epoxy fumes during mixing and application call for cross ventilation or a respirator rated for organic vapors, especially in an enclosed basement.
Readers weighing finish options in more depth can find a broader rundown in this epoxy finishes overview.
What Epoxy Over Tile Actually Costs and How Long It Takes
DIY material costs for a basic 100% solids epoxy kit with primer run modestly per square foot, but that number climbs fast once you add flake, a polyaspartic topcoat, or extra primer for glazed tile. Professional installation over existing tile typically costs more per square foot than a straightforward concrete coating job, because the grinding and grout repair add labor hours a bare slab never requires.
What drives the variance:
- Grinder rental (roughly a day or weekend rate) plus a shop vacuum rated for fine dust
- Hours spent on tile repair or replacement before any coating touches the floor
- How much grout leveling or skim coating the floor needs
- Room size and how many corners, drains, or transitions complicate the layout
Timeline expectations:
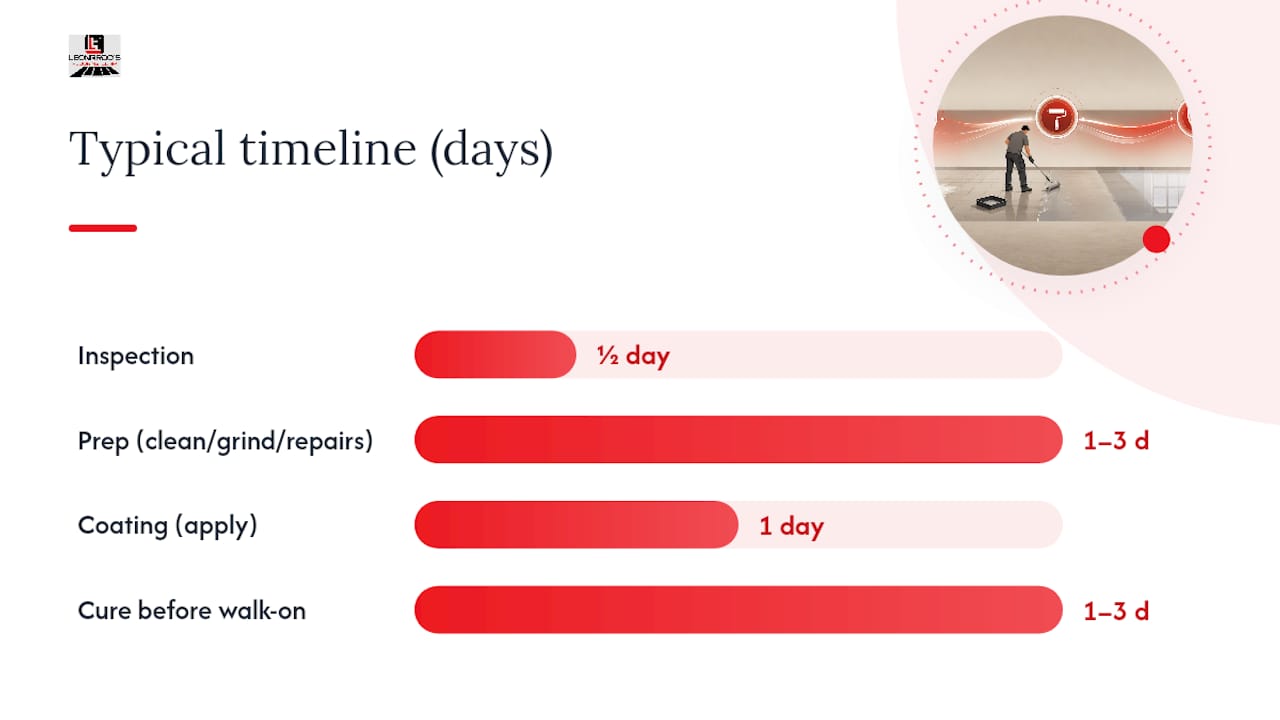
- Inspection and testing: half a day, including the tap test and moisture patch setup
- Prep (cleaning, grinding, repairs, leveling): 1 to 3 days depending on floor condition
- Coating and cure: 1 day to apply, 1 to 3 days before walking on it, longer before heavy furniture
A small bathroom or laundry room moves through this timeline in under a week. A full garage with drummy tiles and grout repair can stretch to two weeks from first inspection to walk-on.
When You Should Call a Professional Instead of DIYing It
Some jobs are genuinely DIY-friendly. Others aren’t, and knowing the difference saves you from a redo.
Hire a pro when moisture is a live concern, when you’re dealing with dense vitrified porcelain that needs serious grinding power, when the square footage is large enough that a rental grinder becomes a multi-day commitment, or when a warranty on the finished floor actually matters to you.
Questions worth asking any bidder:
- Can they show photos or references from a similar tile overlay job, not just new-slab work?
- What moisture testing method do they use, and will they give you the actual readings?
- What grinding equipment do they run, and does it include dust containment?
- What does the warranty cover, and what voids it?
A solid quote should include an inspection report, documented moisture readings, a written prep plan, the specific materials being used, and a realistic cure schedule. Anything vaguer than that is a red flag.
Why Most Epoxy-Over-Tile Failures Are Preventable, Not Inevitable
Here’s what gets lost in most of the advice floating around online: epoxy over tile has a reputation problem it doesn’t fully deserve. People blame the material when the real culprit is almost always a skipped step, usually the grinding, sometimes the moisture check nobody bothered to run.
I’d go further than most guides will. The tap test and the water wet-out test take maybe an hour combined, and they eliminate the two most common failure modes before a drop of primer goes down. Skipping them to save an afternoon is the single worst trade a homeowner makes on this kind of project. The second worst is assuming a chemical deglosser can replace mechanical grinding on glazed tile. It can’t. Diamond tooling opens up a surface at a level a liquid product simply doesn’t reach, and every failure story involving peeling epoxy traces back to that shortcut more often than any other cause.
Where I’ll push back on the conventional wisdom a bit: not every “problem” tile floor needs full removal. The instinct to demolish first and ask questions later ignores how much a targeted repair, replacing a dozen bad tiles instead of the whole floor, can save without compromising the final result. The skill is in knowing which floor is which, and that only comes from actually inspecting it rather than guessing from a photo.
— Jim
Get an On-Site Epoxy Assessment From Leonardo’s Flooring Corp
Professional flooring contractors often have extensive experience working on floors throughout their local area, and epoxy coating is a common service offered on jobs where a homeowner is deciding between coating existing tile and starting over. Every epoxy quote should start with an actual walk of the floor, a tap test on the tile, and a moisture reading rather than a guess based on square footage alone.
What sets that process apart from a generic bid is honesty about what the floor actually needs. If your tile is sound and the moisture readings come back clean, the contractor can walk you through grinding, priming, and coating with a clear timeline. If the tile is failing in more places than it’s worth patching, the contractor should inform you, instead of coating over a problem that’s going to resurface in a year.
If you’re weighing epoxy over tile for a Denver-area property, start with our epoxy floor coating services page and request an on-site estimate. You’ll get a written scope, actual moisture numbers, and a real answer on whether coating or removal makes sense for your floor.
Sources
For deeper technical detail on the prep work and material choices covered here, the D and G Flooring guide to epoxy over tile covers grinding standards and failure modes in more depth. The Epoxy AZ breakdown of coating systems goes further into primer and topcoat selection. Real World Epoxies offers a candid look at when removal beats coating, and Homevison’s overview covers common DIY missteps around ventilation and cure timing. For readers weighing efflorescence issues in grout before coating, this guide on removing efflorescence is worth a read. Homeowners comparing coating against a full retile can also check what a bathroom retile actually costs.
- Epoxy Flooring Over Tiles: Pros, Cons, and Buying Guide – D and G Flooring
- Epoxy Floor Coating Over Tile: Can You Really Do It Without Removing Tile?
- Epoxy Flooring Over Tiles | Real World Epoxies