
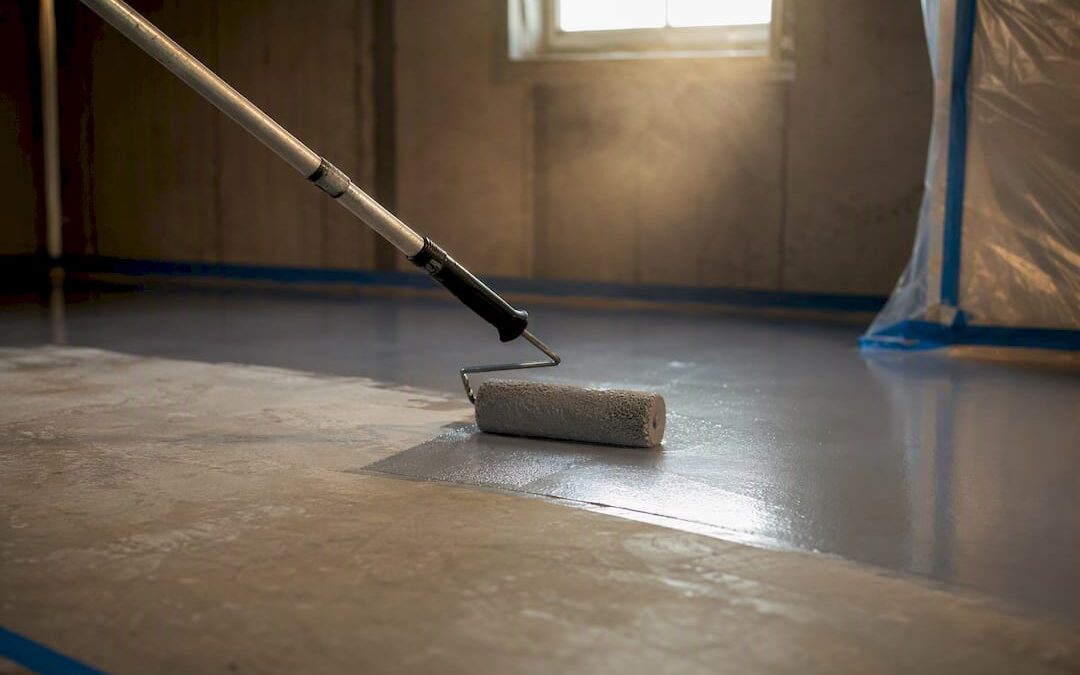
Epoxy is a solid choice for a basement floor if the slab tests dry, or if you’re willing to pay for moisture mitigation when it doesn’t. That single condition decides almost everything else: cost, product type, whether you can DIY it, and how long the floor lasts before it peels. Skip the moisture test and even a perfect application can fail within a year.
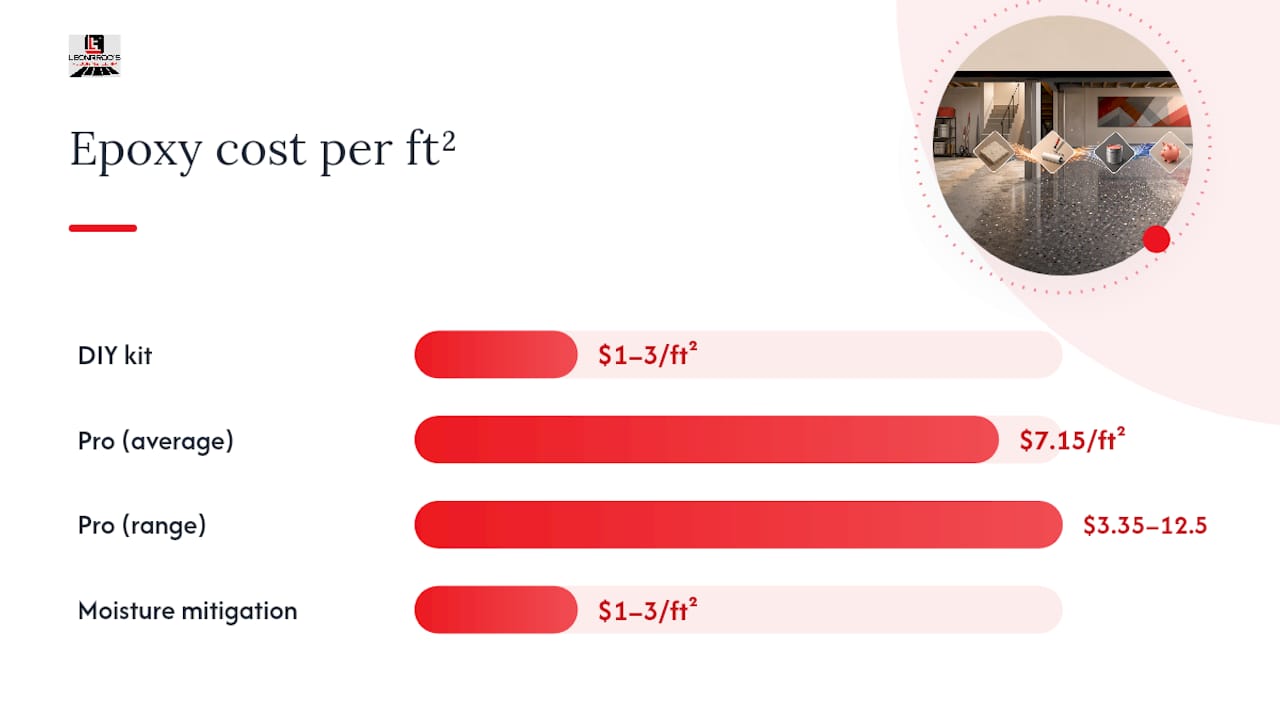
Cost splits into two tiers. A DIY kit typically runs $1 to $3 per square foot in materials, so a 1,000 square foot basement might cost $1,500 to $3,000 in product alone. Professional installation averages $7.15 per square foot, with a range of $3.35 to $12.50 depending on how much prep and mitigation the slab needs.
Before you buy anything, do two things this weekend:
- Run a plastic-sheet moisture test. Tape an 18 by 18 inch sheet of clear plastic to the slab, seal all four edges, and check it after 24 to 48 hours. Condensation or darkened concrete underneath means moisture is moving through the slab, and standard epoxy is the wrong product until that’s addressed, according to MyNextHouseProject’s testing guidance.
- Check for old sealers or coatings. Splash a little water on the concrete. If it beads up instead of soaking in, something is already sealing the surface, and it needs to come off before any epoxy will bond.
Pro Tip: If your basement has ever flooded, smelled musty after rain, or shown white powdery efflorescence on the walls, assume you have a moisture problem until a real test proves otherwise. Visual guessing gets people burned.
Key Takeaways
Basement epoxy flooring succeeds when moisture testing passes or gets properly mitigated, and fails almost every time that step gets skipped.
| Point | Details |
|---|---|
| Moisture test first, always | Run a plastic-sheet test before buying materials; escalate to calcium chloride or RH probe testing if results are borderline. |
| Budget realistically | Expect $1 to $3 per square foot in DIY materials versus a $7.15 per square foot professional average. |
| Grind, don’t etch | Diamond grinding to the right concrete surface profile outperforms acid etching for long-term adhesion. |
| Match product to conditions | Reserve standard epoxy for dry slabs; require ASTM F3010-compliant systems when RH or MVER readings run high. |
| Know your DIY limit | Handle a dry, low-traffic basement yourself; hire a professional like Leonardo’s Flooring Corp when moisture mitigation, cracks, or a finished living space raise the stakes. |
Table of Contents
- Basement Epoxy Flooring Pros and Cons
- How Much Does Epoxy Basement Flooring Cost?
- Which Type of Epoxy Works Best for Basements?
- What Moisture Testing and Prep Does an Epoxy Floor Need?
- Can You Install Epoxy Flooring Yourself?
- Why Do Epoxy Floors Peel or Fail, and How Do You Maintain Them?
- When Does Hiring a Professional Installer Make More Sense?
- What I’d Tell a Friend Before They Buy Epoxy
- Get Your Basement Epoxy Floor Done Right the First Time
- Sources
Basement Epoxy Flooring Pros and Cons
Epoxy earns its popularity in basements for good reason, but below-grade concrete throws problems at a coating that a garage or a retail floor never sees. Weighing both sides honestly saves you from a floor that looks great in July and lifts at the seams by February.
What epoxy does well down there
A properly cured epoxy floor coating turns dusty, porous concrete into a single seamless surface that wipes clean and shrugs off spills, oil, road salt, and the general abuse of a basement workshop or gym. It’s genuinely tough. Once cured, most systems resist scuffing, staining, and chemical splashes far better than bare concrete or a painted floor. The gloss or satin finish also bounces light around a room that usually has small windows or none at all, which matters more in a basement than almost anywhere else in the house.
- Durability: A correctly installed system can last a decade or more with basic care.
- Stain and chemical resistance: Motor oil, paint, and cleaning chemicals wipe up without soaking in.
- Brightening effect: Light-colored epoxy with a flake broadcast reflects far more light than raw gray concrete.
- Seamless, easy-clean surface: No grout lines or seams for dirt, mold, or moisture to hide in.
Where basements fight back
Below-grade concrete sits against soil, and soil holds water. Even a slab that looks bone dry can be pushing vapor upward constantly, and that vapor is the number one reason DIY epoxy jobs fail, according to the moisture-first testing framework most experienced installers now follow. Cured epoxy is also hard and cold underfoot, which is fine for a workshop but less pleasant for a family room where kids sit on the floor. Add a slip risk on high-gloss finishes, especially near a utility sink or laundry area, and a cure time that stretches out in a basement’s naturally cooler temperatures.
- Moisture vulnerability: Vapor drive from below can cause bubbling, peeling, or a milky “blush” in the finish.
- Hard, cold surface: No cushioning, and basements run colder than the rest of the house.
- Slip risk: Glossy finishes get slick when wet; textured additives or a matte topcoat reduce this.
- Slower cure in cool temps: Basements below 55°F can double normal cure and recoat windows.
Match the finish to the use. A workshop, gym, or storage area is close to the ideal use case for epoxy: it takes abuse and cleans up fast. A finished family room or home theater is a tougher sell unless you pair epoxy with area rugs, radiant floor heating, or accept the tradeoff for the look and durability, an approach several basement remodeling guides recommend for comfort-focused living spaces.
How Much Does Epoxy Basement Flooring Cost?
Budget for two very different price tags depending on who does the work and what your slab needs. DIY kits run roughly $1 to $3 per square foot in materials, meaning a 600 square foot basement might cost $600 to $1,800 in product, plus rental fees for a grinder. Professional installation averages $7.15 per square foot, so that same 600 square foot space runs roughly $4,300, and a larger 1,000 square foot basement lands closer to $7,150, with a documented range of $3.35 to $12.50 per square foot depending on prep and system complexity.
That range is wide because several variables swing the number hard in either direction:
- Moisture mitigation: Adding a vapor-blocking primer or an ASTM F3010-compliant system can add $1 to $3 per square foot, sometimes more on severe cases.
- Diamond grinding vs. skipping it: Mechanical profiling costs more upfront than acid etching but is the difference between a floor that bonds and one that doesn’t.
- Patching and crack repair: Old basements often need spot repairs before coating, billed separately in most bids.
- Resin system: 100% solids epoxy costs more per gallon than water-based formulas but lays down thicker and lasts longer.
- Decorative elements: Color flake broadcasts, metallic pigments, and multi-color designs all add labor and material cost.
- Topcoat choice: A polyaspartic topcoat adds cost but buys UV stability and faster return-to-service time.
- Labor rates: Regional labor costs and crew size affect the install portion of a professional bid significantly.
Here’s the part most cost calculators skip: build in a contingency for what happens if your moisture test comes back bad. Professional installers frequently fold moisture testing, diamond grinding, patching, primer, a base coat, decorative broadcast, and a polyaspartic topcoat into one bid, and that expanded scope explains most of the price gap between a bargain quote and a realistic one. If you’re a DIYer and the plastic-sheet test shows moisture, don’t just proceed anyway. Either budget for a mitigating primer system, which can add several hundred dollars in materials for an average basement, or shift your plan toward a moisture-tolerant flooring type instead.
There’s also a real cost to getting it wrong the first time. Consumer reporting and installer accounts consistently note that homeowners who skip proper testing and prep often end up paying for a full removal and redo, which frequently costs more in total than hiring a professional would have cost upfront. Cheap insurance against that: spend the $15 on plastic sheeting and painter’s tape before you spend $1,000 on epoxy.
Which Type of Epoxy Works Best for Basements?
Not all epoxy is built the same, and the differences matter more below grade than almost anywhere else in the house.
Water-based epoxy is the easiest to work with for a first-time DIYer. Low odor, easy cleanup, and a thinner film build make it forgiving, but that thin film also means less durability and less resistance to the vapor pressure a basement slab can generate. It’s a reasonable choice for a dry, well-ventilated basement with light traffic.
Solvent-based epoxy cures harder and resists chemicals better than water-based formulas, but the fumes are genuinely strong. In an enclosed basement with limited airflow, that’s a real problem, not just an inconvenience. Ventilation becomes mandatory, not optional, and anyone with respiratory sensitivity should avoid being in the house during application and cure.
It builds a thicker film, cures harder, and handles vapor drive better than either alternative, though it’s less forgiving to apply and usually requires more skill or professional application.
Polyaspartic and polyurea topcoats have become standard companions to an epoxy base coat rather than competitors to it. They cure in hours instead of days, add abrasion and UV resistance, and let a basement floor return to light use much faster, a combination that’s become common in DIY guides that pair a polyaspartic topcoat with an epoxy base coat specifically for basement projects.
When moisture readings exceed a product’s stated limits, standard epoxy is off the table regardless of chemistry. That’s when ASTM F3010-compliant mitigation systems become necessary, and it’s also worth considering alternatives that tolerate moisture better by design:
- Floating vinyl plank: Handles minor moisture without direct adhesive bond to the slab, though it won’t survive standing water.
- Tile: Extremely moisture-tolerant with the right membrane, but a bigger labor investment and colder underfoot than epoxy.
- Polished concrete: No coating to fail, but less color and design flexibility than epoxy.
- Cementitious overlays: Bridge the gap between raw concrete and a finished look, often more moisture-forgiving than resin coatings.
What Moisture Testing and Prep Does an Epoxy Floor Need?
Moisture is the single biggest variable in whether a basement epoxy floor lasts five years or fails in five months. Skipping this step is the most common reason DIY jobs go bad, and it’s worth treating as a hard gate rather than a suggestion.
- Start with a plastic-sheet screening test. Tape a clear plastic sheet to the slab, sealed on all sides, and leave it for 24 to 48 hours. Any condensation or dark staining underneath signals active moisture movement and means you need further testing before anything else.
- Move to a calcium chloride test if the screen looks borderline. This measures moisture vapor emission rate (MVER) in pounds per 1,000 square feet over 24 hours. Most epoxy manufacturers cap acceptable MVER around 3 to 5 pounds; above that, standard products are at serious risk of failure.
- Use an in-slab relative humidity (RH) probe for the most reliable reading. RH probes measure moisture deeper in the slab and are considered more accurate than surface tests. Many manufacturers set their acceptable ceiling around 75% to 85% RH, and readings above that threshold generally require a specialized mitigation product rather than a standard coating.
- Profile the surface mechanically rather than relying on acid etching. Diamond grinding or shot-blasting to a specific concrete surface profile (CSP), typically CSP 2 to 3 for residential epoxy, creates a consistent mechanical bond that acid etching often can’t match, particularly on power-troweled slabs where etching leaves residue instead of a real profile.
- Ask for documentation, not just a verbal assurance. If you’re hiring a contractor, the bid should specify the testing method used, the results, the target CSP, and whether the product being installed is ASTM F3010-compliant if moisture readings warrant it.
Mechanical grinding costs more time and rental money than a bottle of muriatic acid, but it’s the single biggest predictor of long-term adhesion according to installer-level guidance on surface prep. Renting a grinder for a weekend typically costs a fraction of what a full floor removal and redo would run, which makes the grinder rental one of the cheapest insurance policies in the entire project.
Pro Tip: Don’t test moisture once and call it done. Test in different seasons if you can, or at least after a period of heavy rain, since vapor drive fluctuates with groundwater levels and can be worse in spring than in a dry summer month.
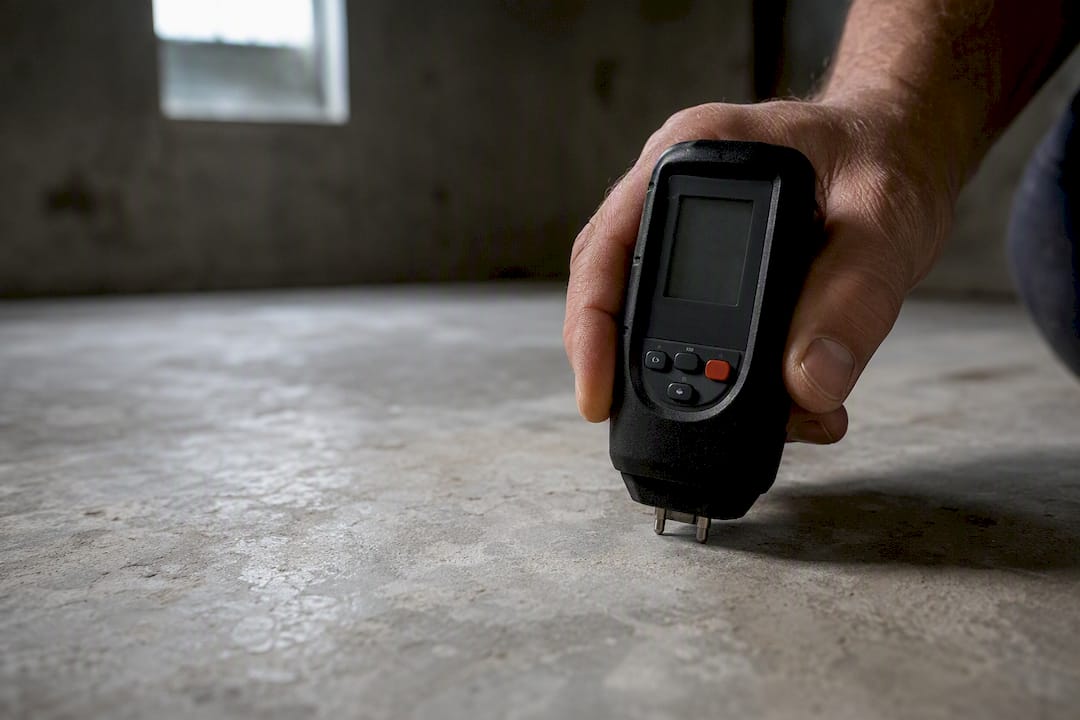
If your RH or MVER readings come back high, this is the point where the project genuinely branches. You either commit to a moisture-mitigating primer system, one that’s specifically engineered and tested to ASTM F3010 standards, according to the ITRC’s technology sheet on epoxy floor coatings, or you pivot to a different flooring type entirely. Proceeding with a standard epoxy over a wet slab isn’t a shortcut. It’s a guaranteed callback.
Can You Install Epoxy Flooring Yourself?
Plenty of experienced DIYers install their own basement epoxy successfully, but the margin for error is thinner than most kit instructions let on. Here’s the realistic sequence, with the points where people usually go wrong.
Before you buy anything:
- Confirm your moisture test passed, or that you have a mitigation plan for a failed one.
- Confirm the slab has no existing sealer or coating (the water-bead test from earlier).
- Confirm the slab is structurally sound, no major cracking, heaving, or crumbling.
Tools and materials to gather:
- A diamond grinder (rent, don’t buy, unless you’re doing multiple floors)
- Shop vacuum rated for concrete dust, ideally with HEPA filtration
- Concrete patching compound for cracks and pits
- Primer (moisture-mitigating if your test results call for it)
- Epoxy base coat, calculated at roughly 1.5 to 2 gallons per 300 to 400 square feet depending on product
- Color flakes for broadcast, if using a decorative finish
- Notched squeegee, rollers with extension poles, and spiked shoes for walking on wet epoxy
- Polyaspartic or polyurethane topcoat
The actual timeline:
- Day 1: Grind the slab, vacuum thoroughly, patch any cracks, and let patches cure per manufacturer instructions.
- Day 2: Apply primer and let it cure to the recoat window specified on the datasheet, usually 4 to 24 hours.
- Day 2 or 3: Mix and apply the epoxy base coat within its pot life, typically 30 to 45 minutes once mixed, working in sections you can realistically cover before it kicks.
- Same day: Broadcast color flakes into the wet base coat if using a decorative finish, timed to the base coat’s tack window.
- Day 3 or 4: Scrape off excess flakes, then apply the topcoat within the recoat window; polyaspartic topcoats often allow foot traffic within 24 hours.
- Day 5 through 7: Allow full cure before moving furniture back or subjecting the floor to heavy use; basements running cooler than 65°F extend every one of these windows.
Pro Tip: Mix smaller batches than the kit recommends if this is your first epoxy project. Losing a gallon of epoxy to a pot-life miscalculation is a cheap mistake; losing an entire section of floor to lap marks from working too slowly is not.
Know when to stop. If your moisture test failed and you don’t have experience with mitigation primers, if the basement has active cracks or settling, or if you’re not confident grinding evenly across the whole slab, that’s the point to call a professional instead of pushing forward. A failed DIY attempt frequently costs more to fix than hiring it out would have cost from the start.
Why Do Epoxy Floors Peel or Fail, and How Do You Maintain Them?
Most basement epoxy failures trace back to one of three causes, and knowing which one you’re looking at determines whether you’re facing a quick fix or a full teardown.
- Blistering or bubbling: Usually moisture-driven. Vapor pushing up from below the slab lifts the coating from beneath, often appearing as scattered bubbles or a cloudy, milky patch.
- Peeling or delamination at edges and seams: Almost always a surface prep failure. If the slab wasn’t ground to the right profile, or if an old sealer wasn’t fully removed, the epoxy never truly bonded in the first place.
- Yellowing: Typically UV exposure on a non-UV-stable resin, or excess heat during cure. Basements with a walkout door or window well see this more than fully enclosed spaces.
Diagnosing which one you have matters because the fix is different. Isolated moisture blisters sometimes can be patched, but widespread blistering usually means the whole floor needs to come up, get reground, and get recoated with a moisture-mitigating system this time. Peeling from poor prep has the same answer: removal and reprofiling, since there’s no patch that fixes a bond that never existed. Yellowing, if it’s cosmetic and the bond is otherwise sound, can often be addressed with a fresh UV-stable topcoat without full removal, a distinction worth raising with any contractor diagnosing a peeling floor.
For ongoing care, stick to pH-neutral cleaners and a soft mop or microfiber pad. Avoid ammonia-based cleaners and abrasive scrub pads, both of which dull the topcoat over time. Most basement epoxy floors benefit from a fresh topcoat every 5 to 10 years depending on traffic, and adding a texture additive to high-moisture zones like near a utility sink cuts down on slip risk without redoing the whole floor.
When Does Hiring a Professional Installer Make More Sense?
Here’s where a candid answer matters more than a sales pitch: DIY works fine for a dry, low-traffic basement where the stakes of a mediocre result are low. It stops making sense once moisture mitigation, structural repairs, or a finished living space are involved, because the cost of getting it wrong climbs fast.
Leonardo’s Flooring Corp has spent more than a decade installing flooring throughout the greater Denver area, including epoxy floor coating alongside hardwood, laminate, vinyl, tile, and subfloor preparation work, backed by more than 125 five-star reviews. That range matters for basements specifically, because a crew that regularly handles subfloor prep and moisture barrier work brings judgment calls to a below-grade slab that a general handyman or a first-time DIYer simply hasn’t seen enough times to catch.
If you’re getting bids, hold every contractor to the same checklist:
- Documented moisture testing results, not just a verbal “it seemed fine”
- Diamond grinding to a specified CSP, not acid etching
- Product datasheets confirming ASTM F3010 compliance if your moisture readings require it
- Clear warranty terms in writing, including what voids them
- On-site references or photos from a comparable basement project
A bid that skips moisture testing and profile specs isn’t a lower price. It’s an incomplete quote for a different, riskier job than the one you’re actually asking for.
Professional pricing for a basement with real moisture mitigation needs will run higher than a standard garage install, but that premium buys the testing, grinding, and primer system that determines whether the floor is still intact in year eight.
What I’d Tell a Friend Before They Buy Epoxy
Most articles on this topic treat moisture testing as a footnote. It should be the headline. The conventional advice, pick a color, buy a kit, coat the floor over a weekend, skips the one variable that actually determines whether the project succeeds. A basement slab pushing vapor doesn’t announce itself with a puddle. It shows up eighteen months later as bubbles under a floor you already painted your workshop walls to match.
What’s underrated is the value of mechanical grinding over acid etching. It costs more time and a weekend rental fee, but it’s the difference between a floor that bonds and one that’s cosmetically fine until it isn’t. What’s overrated is treating DIY epoxy as strictly a money-saving move. It only saves money if the test passes and the prep is right; otherwise you’re paying for materials twice.
Prioritize the test, then the prep, then the product. Everything else, color, flake pattern, gloss level, is a preference. Those three aren’t.
— Jim
Get Your Basement Epoxy Floor Done Right the First Time
Everything in this guide points to the same conclusion: the moisture test and the surface prep decide whether your basement floor lasts a decade or fails by next winter, and getting both right takes equipment, judgment calls, and experience that most first-time DIYers are still building. Leonardo’s Flooring Corp has handled epoxy floor coating projects throughout the greater Denver area for over a decade, alongside hardwood, laminate, vinyl, and tile installation, so a basement’s specific moisture and subfloor challenges aren’t guesswork on our end.

If your plastic-sheet test came back questionable, or you’d rather skip the trial-and-error entirely, our epoxy floor coating service includes documented moisture testing, proper diamond grinding, and product selection matched to your slab’s actual readings, not a one-size-fits-all kit. Reach out for a bid that spells out the testing method, the CSP target, and the warranty terms in writing, so you know exactly what you’re paying for before any grinder touches your floor.
Sources
A few sources are worth reading directly before you commit money to this project. The ITRC’s technology sheet on epoxy floor coatings lays out the standards and methods behind surface prep, moisture measurement, and cure requirements in plain technical detail. USAToday’s cost breakdown gives a solid benchmark for what professional pricing actually looks like across different scopes of work. And MyNextHouseProject’s moisture-first guide walks through the exact stepwise testing sequence that separates a floor that lasts from one that doesn’t. If you’re weighing a broader basement remodel beyond just the floor, this basement conversion guide covers realistic budgeting and permitting considerations worth factoring in early.
- ITRC Technology Sheet: Epoxy Floor Coatings (EFCs)
- DIY Epoxy Basement Floor Guide: Do This Test First — MyNextHouseProject
- IFTI: Mitigation chemistries and moisture guidance