
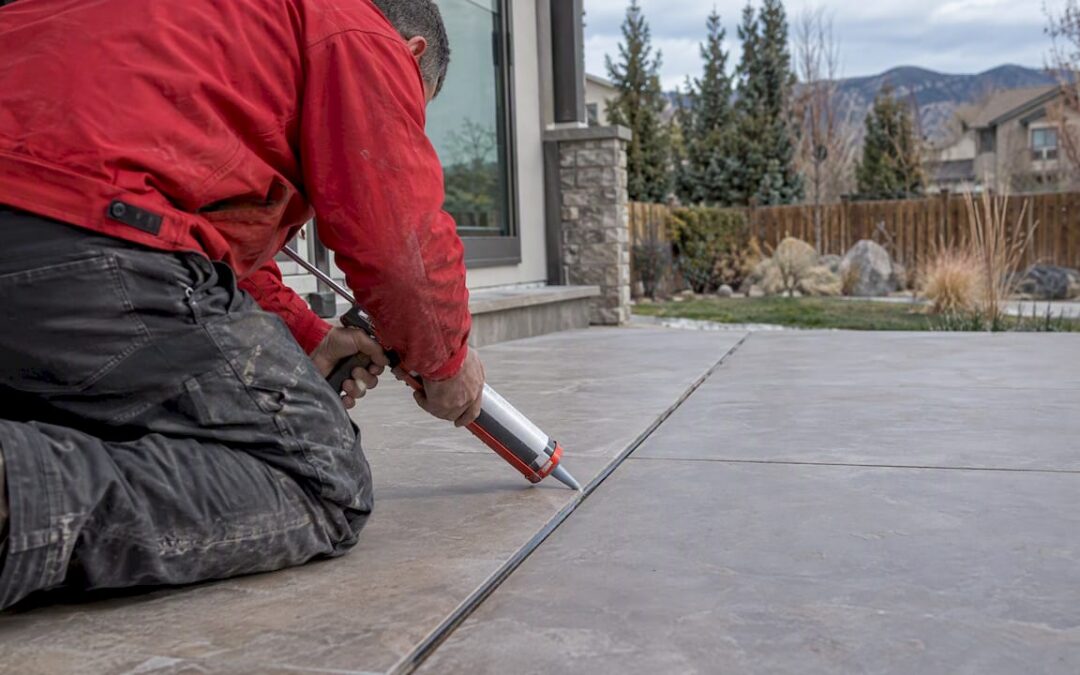
Yes, most tile installations need movement joints, and they need to be filled with a flexible sealant, not grout. Standard practice calls for movement joints placed and sized according to TCNA and ANSI guidance, filled with a flexible sealant meeting ASTM C-920. Below, we cover where joints go, what materials to use, how to size them, and how to install one correctly.
TL;DR:
- Place joints around the entire tile perimeter, directly over slab joints, and at substrate changes; large or sunlit fields need intermediate joints.
- A small bathroom often needs only a perimeter gap, while large rooms, long runs, radiant heat, showers, and direct sun call for closer intermediate spacing.
- Set joint width using slab casting temperature, expected shrinkage, creep, tile size, and anticipated temperature and moisture changes, not a fixed drawing dimension.
- Use 100% silicone or a compatible elastomeric sealant, not grout; commercial floors exposed to vehicles may need reinforced elastomeric profiles.
- Keep the joint cavity clean and dry, use backer rod to shape the sealant bead, and prevent grout or mortar from bridging the joint.
Table of Contents
- What a movement joint is and why it matters
- Where to place movement joints and how far apart they go
- Movement joint profiles and which materials actually work
- How to size a movement joint for your project
- Installing a flexible movement joint, step by step
- Hiding perimeter joints and handling transitions
- Exterior tile: sun, freeze-thaw, and drainage
- What tile crews actually do differently on site
- Getting your tile joint layout done right
- FAQ
- Sources
What a movement joint is and why it matters
A movement joint is a soft, flexible gap in a tile field, filled with sealant instead of grout. A contraction or control joint, by contrast, is cut into the concrete slab itself to control where the slab cracks. Tile, mortar, and the slab beneath them all expand and contract at different rates as temperature and moisture change, and that differential movement puts stress on the bond coat and the tile itself.
Left unaddressed, that stress shows up as cracked tile, lifted corners, or grout that crumbles along a straight line. The 2023 TCNA Handbook and ANSI A108 installation specifications exist to prevent exactly this: designers are expected to specify joint type and location, and installers are expected to never bridge a movement joint with rigid grout or mortar.
- Movement joints absorb stress; grout joints do not.
- Thermal and moisture cycling are the main drivers of tile movement.
- Bridging a movement joint with grout defeats its purpose entirely.
Where to place movement joints and how far apart they go
TCNA guidance and the EJ171 detail cover the placement rules installers rely on. The core principles apply whether you are tiling a small bathroom or a commercial lobby.
- Place a movement joint around the full perimeter of the tile field, where it meets walls, cabinets, curbs, or columns.
- Place a movement joint directly over any existing construction, control, or expansion joint in the slab below.
- Space intermediate joints at intervals commonly used in the field, tightening that spacing for exterior work, direct sun exposure, or large-format tile panels.
- Add joints at changes in substrate, such as where a slab meets a different structural element.
A small interior bathroom often needs only a perimeter joint, since the floor area is limited and movement tends to be minimal. A large open-plan kitchen and living area, by comparison, usually needs intermediate joints breaking up the field, and a long hallway or continuous commercial run needs joints spaced on a regular interval to avoid one unbroken expanse of rigid tile.
Conditions that call for closer spacing include direct sunlight through windows or skylights, installations over radiant heat, high-moisture areas like showers, and large tile panels that expand and contract more in absolute terms than small mosaics.
Movement joint profiles and which materials actually work
Three types of solutions cover most tile projects. A soft sealant joint, built from backer rod plus a flexible sealant, is the most common and the most flexible to install in odd spots. Prefabricated elastomeric profiles snap or set into a routed gap and give a cleaner, more consistent finished line. Metal-edge profiles with an elastomer insert combine a rigid trim edge with a flexible core, often used where a defined reveal line is wanted.
Whichever profile you choose, the filler itself has to be flexible. A 100% silicone or a compatible elastomeric sealant meeting ASTM C-920 is what the industry specifies for movement joints, because it stretches and compresses with the tile instead of cracking like grout would. Heavier elastomeric profiles with reinforced cores are available for commercial floors that see forklift or vehicular traffic, where a plain sealant joint would wear out fast.
- Soft sealant joints: backer rod plus flexible sealant, the most adaptable option.
- Prefabricated elastomeric profiles: cleaner finished line, consistent width.
- Metal-edge profiles with elastomer insert: defined reveal plus flexibility.
Pro Tip: Match the sealant color to your grout as closely as possible; manufacturers typically offer a range close to standard grout shades.
How to size a movement joint for your project
Joint width is not a guess; following guidelines for Concrete Control Joints: Spacing, Timing, And DIY Steps helps ensure proper sizing based on slab conditions. The procedure used for specifying expansion joint width in concrete slabs accounts for the slab’s cast temperature, its expected shrinkage, and time-dependent effects like creep and elastic shortening. A joint sized only from a single number on a drawing, without those inputs, is a common cause of later failure.
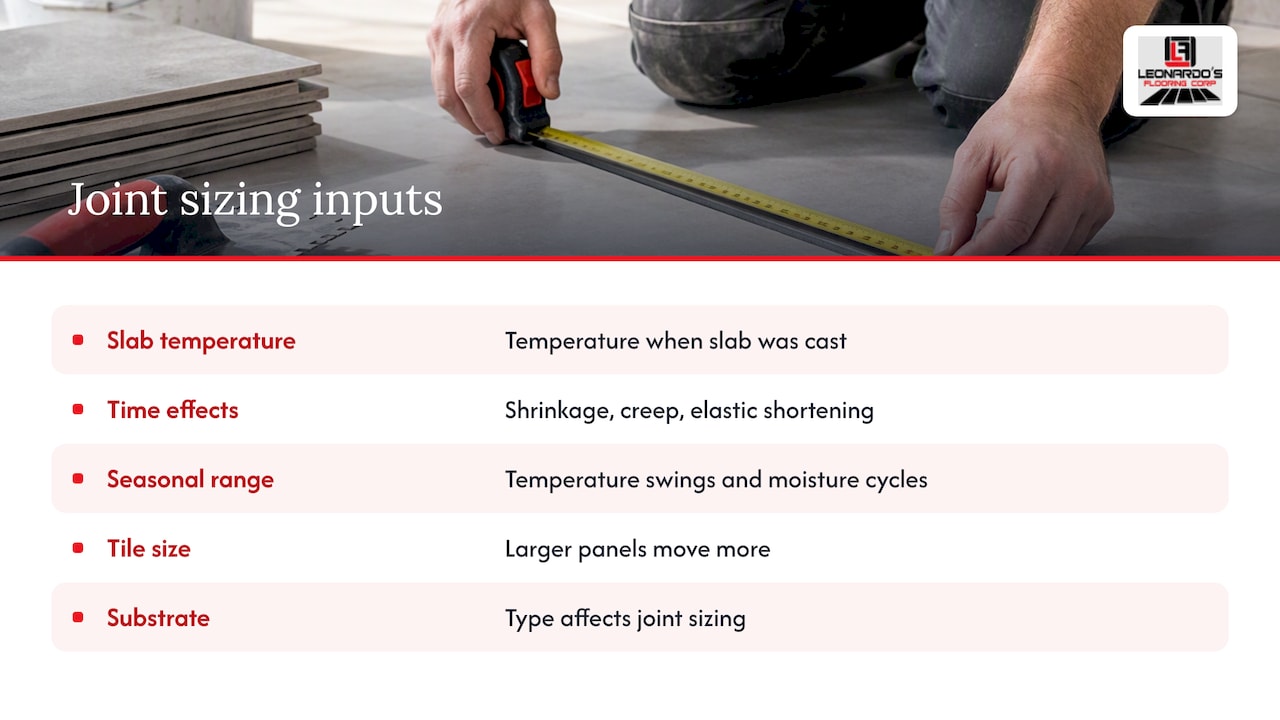
For tile specifically, the other drivers are tile or panel size (larger panels move more in absolute terms) and how much total movement the installation is expected to see over temperature swings and moisture cycles. In practice, this means documenting your assumptions: slab cast temperature, expected seasonal range, tile size, and substrate type, then communicating the resulting joint width to your sealant supplier or installer so they can select a system rated for that movement range.
Installing a flexible movement joint, step by step
- Verify the substrate has full mortar coverage per ANSI A108, and confirm the joint cavity is clean, dry, and free of debris or old grout.
- Install backer rod to the correct depth inside the joint, sized so the sealant achieves the right hourglass profile rather than a flat bead.
- Apply bond-breaker tape on either side where needed, then apply the flexible sealant meeting ASTM C-920, tooling it smooth before it skins over.
- Clean any sealant residue off adjacent tile immediately, and let the joint cure for the manufacturer’s recommended time before foot traffic or water exposure.
The one rule that undoes all of this: never let grout bridge across the joint during installation, even accidentally at the edges.
Pro Tip: Tape off both sides of the joint before tooling the sealant; it keeps the finished line crisp and saves cleanup time.
Hiding perimeter joints and handling transitions
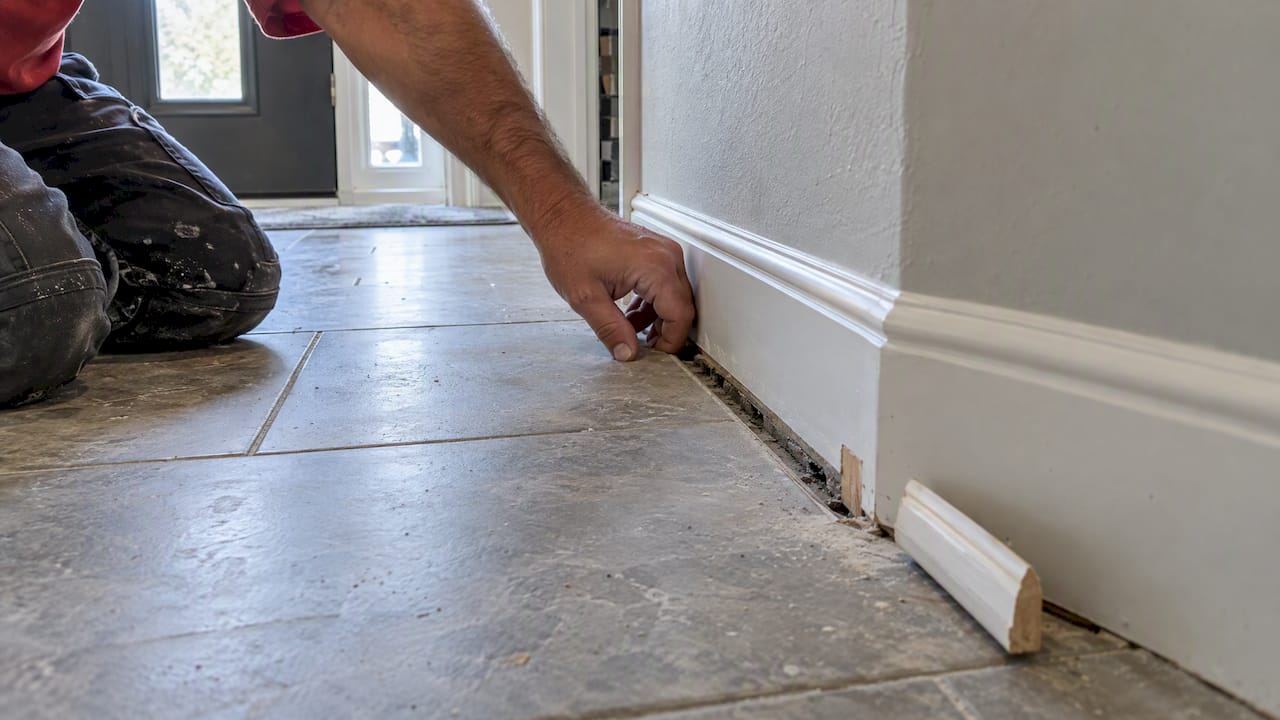
Perimeter movement joints are required, but they do not have to be visible. Leaving the code-required gap at the wall and covering it with baseboard or shoe molding keeps the joint compliant while hiding it completely. Color-matched sealant handles joints that stay visible, and transitions to other flooring materials should account for height changes and accessibility where applicable.
Exterior tile: sun, freeze-thaw, and drainage
Exterior installations see far wider temperature swings than interior rooms, and freeze-thaw cycling adds another layer of stress that interior tile never faces. That combination, along with direct solar heating on larger tile panels, typically calls for tighter joint spacing and more weather-resistant sealant systems than an interior job would use. Proper slope, drainage, and substrate preparation matter just as much as the joints themselves, since trapped water undermines even a well-placed joint. Exterior work should follow TCNA’s exterior details and the sealant manufacturer’s specific instructions rather than interior defaults.
What tile crews actually do differently on site
In the field, the difference between a joint layout on paper and one that works often comes down to walking the room first. Pros tend to lay out intermediate joints around natural sightlines and traffic patterns, then plan perimeter gaps to land exactly where baseboard or shoe molding will cover them, which keeps the finished room looking continuous. We’ve found that writing the joint spec down before tile goes down, widths, locations, and sealant type, avoids the rework that happens when trim gets installed as an afterthought. Our flooring installation work across the Denver area, backed by 125+ five-star reviews, has reinforced how much a tailored layout saves on callbacks compared to a generic one.
— Jim
Getting your tile joint layout done right
Tile floor installation is one of the services we handle directly, and that includes planning movement joint layout as part of the job, not as an afterthought once tile is already down. If you’d rather hand this off, our tile floor installation team can walk your space, mark joint locations against walls and slab joints, and spec the right sealant for your conditions before any tile goes down.

- On-site joint layout mapped to your room’s actual walls, slab joints, and traffic patterns.
- A written spec covering joint width and sealant type, handled alongside the installation itself.
Reach out through our services page to get a project evaluated.
FAQ
Do all tile floors need expansion joints?
Most tile installations need movement joints at the perimeter at minimum, and interior fields often need intermediate joints depending on size and conditions. TCNA guidance treats movement joints as a standard part of tile design, not an optional extra.
Can I use regular grout instead of a flexible sealant?
No, rigid grout cannot absorb the stress that movement joints are designed to handle. Movement joints need a flexible filler such as a 100% silicone or elastomeric sealant meeting ASTM C-920.
How wide should a tile expansion joint be?
Width depends on slab cast temperature, expected shrinkage, creep, and tile panel size rather than a single fixed number. The industry procedure for specifying joint width walks through how to calculate it for a given slab and installation.
Can a tile expansion joint be hidden?
Yes, a perimeter movement joint can be left as a soft gap at the wall and covered with baseboard or shoe molding, which keeps it compliant without leaving it exposed. Joints within the field of the floor, though, usually stay visible as a color-matched sealant line.
What happens if a movement joint is missing or bridged with grout?
Grout bridging a joint tends to crack along the line where movement is concentrated, which can spread to lifted or cracked tile nearby. The Ceramic Tile Foundation notes that missing or compromised expansion joints are a common cause of premature tile failure.
Sources
- Placement | Tile Council of North America
- Specifying movement joints and sealants for tile and stone: reviewing current industry standards and design options