Hardwood floors can add thousands of dollars to your home’s value and completely transform how a room feels. But for many Denver homeowners, the idea of installing them brings up real concerns: Will I get the layout right? What if the boards buckle? How do I handle Colorado’s dry climate? Those are fair questions, and this guide answers all of them. From gathering your tools to making final quality checks, you’ll find step-by-step guidance built specifically for homes here in the Denver metro area.
Table of Contents
- What you need before you start
- Step-by-step process for flawless installation
- Troubleshooting and avoiding common mistakes
- How to check your results (and maintain beautiful floors)
- What most guides leave out about installing hardwood in Denver
- Expert help for your Denver hardwood floor project
- Frequently asked questions
Key Takeaways
| Point | Details |
|---|---|
| Plan carefully | Proper planning and subfloor prep are essential to avoid installation problems. |
| Follow expert steps | Using a detailed, step-by-step approach increases your odds of flawless hardwood floors. |
| Prevent common errors | Acclimate materials and avoid shortcuts to keep Denver floors beautiful and long-lasting. |
| Inspect your work | Checking finished floors helps catch issues early, protecting your investment. |
| Know when to hire help | Some projects need professional expertise—don’t hesitate to ask for support when in doubt. |
What you need before you start
Every successful hardwood installation starts long before the first plank hits the floor. Getting your materials, tools, and subfloor ready is the most important phase of the entire project. Skip this step and you’re setting yourself up for expensive problems later.
Here’s a quick-reference table of everything you’ll need:
| Category | Items needed |
|---|---|
| Cutting tools | Miter saw, circular saw, jigsaw |
| Fastening tools | Flooring nailer or stapler, hammer, nail set |
| Measuring tools | Tape measure, chalk line, carpenter’s square |
| Safety gear | Knee pads, safety glasses, respirator mask |
| Finishing tools | Pull bar, tapping block, rubber mallet |
| Materials | Hardwood planks, underlayment, moisture barrier, fasteners |
| Extras | Spacers (3/4 inch minimum), wood filler, transition strips |
Before you buy a single plank, you need to assess your subfloor. In Denver, this matters more than in most other cities. Our altitude sits at exactly 5,280 feet, and seasonal humidity swings between very dry winters (sometimes below 20% relative humidity) and wetter summer months. That swing puts real stress on wood.
Moisture testing is non-negotiable. Use a pin-type or pinless moisture meter to test your subfloor. Concrete subfloors should read below 3 lbs per 1,000 square feet per 24 hours using a calcium chloride test. Wood subfloors should measure no more than 12% moisture content. Proper subfloor preparation ensures hardwood floor durability, so don’t rush this step.
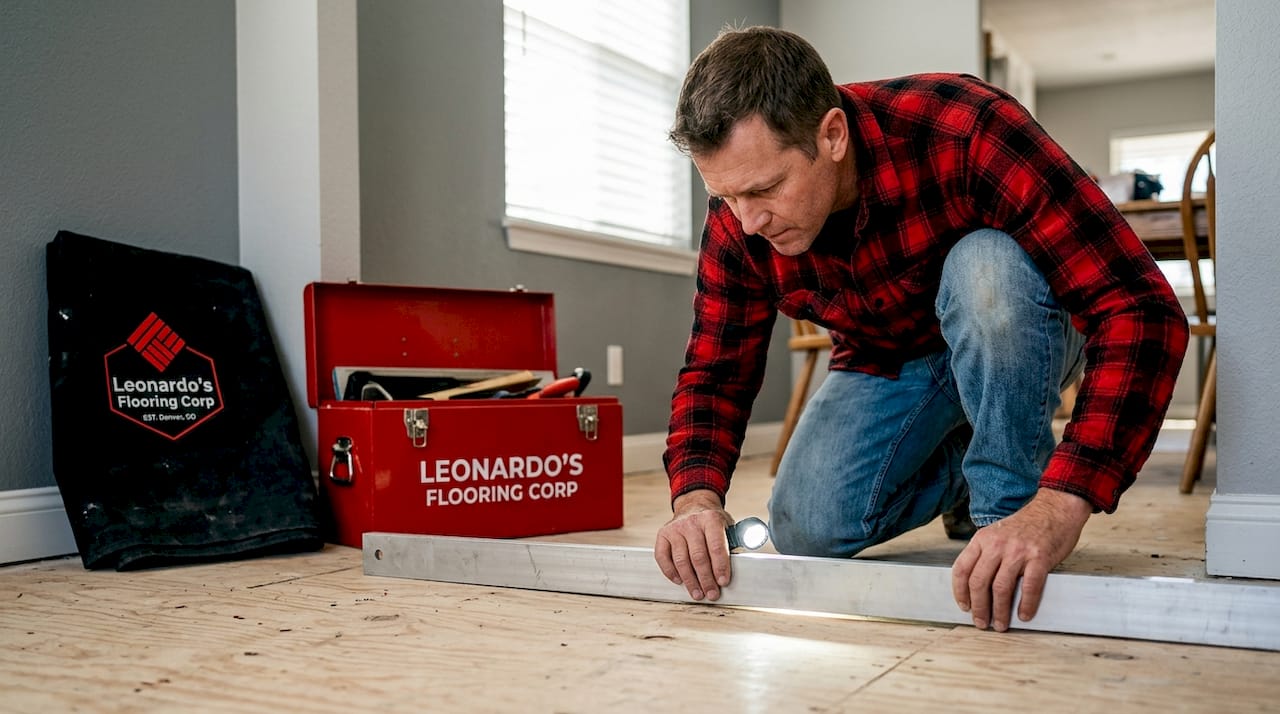
Your subfloor also needs to be flat within 3/16 of an inch over a 10-foot span. Use a long straightedge to check this. High spots get sanded down. Low spots get filled with a floor leveling compound. If your subfloor has significant issues, consider reading up on subfloor preparation basics before moving forward.
Material acclimation is another Denver-specific must. Stack your planks flat in the room where they’ll be installed. Run your HVAC at the temperature you normally keep the house. Let the wood sit for at least 72 hours, though 5 to 7 days is even better. This allows the wood to adjust to the exact moisture and temperature conditions it will live in permanently.
Not sure which type of wood to choose? Solid hardwood is beautiful but more sensitive to humidity shifts. If you want to understand the full trade-off, learning about engineered wood vs. solid hardwood will help you make a smarter purchase before you spend a dime.
Pro Tip: In Colorado, always install a quality 6-mil polyethylene moisture barrier over concrete subfloors, even in finished basements. Our winters pull moisture upward through concrete slabs in ways that can silently destroy an unprotected floor from underneath.
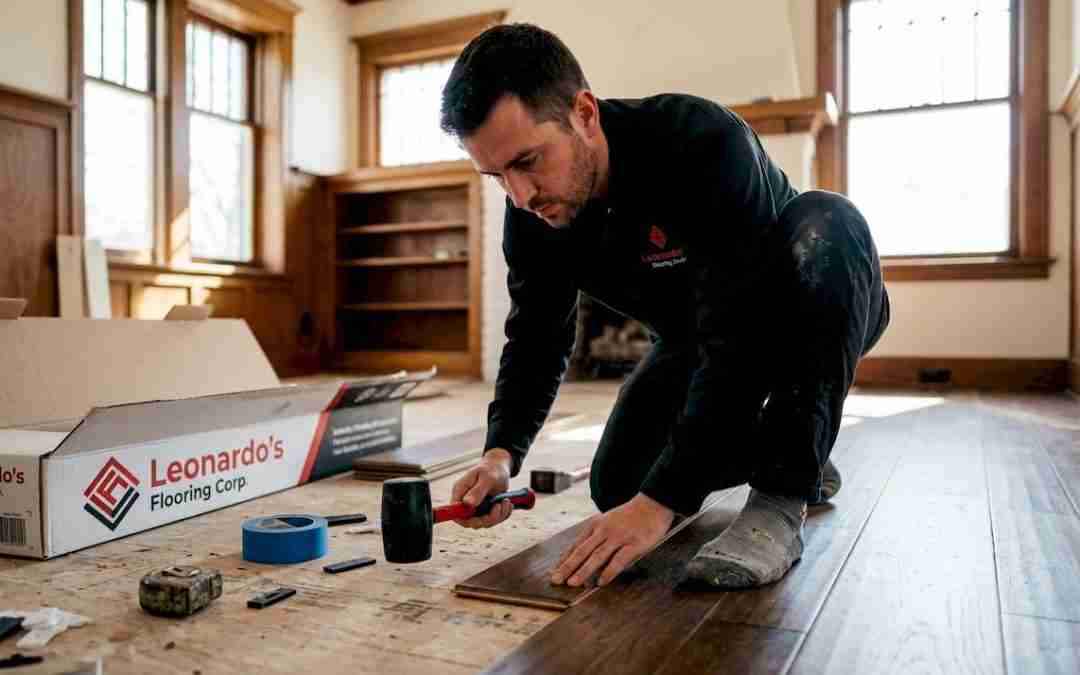
Step-by-step process for flawless installation
Armed with the right tools and materials, you’re ready to start the installation process. Here’s exactly how to tackle each step.
-
Clear the room completely. Remove all furniture, appliances, and existing floor coverings. You need a clean slate.
-
Remove baseboards carefully. Use a pry bar and score the paint line first. Label each piece so reinstallation is simple.
-
Inspect and prep the subfloor. Sand down any high spots and fill low spots with leveling compound. Let it cure fully before proceeding.
-
Install your moisture barrier or underlayment. Roll it out perpendicular to the direction you’ll lay the planks. Overlap seams by 6 inches and tape them down.
-
Snap your layout lines. Use a chalk line to mark the center of the room. Working from a straight reference line helps keep rows from drifting.
-
Determine your starting wall. Most installers start along the longest, most visible wall. Make sure it’s perfectly straight using your carpenter’s square.
-
Set your expansion gaps. Place 3/4-inch spacers between the first row and the wall. Wood expands and contracts with humidity changes, and that gap is essential.
Safety warning: When cutting planks with a miter saw or circular saw, always wear your safety glasses and respirator mask. Wood dust from cuts can contain fine particles that are harmful when inhaled, and flying debris is a real risk.
-
Lay the first row. This is your foundation. Every row that follows will align from here. Take your time. Check it twice before nailing.
-
Face-nail the first two rows. You won’t have enough room to use a flooring nailer near the wall, so face-nail these rows and fill nail holes with wood filler later.
-
Switch to the flooring nailer. From the third row forward, use your pneumatic flooring nailer at a 45-degree angle through the tongue of each plank. Space nails every 6 to 8 inches.
-
Stagger your joints. End joints between rows should be offset by at least 6 inches. Random stagger patterns look the most natural and add structural strength.
-
Work around heat vents and obstacles. Denver homes often have floor-level heat vents. Cut the opening with a jigsaw, leave the vent frame as a natural border, and add a vent cover that matches your floor finish.
-
Handle the final rows like the first. Near the opposite wall, you’ll face-nail again. Use a pull bar and mallet to seat planks tightly when the nailer can’t reach.
-
Reinstall baseboards and add transition strips. Nail the baseboards into the wall, not the floor, so the floor can still move freely underneath.
Pro Tip: When setting up your starter row, tack a straightedge board temporarily to the floor parallel to your chalk line. Use it as a physical guide when you nail the first row. It keeps everything locked in position and saves you from the most common DIY mistake: a first row that slowly drifts off course.
For more location-specific advice tailored to local homes, check out the Denver hardwood flooring tips we’ve put together from years of working in this market.
Troubleshooting and avoiding common mistakes
Even the most careful installers encounter challenges. Here’s how to fix errors and prevent future problems before they cost you money.
The five most common hardwood installation mistakes in Denver:
- Skipping acclimation. This is the single biggest cause of floor failure in Colorado. Up to 70% of failed installations trace back to improper subfloor preparation and acclimation. Give the wood time to settle into your home’s specific conditions.
- Ignoring expansion gaps. Floors that are nailed too tight to the walls have nowhere to expand. The result? Boards buckle and cup upward. That 3/4-inch gap is your insurance policy.
- Installing over an unlevel subfloor. Even a small dip or ridge translates into planks that rock, creak, and separate. Check flatness obsessively before you start.
- Misaligned rows. If your first row drifts even slightly, every row after it compounds that error. Always verify with a chalk line before nailing each row.
- Wrong fastener spacing. Too few nails leave planks loose. Too many can split the tongue. The sweet spot is every 6 to 8 inches along the plank.
Common problems and their fixes:
Squeaking usually means a plank isn’t fully seated against the subfloor. Drive a screw through the face of the board at the squeak point, countersink it, and fill with wood filler. Lifting at edges typically signals moisture intrusion or missing expansion gaps. Address the moisture source first, then refasten. Gapping between planks during Denver’s dry winter months is actually normal if you’ve done everything right. A whole-home humidifier set to 35 to 50% relative humidity keeps gaps from getting out of hand.
When should you call a professional? If your subfloor needs major leveling work, if you’re working over radiant heat, or if the total area exceeds 500 square feet and you’ve never done this before, reaching out to Denver hardwood floor professionals can save you far more than the cost of the service call. You can also find specific hardwood floor troubleshooting tips in our resource library.
How to check your results (and maintain beautiful floors)
Once your floor is down, it’s time to inspect your work and make sure your new hardwood surface stays stunning for years to come.
Post-installation inspection checklist:
- Walk every row and listen for squeaks or hollow sounds
- Check that all expansion gaps are consistent and unobstructed
- Verify that transition strips are securely fastened at doorways and room edges
- Look for any raised edges or lips between planks
- Confirm that baseboards sit flush without pressing down on the floor surface
Here’s a simple comparison of what a DIY inspection catches versus what a professional eye picks up:
| Inspection point | DIY inspection | Professional inspection |
|---|---|---|
| Visible gaps and squeaks | Easy to spot | Full acoustic and visual analysis |
| Subfloor flatness issues | Hard to detect after install | Can diagnose from flex or sound |
| Moisture-related early damage | Usually missed | Identified with moisture meter |
| Fastener placement problems | Often missed | Checked systematically |
| Finish coat adhesion | Surface check only | Full adhesion and curing assessment |
Professional inspections and maintenance prevent costly repairs down the road, especially in a climate like Denver’s where seasonal stress on wood is real and ongoing.
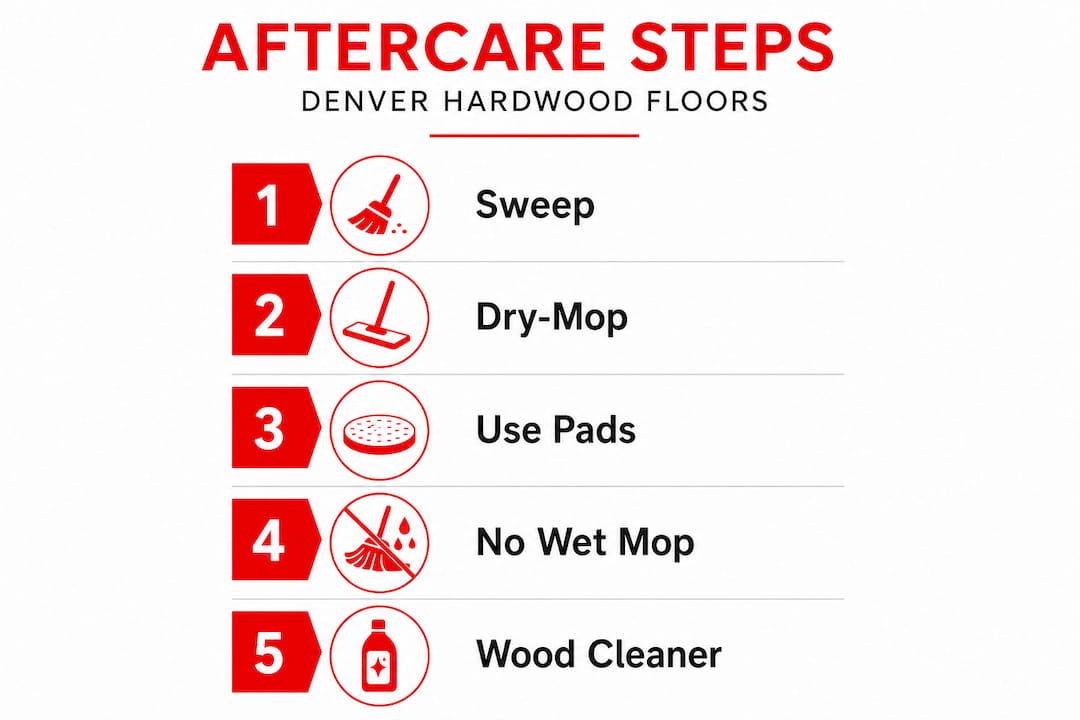
Basic maintenance for Denver homes:
Sweep or dry-mop at least twice a week. Avoid wet mopping entirely. Use only hardwood-specific cleaning products. Place felt pads under all furniture legs. And critically: run a humidifier during the heating season. Denver winters can push indoor humidity below 20%, which causes wood to shrink and crack. Target 35 to 50% relative humidity year-round to keep your floors stable and beautiful. Also keep an eye out for warning signs that signal you need a specialist, including widespread cupping, large gaps forming across multiple boards, or discoloration near walls that could suggest moisture intrusion.
What most guides leave out about installing hardwood in Denver
Most how-to guides are written for a generic American home in a temperate climate. Denver is not that home.
At 5,280 feet, Denver’s air holds dramatically less moisture than lower elevation cities. Your heating system runs harder and longer through a genuinely long winter, and that dries your interior air more aggressively than most homeowners realize. A floor that would perform perfectly in Chicago or Atlanta can fail within one season here if the installation doesn’t account for these conditions.
What surprises even experienced out-of-state installers is just how fast the environment changes between seasons. We’ve seen floors that looked perfect in October start showing gaps by January because the installer didn’t factor in winter humidity drops. No amount of quality product compensates for installation that ignores the local environment.
Here’s the uncomfortable truth about some of the premium products marketed to Colorado homeowners: wider planks look gorgeous but are significantly more vulnerable to expansion and contraction in low-humidity climates. Some suppliers push 5-inch and 6-inch wide boards as luxury upgrades without disclosing that narrower boards are actually more stable in our climate. Local knowledge protects you from expensive mistakes that look like they’re your fault but actually start at the point of sale.
The DIY versus professional question isn’t just about skill level. It’s about knowing what you don’t know. A motivated homeowner can absolutely install hardwood flooring in a mid-sized room with good results. But larger projects, tricky subfloors, radiant heat systems, or whole-home renovations carry compounding risk. The complete Colorado installation guide we put together walks through these trade-offs honestly, because we believe an informed client makes better decisions and ends up with a floor they’re proud of.
Local expertise isn’t about upselling. It’s about understanding that the same floor behaves differently depending on where it’s installed, how the home is heated, and what the subfloor situation looks like. That knowledge comes from doing hundreds of installations across Denver neighborhoods over more than a decade.
Expert help for your Denver hardwood floor project
If this guide has you feeling confident, that’s exactly the goal. But even the most prepared homeowners sometimes run into situations where professional support makes all the difference.
At Leonardo’s Flooring Corp, we’ve been serving Denver homeowners for over 10 years as trusted flooring experts and Home Depot Contractors. Our team handles hardwood floor installation from start to finish, including subfloor prep, acclimation guidance, and final inspection. Whether you’re tackling one room or a full renovation, our Denver hardwood floor installers are ready to help you get it right the first time. For deeper guidance on everything covered here and more, explore our complete hardwood floor guide. With 125+ five-star reviews and a commitment to honest, tailored service, we’re the local team Denver homeowners trust most.
Frequently asked questions
How long does it take to install hardwood floors in a typical Denver home?
Most Denver homes take 2 to 5 days for professional hardwood floor installation, depending on room size, subfloor condition, and the amount of prep work required.
Can I install hardwood floors myself or should I hire a pro?
DIY is possible for skilled homeowners on smaller projects, but professional installations ensure lasting results, especially given Denver’s altitude, dry climate, and seasonal humidity swings.
How should I acclimate hardwood flooring in Denver?
Let hardwood planks rest flat in the room for at least 72 hours before installation. Material acclimation is vital for installation success and helps the wood adjust to Denver’s altitude and low humidity.
What type of hardwood is best for Colorado homes?
Both solid and engineered options work, but engineered wood flooring offers better dimensional stability for Denver’s fluctuating indoor humidity levels, especially in winter.
What maintenance steps should I follow after installation?
Sweep regularly with a dry mop, avoid any wet mopping, and use a whole-home humidifier during winter months to maintain 35 to 50% indoor relative humidity and protect your hardwood investment.