
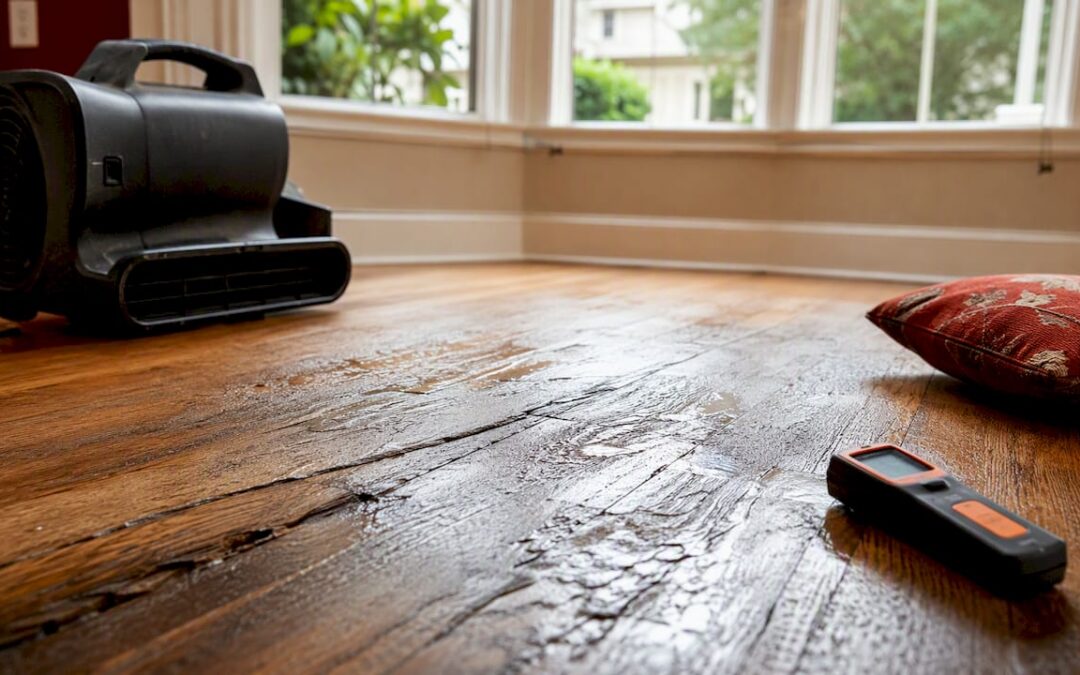
Most hardwood floor water damage is salvageable — but only if you act within the critical 48–72 hour window before wood cells undergo permanent deformation that no amount of drying can reverse. Stop the water source right now, extract standing water, start controlled drying, and photograph everything. Those four steps, done fast, are the difference between a refinish job and a full replacement.
Immediate action checklist:
- Shut off the water source or isolate the leaking appliance
- Cut power to the affected area if there’s any electrical risk
- Extract standing water with a wet/dry vac or mop
- Open windows and run a dehumidifier to begin air circulation
- Photograph all affected areas with timestamps
- Record initial moisture readings if you have a meter
The IICRC S500 is the industry standard governing water damage inspection and drying procedures. Leonardosflooringcorp uses these benchmarks on every water damage job in the Denver metro.
Key Takeaways
Acting within 48–72 hours of a water event gives hardwood floors the best chance of full restoration through drying and refinishing rather than replacement.
| Point | Details |
|---|---|
| Act within 48–72 hours | Wood cells can permanently deform after this window, making drying alone insufficient to reverse damage. |
| Document from the first minute | Time-stamped photos, moisture logs, and written action notes are what insurance adjusters need to approve coverage. |
| Never sand until fully dry | Sanding a board that still holds moisture locks in deformation and can cause crowning to worsen. |
| Verify subfloor dryness with pin testing | A dry surface can hide wet subfloor; invasive pin readings are required for final validation per IICRC S500. |
| Leonardosflooringcorp | Denver’s local hardwood restoration resource, offering IICRC-aware drying, documented moisture logs, and insurance claim support. |
Table of Contents
- What to do in the first hours after hardwood floor water damage
- How professional drying works and how long it actually takes
- How to assess the extent of damage: visual signs and moisture testing
- Repair options: drying in place, refinishing, or replacement
- How to document damage for your insurance claim
- When to stop DIY work and call a professional
- Prevention and maintenance steps that actually reduce your risk
- Why intrusive testing matters more than most homeowners realize
- What experience actually teaches you about water-damaged floors
- Leonardosflooringcorp handles water-damaged hardwood floors in Denver
- Sources
What to do in the first hours after hardwood floor water damage
Speed matters more than perfection here. Your goal in the first few hours is to stop absorption, not to fix the floor.
Priority actions:
- Stop the source first. Turn off the supply valve under the sink, behind the toilet, or at the main shutoff. If an appliance caused the leak, unplug it.
- Check for electrical hazards. Standing water near outlets, appliances, or HVAC equipment is a safety issue. Cut power at the breaker before entering.
- Assess the water category. Clean water from a supply line is Category 1. Dishwasher or washing machine overflow is typically Category 2 (gray water). Sewage backup is Category 3 (black water) and requires professional remediation — do not attempt DIY cleanup.
- Extract standing water. A wet/dry vac works well for small volumes. For larger spills, professional extraction uses truck-mounted or portable units measured in gallons per hour, and is followed by dehumidification and air movers.
- Move rugs and furniture. Wet rugs trap moisture against the floor and accelerate absorption. Move them immediately.
- Remove baseboards carefully. Baseboards seal moisture against the wall cavity. Removing them allows the edges of the floor to breathe and dry more evenly.
- Document everything. Time-stamped photos, a short written log of actions taken, and initial moisture readings form the foundation of any insurance claim.
Pro Tip: Never use a standard hair dryer, heat gun, or space heater to dry hardwood. Rapid, uneven heat causes crowning and splitting — sometimes worse than the water itself. Controlled, gradual drying is the only safe method.
How professional drying works and how long it actually takes
Drying hardwood is not the same as drying carpet or drywall. Wood grain runs lengthwise, and moisture moves slowly through it. The subfloor beneath adds another layer of complexity — it can stay wet long after the surface feels dry to the touch.
Professional drying follows a sequence:
- Extraction first. Remove all standing water before deploying drying equipment. Dehumidifiers cannot compensate for pooled water.
- Deploy air movers. High-velocity air movers accelerate evaporation from the surface and edges of the boards.
- Run low-grain refrigerant (LGR) dehumidifiers. LGR units pull moisture from the air more efficiently than standard dehumidifiers, especially at lower humidity levels.
- Use floor-drying mats or injectidry systems. These specialty mat systems create controlled low-pressure zones that draw moisture through the wood grain without forcing rapid surface drying — the key advantage over household fans.
- Monitor daily. Professionals take moisture readings every 24 hours and adjust equipment placement based on psychrometric calculations.
Realistic timelines:
- Small spill caught immediately: 24–72 hours
- Isolated appliance leak (dishwasher, refrigerator line): 3–10 days
- Large saturation or basement flooding: 2–4+ weeks
The 48–72 hour mark is when wood cells begin to change at a structural level. After that point, cupping and warping may become permanent even with aggressive professional drying. Box fans and household heat do not just fail to help — they actively worsen the outcome by drying the surface faster than the core, which causes crowning and splits.
How to assess the extent of damage: visual signs and moisture testing
Before you decide on a repair path, you need to know what you’re actually dealing with. Visual signs tell part of the story; moisture readings tell the rest.
Visual signs and what they mean
- Cupping: Board edges rise higher than the center. This is the most common early sign and often reversible with prompt, correct drying.
- Crowning: The center of the board rises above the edges. Usually caused by surface drying too fast while the core stays wet — or by sanding cupped boards before they fully dry.
- Buckling: Boards physically lift off the subfloor. This indicates severe or prolonged saturation and typically means replacement, not repair.
- Staining and discoloration: Dark staining along board edges or in the grain suggests prolonged moisture exposure and possible microbial activity beneath the finish.
Cupping can often be reversed with proper drying; buckling and contamination usually require replacement.
Moisture testing: pinless vs. pin meters
Pinless meters scan large areas quickly and are useful for mapping the extent of moisture spread. Their limitation is that they read relative surface-level moisture — they cannot confirm how deep the moisture has penetrated. Pin-type meters use electrodes inserted into the wood to get depth-validated readings, which are required for final drying validation and insurance documentation.
Moisture-reading checklist:
- Take a baseline reading in a dry, unaffected area of the same floor (your control)
- Map the wet zone with a pinless meter, marking the perimeter
- Use a pin meter at multiple points within the wet zone, including near the subfloor if accessible
- Log the date, time, meter model, and location of every reading
- Repeat readings every 24 hours and track the trend
Pro Tip: If you can access the subfloor from below (a crawl space or unfinished basement), take pin readings there too. A surface that reads dry can still have a wet subfloor — and that hidden moisture is the primary cause of recurring cupping and mold months later.
Repair options: drying in place, refinishing, or replacement
Once you know the extent of the damage, the decision tree is fairly straightforward. Three paths exist, and the right one depends on water category, exposure time, and structural condition.
Path 1: Controlled drying in place
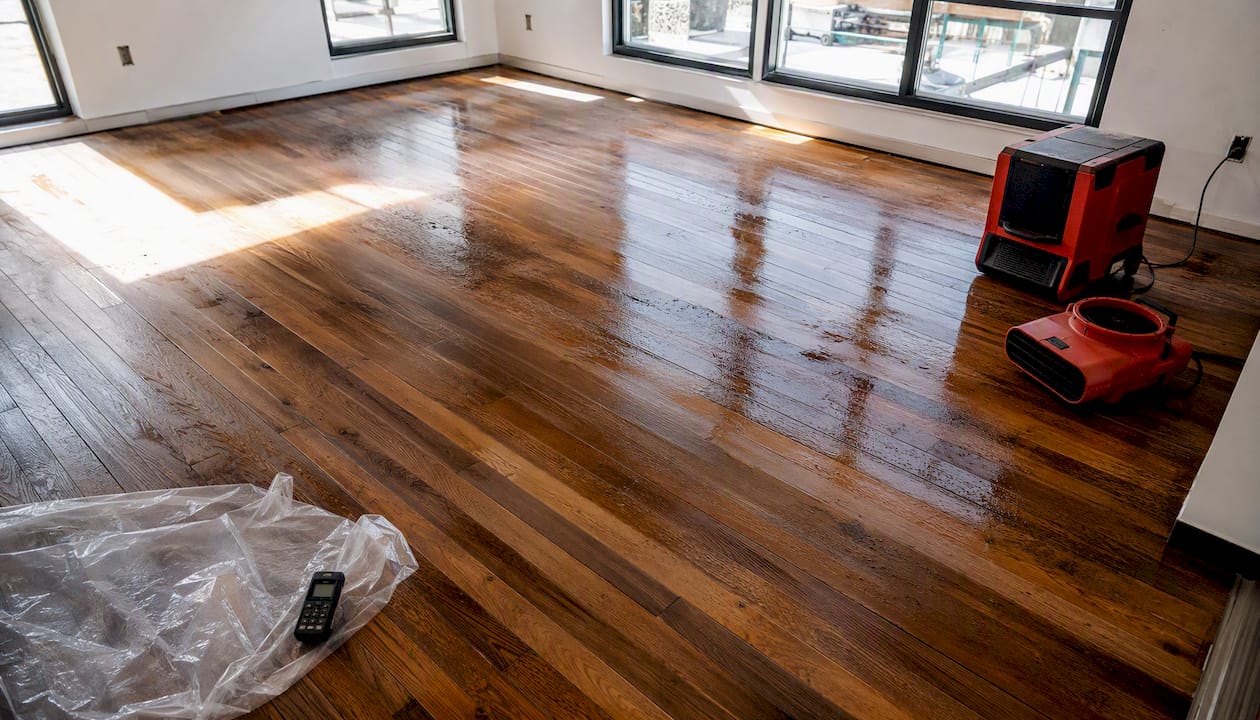
This works when the water was clean (Category 1), exposure was under 48–72 hours, boards show cupping but no buckling, and the subfloor reads wet but structurally sound. Professional drying equipment handles the rest. No sanding, no replacement.
Path 2: Sanding and refinishing after verified drying
The timing rule here is absolute: never sand before the floor is fully dry. Sanding a board that still holds moisture locks in the deformation and can cause crowning to worsen.
Solid 3/4" hardwood tolerates multiple sanding cycles, giving it a higher restoration ceiling. Engineered hardwood with thin veneers is more likely to delaminate under prolonged moisture and may have only one sanding left — or none — before the veneer is gone.
Path 3: Partial or full replacement
Replacement becomes necessary when:
- Water was Category 2 or 3 (gray or black water contamination)
- Exposure lasted longer than 72 hours with visible structural damage
- Boards are buckled or delaminated
- Subfloor shows rot, delamination, or mold growth
- Engineered veneer has separated
Pro Tip: When partial replacement is possible, document the removed boards and keep them for your insurance adjuster. They may need to verify the damage category and extent before approving coverage.
How to document damage for your insurance claim
Insurance adjusters work from evidence. The stronger your documentation, the fewer disputes you’ll face.
Essential documentation to collect:
- Time-stamped photos of every affected area before any cleanup begins
- Video walkthrough showing the full extent of visible damage
- Photos under baseboards, behind appliances, at cabinet toe kicks, and of any subfloor that gets opened
- Written log of when the damage was discovered, what actions were taken, and when
- Receipts for any emergency services, equipment rentals, or materials purchased
- Moisture readings log with dates, meter model, locations, and values
Call your insurer promptly. Most policies require notification within a specific timeframe, and delays can affect coverage. An IICRC S500-compliant intrusive inspection can be decisive in disputed claims — it establishes the water category, documents hidden moisture, and can prove the timing of any microbial growth through culture testing.
Working with your adjuster:
- Request written documentation of the Category determination (1, 2, or 3)
- Preserve all removed materials until the adjuster has inspected them
- Keep a chain-of-custody record if mold samples are collected
- Ask for the adjuster’s scope of work in writing before any repairs begin
Mold can begin developing within 24–48 hours of a water event in warm, humid conditions. Understanding why mold grows after water intrusion and the timing involved helps you frame your documentation accurately for the insurer.
When to stop DIY work and call a professional
Some situations are beyond what a homeowner should handle alone. Knowing when to call is as important as knowing what to do first.
Red flags that require a professional:
- Standing water has been present for more than 24–48 hours
- Water source was sewage, toilet overflow, or any Category 2/3 contamination
- Visible mold or musty odor
- Boards are buckled or lifting off the subfloor
- Subfloor or joists show visible damage, rot, or softness
- The affected area is large (more than one room or a significant portion of a floor)
What a professional restoration process looks like:
- Intrusive moisture mapping of the full floor assembly
- Written drying plan with equipment placement and target moisture levels
- Daily moisture logs with meter model, readings, and locations
- Final validation readings confirming the floor has reached dry standard
- Refinishing or replacement timeline based on validated drying completion
Questions to ask any contractor before hiring:
- Are you IICRC-certified, and which certifications does your team hold?
- What specific equipment do you use for hardwood floor drying?
- Can you show examples of similar hardwood restoration jobs?
- How do you document drying progress, and will I receive copies of the logs?
- Do you provide insurance claim support and work directly with adjusters?
Pro Tip: A contractor who immediately recommends full tear-out without performing intrusive moisture mapping first is a red flag. Legitimate restoration professionals always test before they recommend replacement — salvaging original flooring is both cheaper and better for the homeowner.
For local restoration guidance specific to Denver homes, the wood floor restoration guide covers common scenarios and what to expect from the process.
Prevention and maintenance steps that actually reduce your risk
Most hardwood water damage is preventable. A few routine checks catch the problems that cause the most damage.
Regular maintenance:
- Inspect supply lines under sinks, behind toilets, and at the refrigerator every six months — braided stainless lines fail less often than plastic
- Check HVAC condensate drain lines annually; a clogged line can overflow onto a nearby floor
- Monitor indoor humidity with a hygrometer; the NWFA recommends 35%–55% relative humidity for hardwood floors year-round
- Keep a moisture barrier in good condition under any hardwood installed over a crawl space or concrete slab
Leak and flood prevention:
- Install automatic water shutoff valves on supply lines to washing machines, dishwashers, and refrigerators
- Place water-detection alarms under appliances and in utility rooms — they cost under $20 and alert you before a small leak becomes a flood
- Seal thresholds and transitions at exterior doors, especially in rooms adjacent to garages or entryways
- Review flood-resistant flooring options for high-risk areas like mudrooms and laundry rooms
Denver-specific seasonal checks:
- Before winter, insulate pipes in exterior walls and crawl spaces to prevent freeze-thaw bursts
- After snowmelt, check entry points where water can track in — thresholds, door sweeps, and transitions at exterior doors
- In summer, Denver’s humidity can spike enough to affect equilibrium moisture content (EMC) in hardwood; run the AC or a dehumidifier to keep indoor humidity in range
- Review hardwood maintenance tips specific to Denver’s climate for a full seasonal checklist
Why intrusive testing matters more than most homeowners realize
This is the part most online guides skip, and it’s the part that most affects both your floor’s long-term outcome and your insurance claim.
Non-invasive pinless meters are fast and useful for mapping. But they read surface-level moisture and cannot confirm what’s happening at the subfloor. IICRC S500 requires intrusive moisture readings to determine water contamination category and to detect hidden microbial growth — non-intrusive checks alone are insufficient for insurance documentation in disputed cases.
Professionals use both: pinless meters to map the extent of moisture spread across a large area, then targeted pin readings to verify penetration depth and confirm subfloor dryness. Drying is complete only when invasive readings at the subfloor match the control area baseline — not when the surface feels dry or reads acceptable on a pinless scan.
Validation checklist to request from your contractor:
- Written control area baseline reading (from a dry, unaffected section of the same floor)
- Daily moisture logs with meter model, reading locations, and values
- Invasive pin readings at the subfloor level, not just the surface
- Photographic evidence of probe locations and readings
- Final sign-off reading confirming the floor has reached dry standard before any sanding or closing work begins
A complete drying documentation package — daily logs, photos, instrument models, and final invasive readings — both protects you as a homeowner and strengthens your insurance claim significantly. If mold testing is performed, keep the chain-of-custody documentation for culture samples. Insurers in disputed cases often rely on this evidence to confirm timing and category.
For subfloor-level concerns, particularly in homes with crawl spaces, mold testing guidance can help you understand what culture sampling involves and when it’s warranted.
What experience actually teaches you about water-damaged floors
The most common mistake homeowners make is not waiting too long to call a pro. It’s acting too fast in the wrong direction: renting a floor sander the week after a leak because the floor looks dry, or pointing a box fan at the boards for three days and assuming the job is done.
Denver’s climate adds a layer of complexity most guides don’t account for. When a leak happens in January, the contrast between the wet zone and the surrounding dry wood is extreme, and the stress on the boards is proportionally higher. Cupping can appear within hours. In summer, when humidity climbs, the same floor that dried fine in winter may take longer to stabilize because the surrounding EMC is higher.
Realistic outcome expectations: a clean-water leak caught within 24 hours, with professional drying started the same day, has a strong chance of full restoration through drying and refinishing alone. A leak discovered after a weekend away, with boards buckled and a musty smell already present, almost always involves subfloor work and partial board replacement at minimum. The floor’s history matters too — a floor that has been refinished multiple times may have less sanding margin left than it appears.
The homeowners who get the best outcomes are the ones who document aggressively from the first hour, resist the urge to sand or heat-dry, and call a professional the moment they see buckling or smell anything musty.
Leonardosflooringcorp handles water-damaged hardwood floors in Denver
When a water event hits your hardwood floors, the difference between restoration and replacement often comes down to who you call and how fast they respond. Leonardosflooringcorp has spent over 10 years handling hardwood floor water damage across the Denver metro, with workflows built around IICRC S500 standards, documented moisture logging, and a clear priority: save the original floor whenever the damage allows it.

Services include emergency moisture extraction, hardwood-specific controlled drying, intrusive pin testing at the subfloor level, sanding and refinishing after verified drying, and partial or full board and subfloor replacement when needed. Every job comes with documented moisture logs you can hand directly to your insurance adjuster. With 125+ five-star reviews and a track record of honest, no-surprise estimates, Leonardosflooringcorp is the local resource Denver homeowners trust when the floor can’t wait.
Call or contact Leonardosflooringcorp today to schedule an assessment. Have your moisture readings, photos, and a brief description of the event ready, and the team will walk you through next steps and a realistic timeline. Visit the hardwood floor installation and restoration services page to learn more or request a quote.
Sources
The guidance in this article draws on the following standards and restoration references:
- Can Water-Damaged Hardwood Floors Be Saved? — People First Restoration
- Moisture detection techniques for hardwood floors — C & R Magazine
- Hardwood floor water damage restoration — National Water Damage Authority