Underlayment is defined as the layer installed between your structural subfloor and finished flooring, and it serves four critical functions: moisture vapor protection, sound absorption, cushioning, and surface smoothing. The role of underlayment in flooring goes far beyond a simple padding layer. Skipping it or choosing the wrong type can void your manufacturer warranty, fail acoustic code requirements, and cause premature floor failure. Common underlayment materials include foam, cork, felt paper, rubber, and vapor barrier composites, each matched to specific flooring types and subfloor conditions.
What does underlayment do in a flooring system?
Underlayment sits between the subfloor and your finish floor, and every material choice you make at this layer directly affects how your floor performs for years. A concrete slab, for example, continuously transmits moisture vapor upward. Without a proper barrier, that moisture reaches your flooring adhesive or click-lock joints and causes warping, buckling, or adhesive failure. The four core functions of underlayment are moisture protection, acoustic dampening, cushioning underfoot, and leveling minor subfloor irregularities.
Getting this layer right also determines whether your flooring warranty stays intact. Manufacturers specify underlayment requirements in their installation guides, and deviating from those specs gives them grounds to deny a claim. For property managers overseeing multiple units, that risk multiplies fast. Choosing the right underlayment from the start is one of the lowest-cost ways to protect a significant flooring investment.
How underlayment manages moisture and protects your floors
Concrete subfloors require a vapor barrier because concrete continuously emits moisture vapor that migrates upward into flooring materials. This is not a one-time event. It happens year-round, driven by humidity differentials between the slab and the room above it.
The industry measures this risk two ways. ASTM F2170 tests relative humidity (RH) using in-situ probes inserted into the slab. ASTM F1869 measures the moisture vapor emission rate (MVER) using calcium chloride test kits placed on the surface. Both ASTM testing methods guide which vapor barrier strategy you need before any flooring goes down.
Here is what those moisture levels mean in practice:
- Low RH (below 75%): Standard underlayment with an integrated vapor barrier or a separate 6-mil polyethylene sheet is typically sufficient.
- Moderate RH (75% to 85%): Many floating vinyl flooring manufacturers require vapor barrier underlayment with a maximum RH threshold in this range.
- High RH (above 85%): Topical epoxy moisture mitigation systems are required before any underlayment or flooring is installed.
Seam integrity matters as much as the barrier material itself. Unsealed seams and penetrations in a vapor barrier allow moisture to migrate through, defeating the entire system. Tape every seam with the manufacturer-specified tape, and seal around any pipe penetrations before laying flooring.
Pro Tip: Always test your slab moisture before purchasing underlayment. A $30 calcium chloride test kit can save you from a $3,000 floor replacement.
What are the acoustic and comfort benefits of underlayment?
Sound performance is one of the most underestimated roles of floor underlayment materials, especially in multi-story homes, condominiums, and rental properties. Two ratings define acoustic performance: Impact Insulation Class (IIC) measures how well a floor assembly blocks impact noise like footsteps, and Sound Transmission Class (STC) measures airborne sound blocking like voices or music.

Different underlayment materials add meaningfully different IIC points to a floor assembly:
| Material | IIC Points Added | Best Use Case |
|---|---|---|
| Foam | 3 to 5 points | Budget laminate, light residential |
| Cork | 5 to 10 points | Floating hardwood, condos |
| Rubber | 10 to 20 points | Multi-family, HOA compliance |
| Felt | 10 to 20 points | Nail-down hardwood, high-traffic areas |
Many HOAs and local building codes require a minimum IIC rating of 50 for floors above occupied spaces. Rubber and felt underlayments are the most reliable way to meet those thresholds. Cork is a strong middle-ground option: it offers natural sound dampening without the cost of rubber, and it performs well under floating hardwood installations.
Thicker does not always mean better. Excessive underlayment thickness causes click-lock joint failures on floating floors by creating too much flex underfoot. Most laminate and LVP manufacturers cap underlayment thickness at 2 to 3mm. Going beyond that spec puts stress on the locking joints every time someone walks across the floor, leading to gaps and cracking over time.
Pro Tip: Check your HOA rules and local building codes before selecting underlayment. Missing an IIC requirement on a condo renovation can mean tearing up the entire floor.
Types of floor underlayment and how to choose the right one
Matching underlayment to your specific flooring type and subfloor condition is where most homeowners go wrong. The right underlayment choice depends on three factors: the flooring installation method, the subfloor material, and the acoustic or moisture demands of the space.
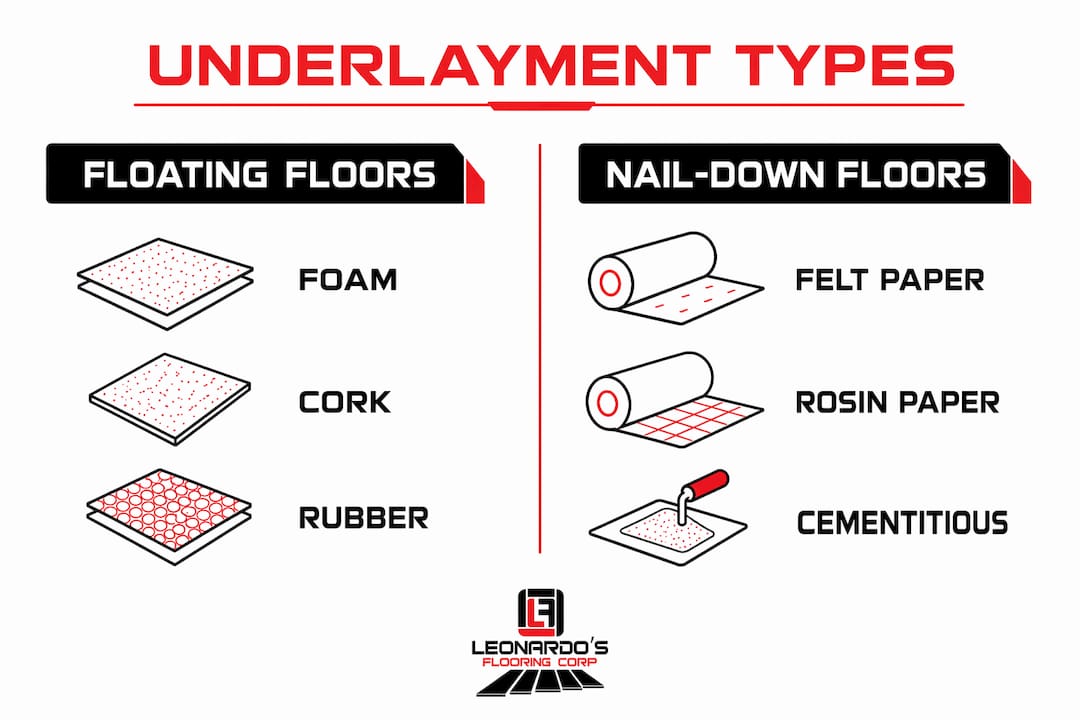
Foam underlayment
Foam is the most widely used option for laminate and floating LVP floors. It is affordable, easy to install, and available in versions with an integrated vapor barrier. Standard foam runs 2 to 3mm thick, which keeps it within manufacturer tolerances for floating floors. The tradeoff is acoustic performance. Foam adds only 3 to 5 IIC points, which falls short of most multi-family building requirements.
Cork underlayment
Cork delivers natural sound dampening and a firm, comfortable feel underfoot. It adds 5 to 10 IIC points and works well under floating hardwood and laminate. One important note: cork is not a vapor barrier. Over concrete slabs, you need to install a separate 6-mil polyethylene sheet beneath the cork layer. Skipping that step exposes the cork itself to moisture, which causes it to compress and lose its acoustic properties over time.
Felt paper and rosin paper
Nail-down solid hardwood uses thin felt paper or rosin paper underlayment, not foam. Foam or compressible pads undermine the rigidity that nail-down installation requires. Felt paper provides light moisture resistance and reduces squeaking by cushioning the wood against the subfloor. It is a thin layer, typically 15-pound or 30-pound felt, and it does not add significant acoustic performance on its own.
Rubber and combination products
Rubber underlayment is the top choice for acoustic compliance in multi-family and commercial settings. It adds 10 to 20 IIC points and holds up under heavy foot traffic. Combination products that layer rubber with foam or cork are available for situations where you need both moisture protection and high acoustic performance. These cost more but often eliminate the need for a separate vapor barrier.
Self-leveling cementitious underlayment
When your subfloor has dips, humps, or height transitions exceeding 3/16 inch over 10 feet, self-leveling cementitious underlayment is the fix before any finish flooring goes down. Products like Ardex K-15 or Mapei Ultraplan are poured over the subfloor and self-level to create a flat surface. This is not the same as acoustic or moisture underlayment. It is a subfloor preparation step, and it pairs with a separate moisture barrier and acoustic layer above it.
One rule applies across all types: never double up padding. Adding underlayment to pre-padded vinyl planks voids the manufacturer warranty and causes joint failures. If your LVP already has an attached underlayment layer, install it directly on the subfloor with only a vapor barrier beneath if needed.
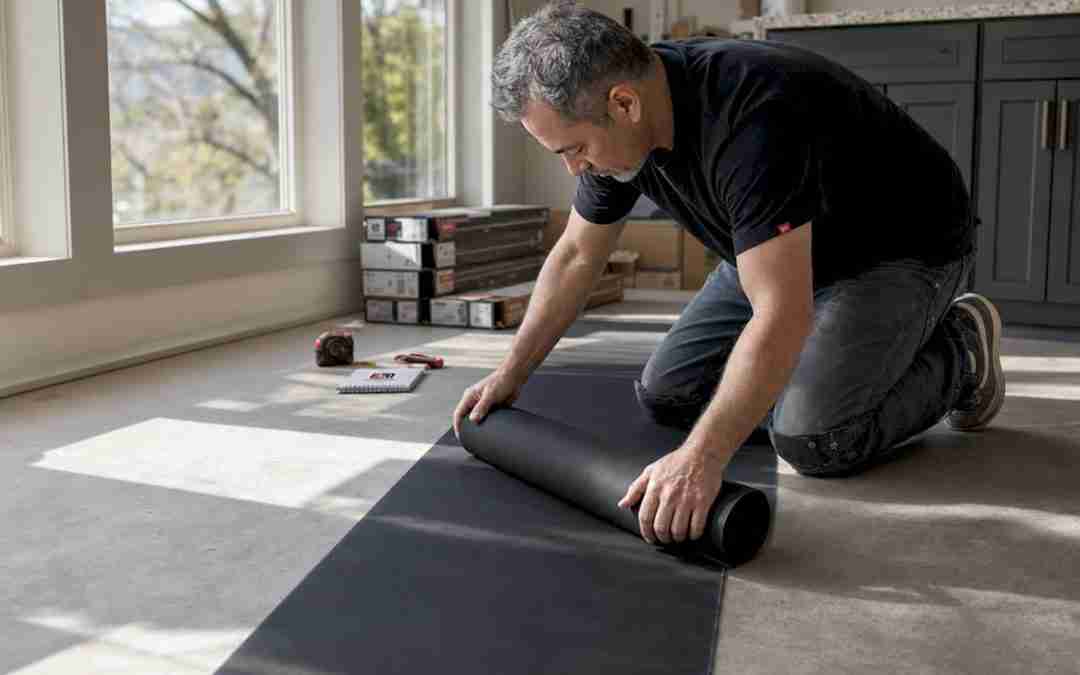
How to install underlayment correctly
Proper installation determines whether your underlayment actually performs its intended functions. Follow these steps for a reliable result:
- Test slab moisture first. Use ASTM F2170 RH probes or ASTM F1869 calcium chloride tests before purchasing any materials. Your subfloor preparation results determine which underlayment and moisture mitigation strategy you need.
- Flatten the subfloor. Fill low spots with floor leveling compound and sand down high spots. Most flooring manufacturers allow no more than 3/16 inch variation over 10 feet.
- Lay the vapor barrier first over concrete. Roll out 6-mil polyethylene or your integrated barrier product, overlapping seams by 6 to 8 inches and taping every seam with moisture-resistant tape.
- Install underlayment with staggered seams. Butt edges together without overlapping. Overlapping adds thickness and creates ridges that telegraph through the finish floor.
- Check thickness against manufacturer specs. Confirm your total underlayment thickness stays within the flooring manufacturer’s stated maximum, typically 2 to 3mm for floating floor installations.
- Account for radiant heat. Radiant heat systems require low-thermal-resistance underlayment. Cork and thick rubber can insulate against the heat you are paying to generate, reducing system efficiency. Check the manufacturer’s thermal resistance (tog) rating for compatibility.
Pro Tip: For property managers overseeing contractor installations, ask to see the moisture test results before flooring goes down. Any reputable installer will have them on file.
Key takeaways
Underlayment is the single most overlooked factor in flooring longevity, and selecting the wrong type costs far more to fix than to prevent.
| Point | Details |
|---|---|
| Moisture testing is non-negotiable | Use ASTM F2170 or F1869 tests before choosing any underlayment over concrete. |
| Match material to installation method | Felt for nail-down hardwood, foam or cork for floating floors, rubber for acoustic compliance. |
| Thickness limits protect warranties | Stay within the manufacturer’s 2 to 3mm maximum to prevent click-lock joint failures. |
| Seam sealing makes or breaks vapor barriers | Tape every seam and seal all penetrations or the barrier performs no better than nothing. |
| Never double up padding | Pre-padded LVP needs no additional underlayment layer, only a vapor barrier if required. |
What I’ve learned from years of underlayment decisions
I have seen more floor failures traced back to underlayment than to any other single cause. The pattern is almost always the same: a homeowner or contractor skips the moisture test, installs a standard foam underlayment over a concrete slab, and six months later the floor is buckling at the seams. The flooring looks like the problem. The underlayment is the actual problem.
The other mistake I see constantly is doubling up. Someone installs a beautiful LVP with an attached pad, then adds a separate foam layer because they want it to feel softer. The floor feels great for about three months. Then the click-lock joints start separating because every step creates micro-movement the joints were never designed to handle. The warranty is void, and the repair cost exceeds what a proper installation would have cost from the start.
My honest recommendation: always consult the flooring manufacturer’s specs before buying underlayment. The spec sheet tells you the maximum thickness, the required moisture barrier performance, and any acoustic minimums. That document is your single most reliable guide, and most homeowners never read it.
For multi-family properties and condos, I would always budget for rubber or felt underlayment over foam. The acoustic performance difference is significant, and failing an HOA inspection after installation is an expensive lesson.
— Jim
Get your Denver flooring installed right the first time
At Leonardo’s Flooring Corp, we have spent over 10 years installing hardwood, laminate, and vinyl floors across the Denver metro, and proper underlayment selection is built into every project we take on. We test slab moisture before any material goes down, match underlayment to your specific flooring and subfloor conditions, and stay within manufacturer specs to protect your warranty from day one.
Whether you are updating a single room or managing a full property renovation, our team handles the details that protect your investment long term. If you are ready to get your floors done right, explore our hardwood floor installation services or reach out for a free consultation. We also offer laminate flooring and vinyl floor installation with full underlayment guidance included.
FAQ
What is underlayment in flooring?
Underlayment is the layer installed between the structural subfloor and the finished flooring surface. It provides moisture vapor protection, sound absorption, cushioning, and minor surface leveling depending on the material chosen.
Do I need underlayment under laminate flooring?
Yes. Most laminate flooring requires underlayment for moisture protection and cushioning, and many products require it to maintain the manufacturer warranty. Check whether your laminate already has an attached pad before adding a separate layer.
What type of underlayment is best for concrete subfloors?
Concrete subfloors require underlayment with an integrated vapor barrier or a separate 6-mil polyethylene sheet installed beneath the underlayment. For high-moisture slabs, topical epoxy treatment is required before any underlayment goes down.
Can too much underlayment damage my floor?
Yes. Excessive thickness causes click-lock joint failures on floating floors by creating too much flex underfoot. Most manufacturers cap underlayment at 2 to 3mm, and exceeding that limit voids the warranty.
How does underlayment improve soundproofing?
Underlayment absorbs impact energy from footsteps before it transmits through the floor assembly. Rubber and felt products add 10 to 20 IIC points, while foam adds only 3 to 5 points, making material selection critical for multi-story and condo applications.